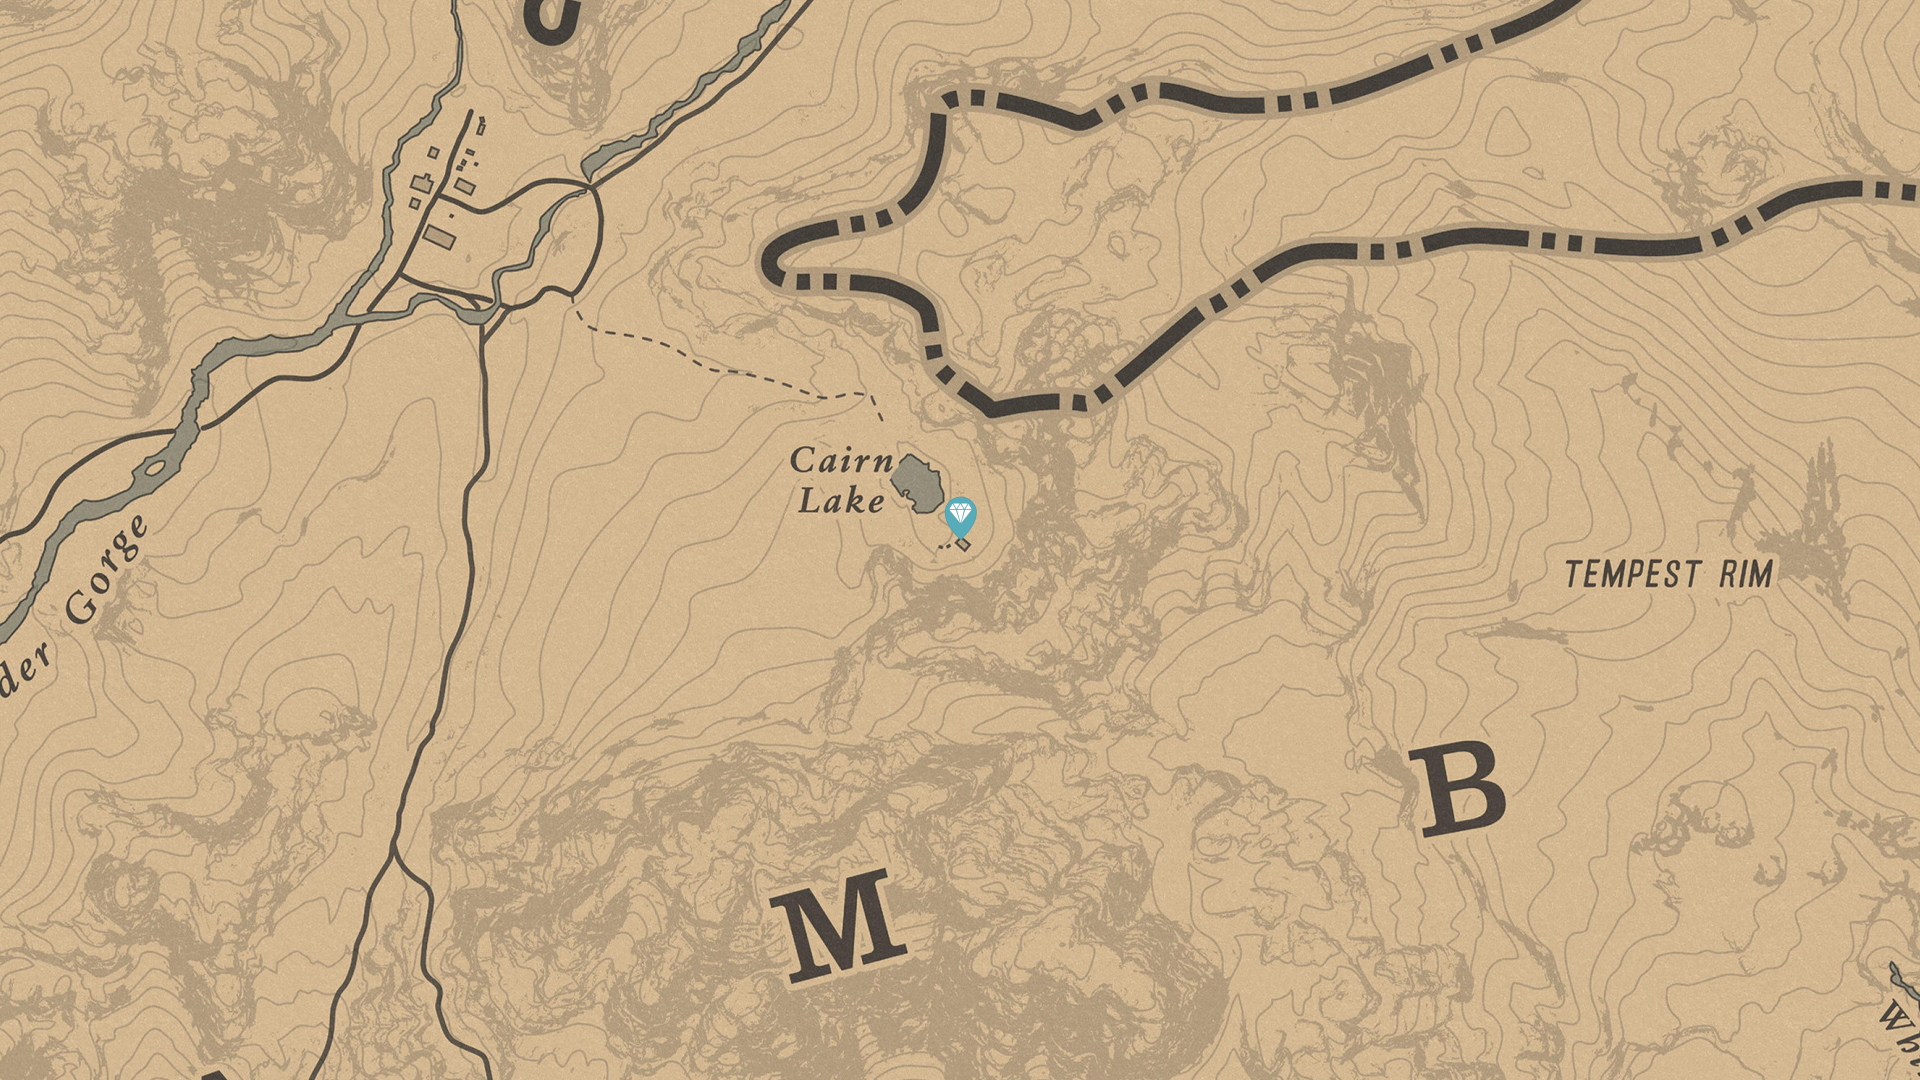
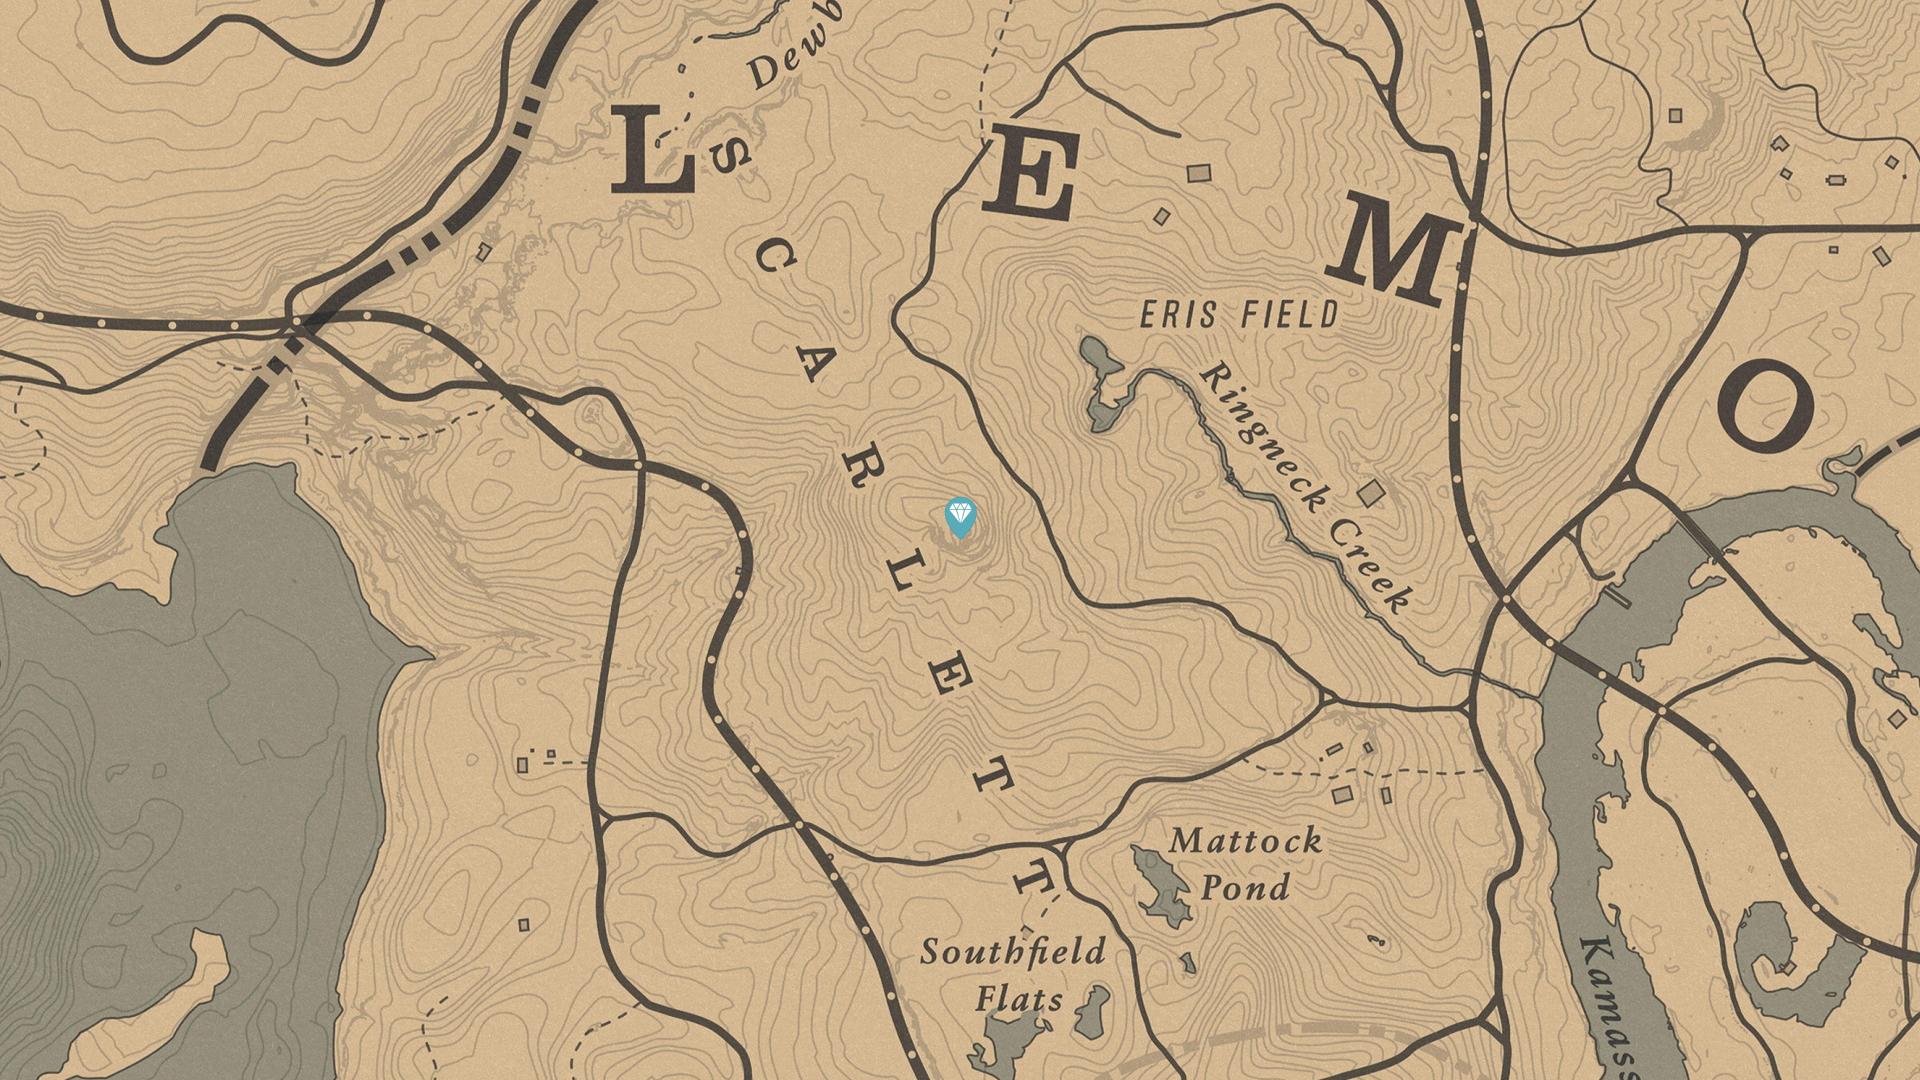
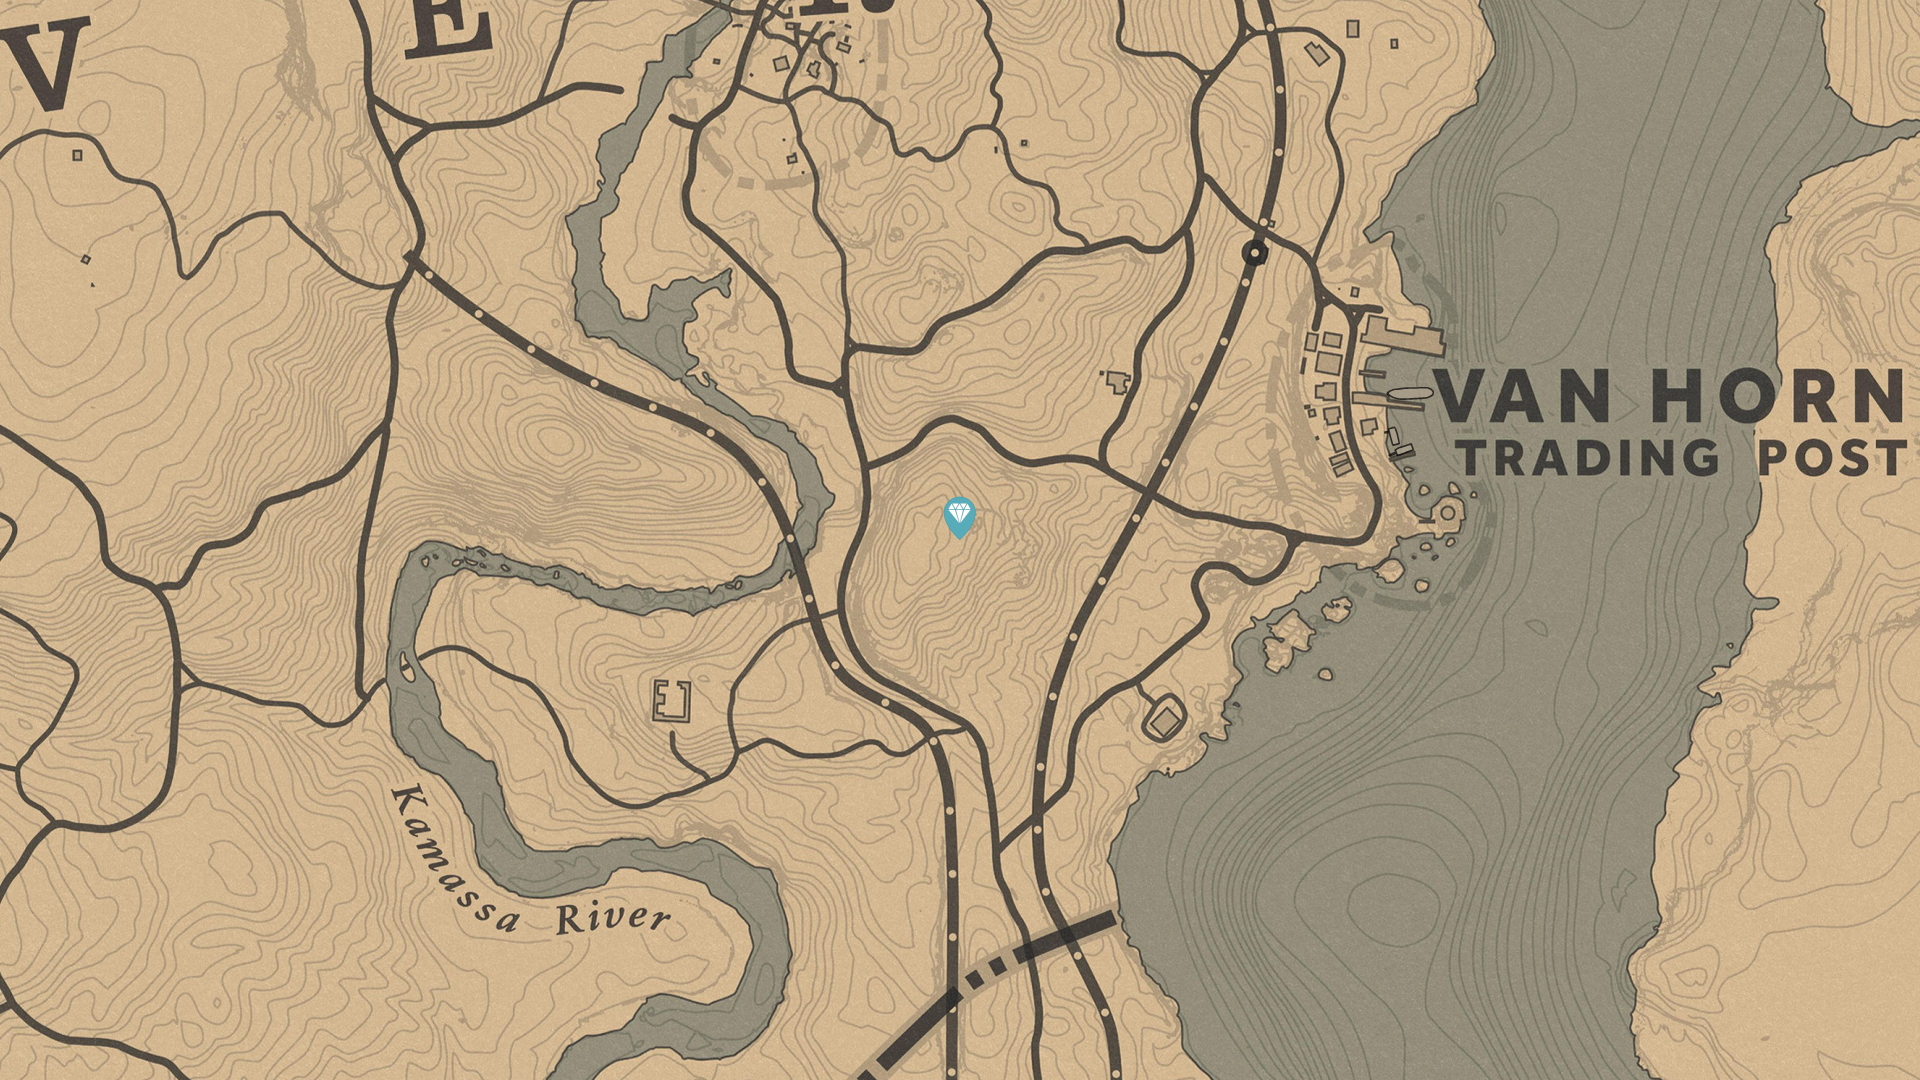
There are plenty of ways to earn money within the world of RDR2. This page is dedicated to locations with Money, Gold, & Jewels just sitting around waiting for you to collect them. There are four categories of gold; Gold Bars are worth $500, Gold Ingots are worth $300, Gold Nuggets are worth $25, and the Gold Jewelry, including teeth, are worth under $10 each. Most gold bars are found during treasure hunts, but there are a few of them just lying around for the taking and available once you gain free roam ability in Chapter 2. Money comes in three varieties; Money Clips worth around $20, Money Sacks worth $5 or less, and Loose Coins usually worth $.25. Jewelry is available in three formats; Large Jewelry Bags worth $75, Small Jewelry Bags worth $25, and individual pieces of Jewelry which has a maximum value of $10 each. The large and small bags of jewelry are just generic bags of value and the contents cannot be individually parted out. Individual pieces of jewelry can be made out of silver, gold, and platinum. NOTE: Watches are listed under the Kits section instead of the Valuables section of your satchel. This is useful for when you are selling off your inventory and don’t want to accidentally sell something like your cigarette cards.
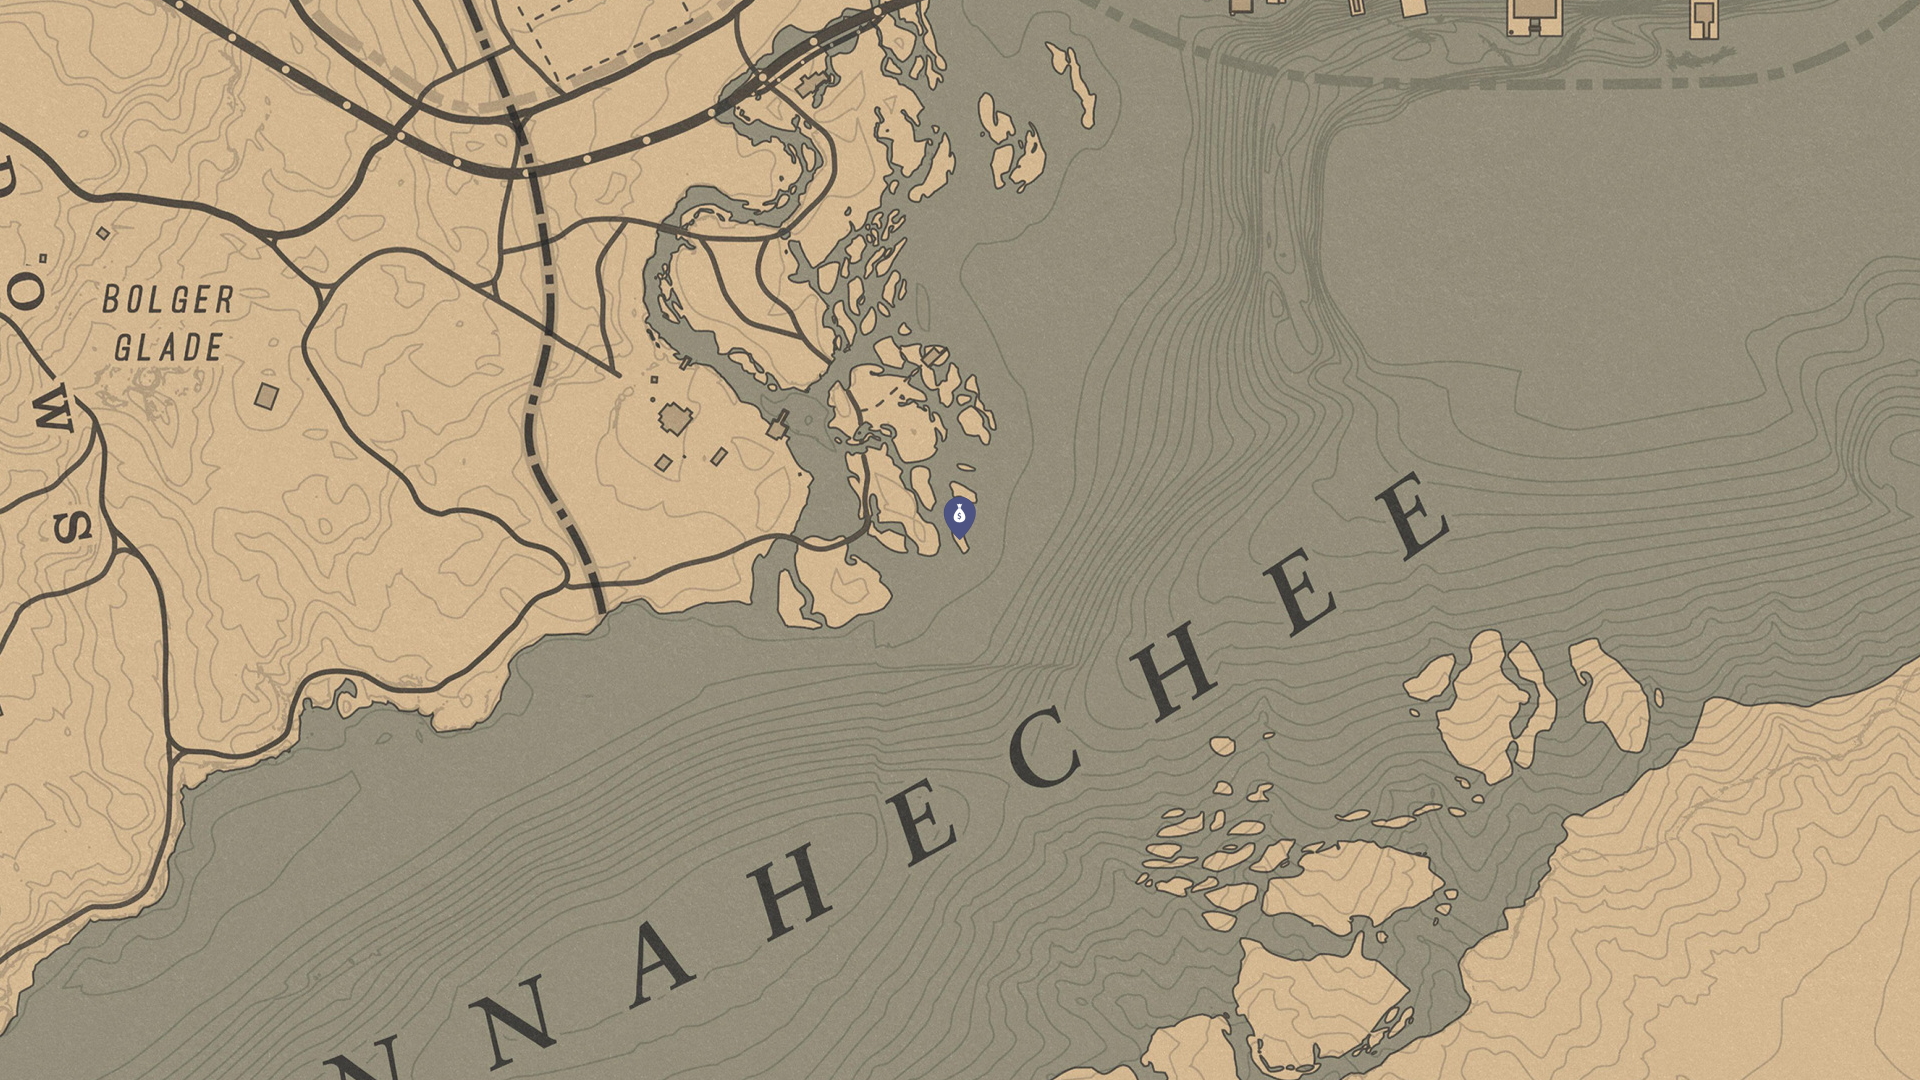
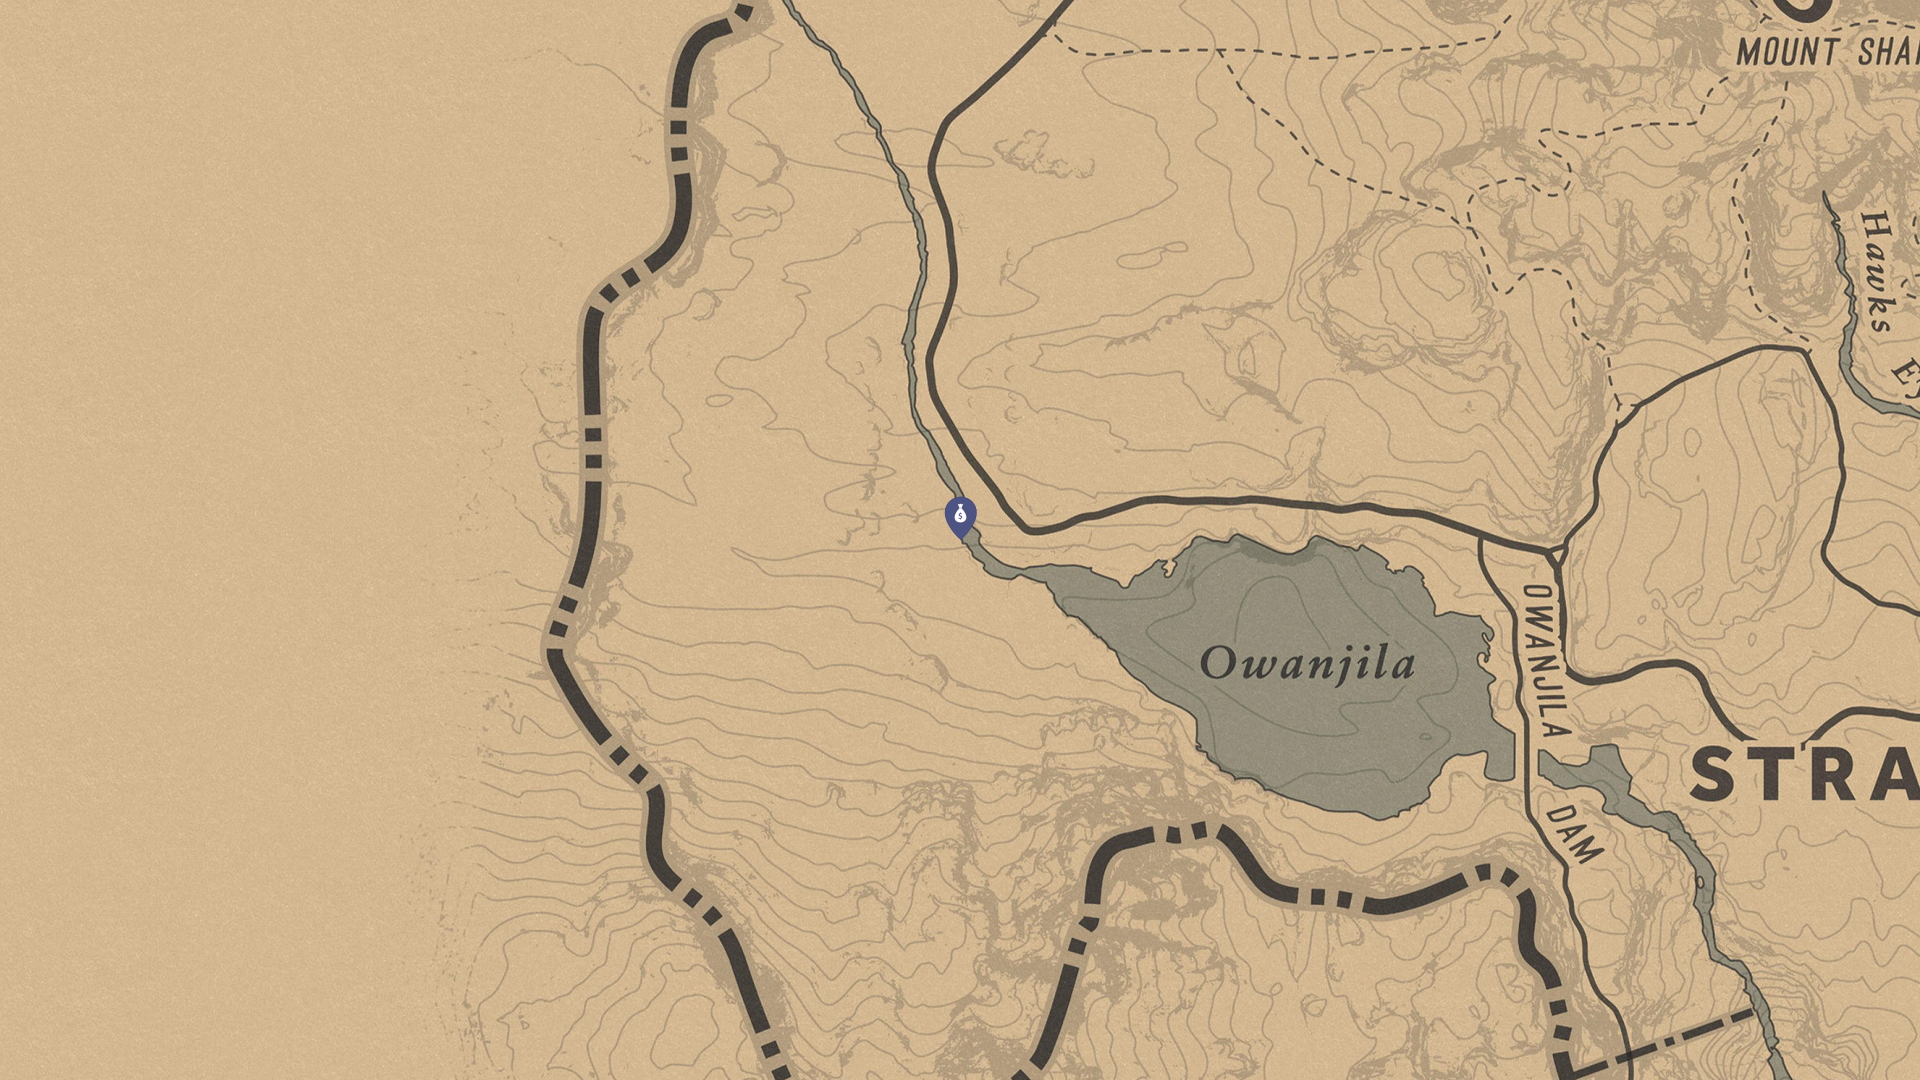
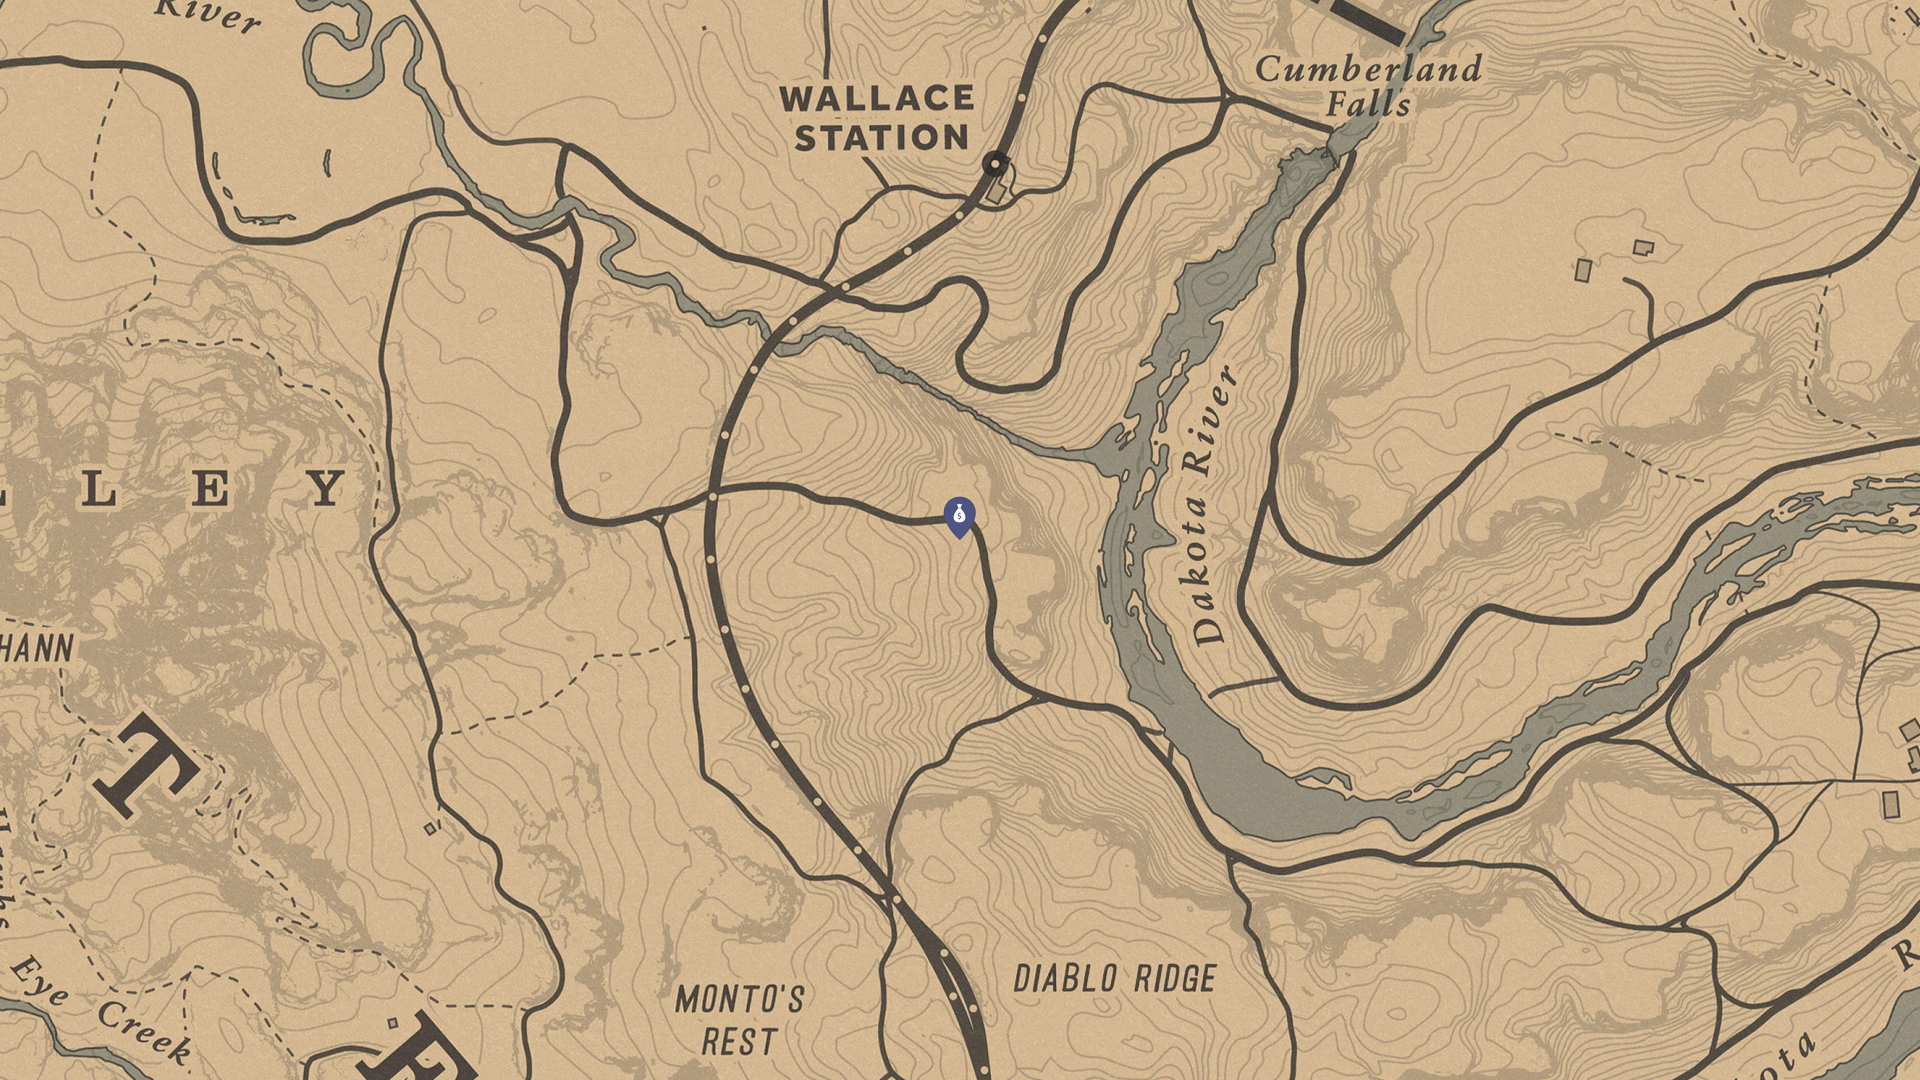
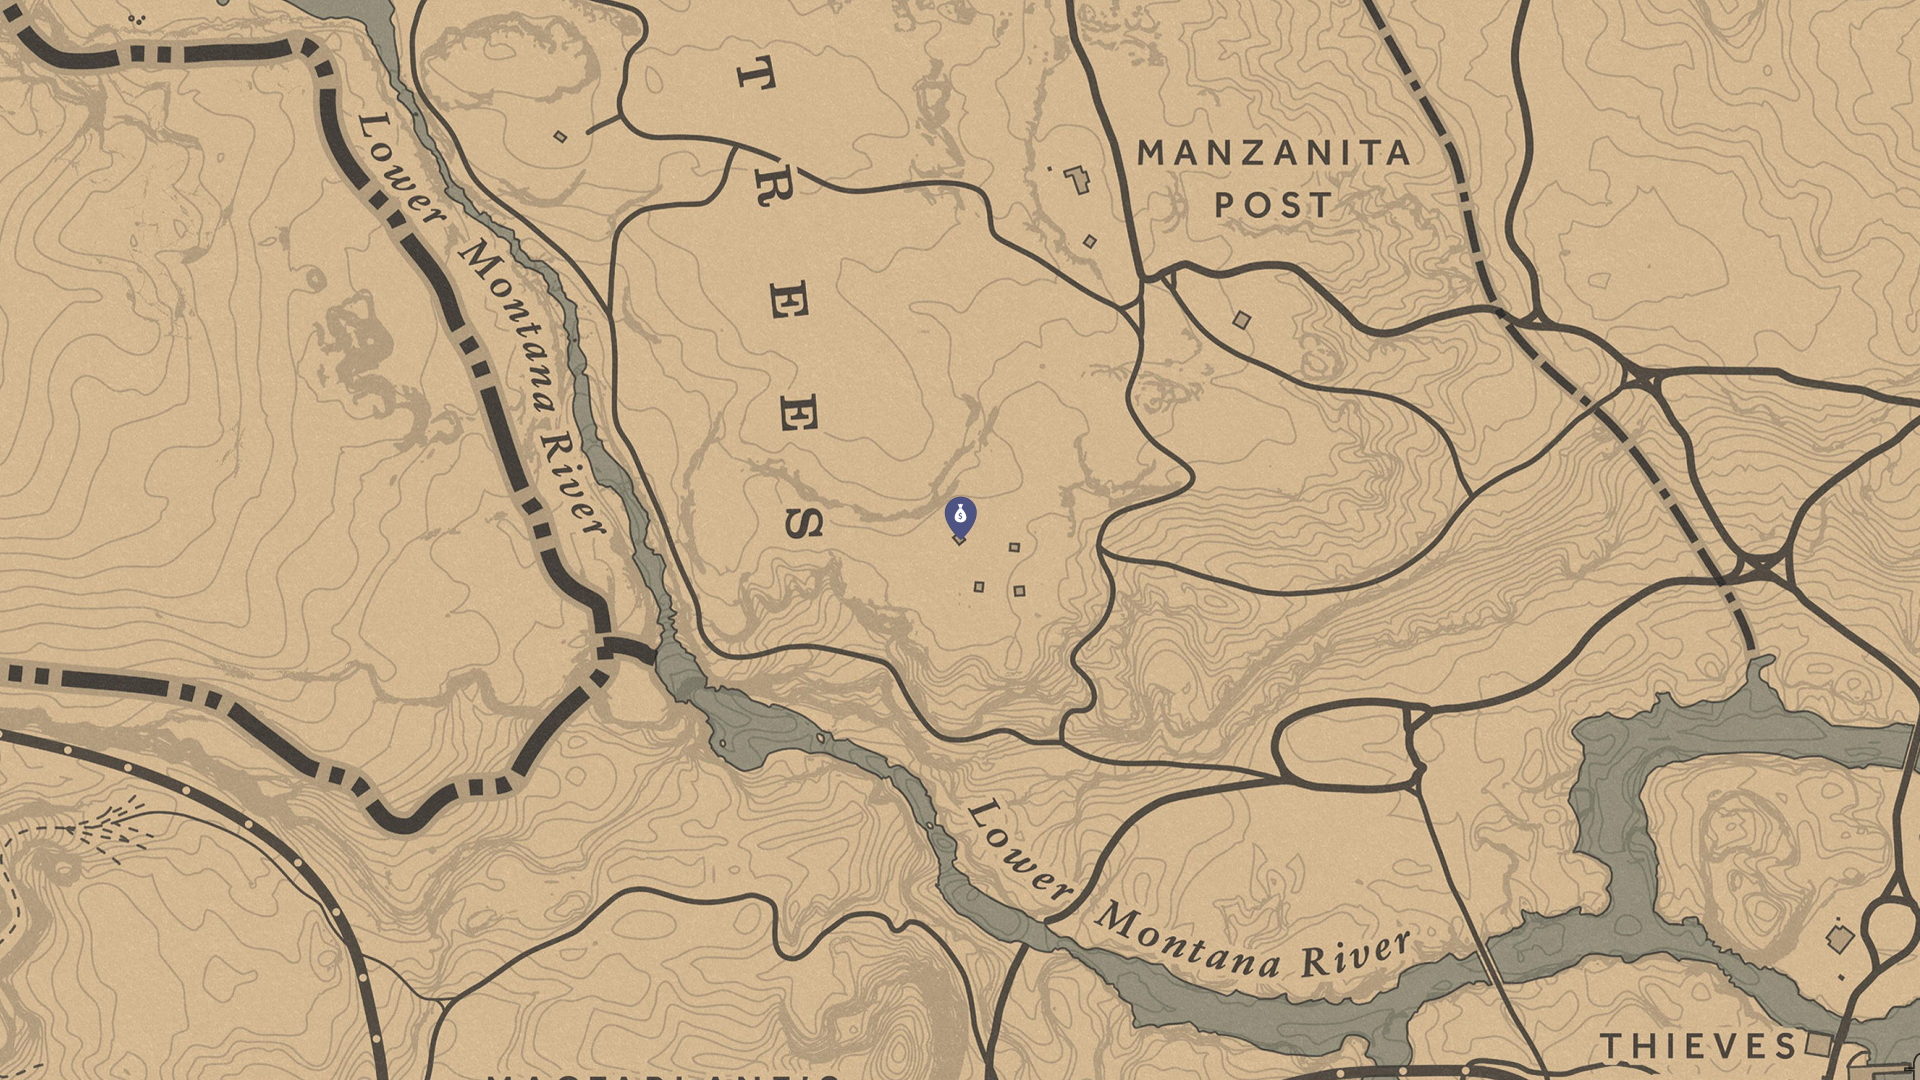
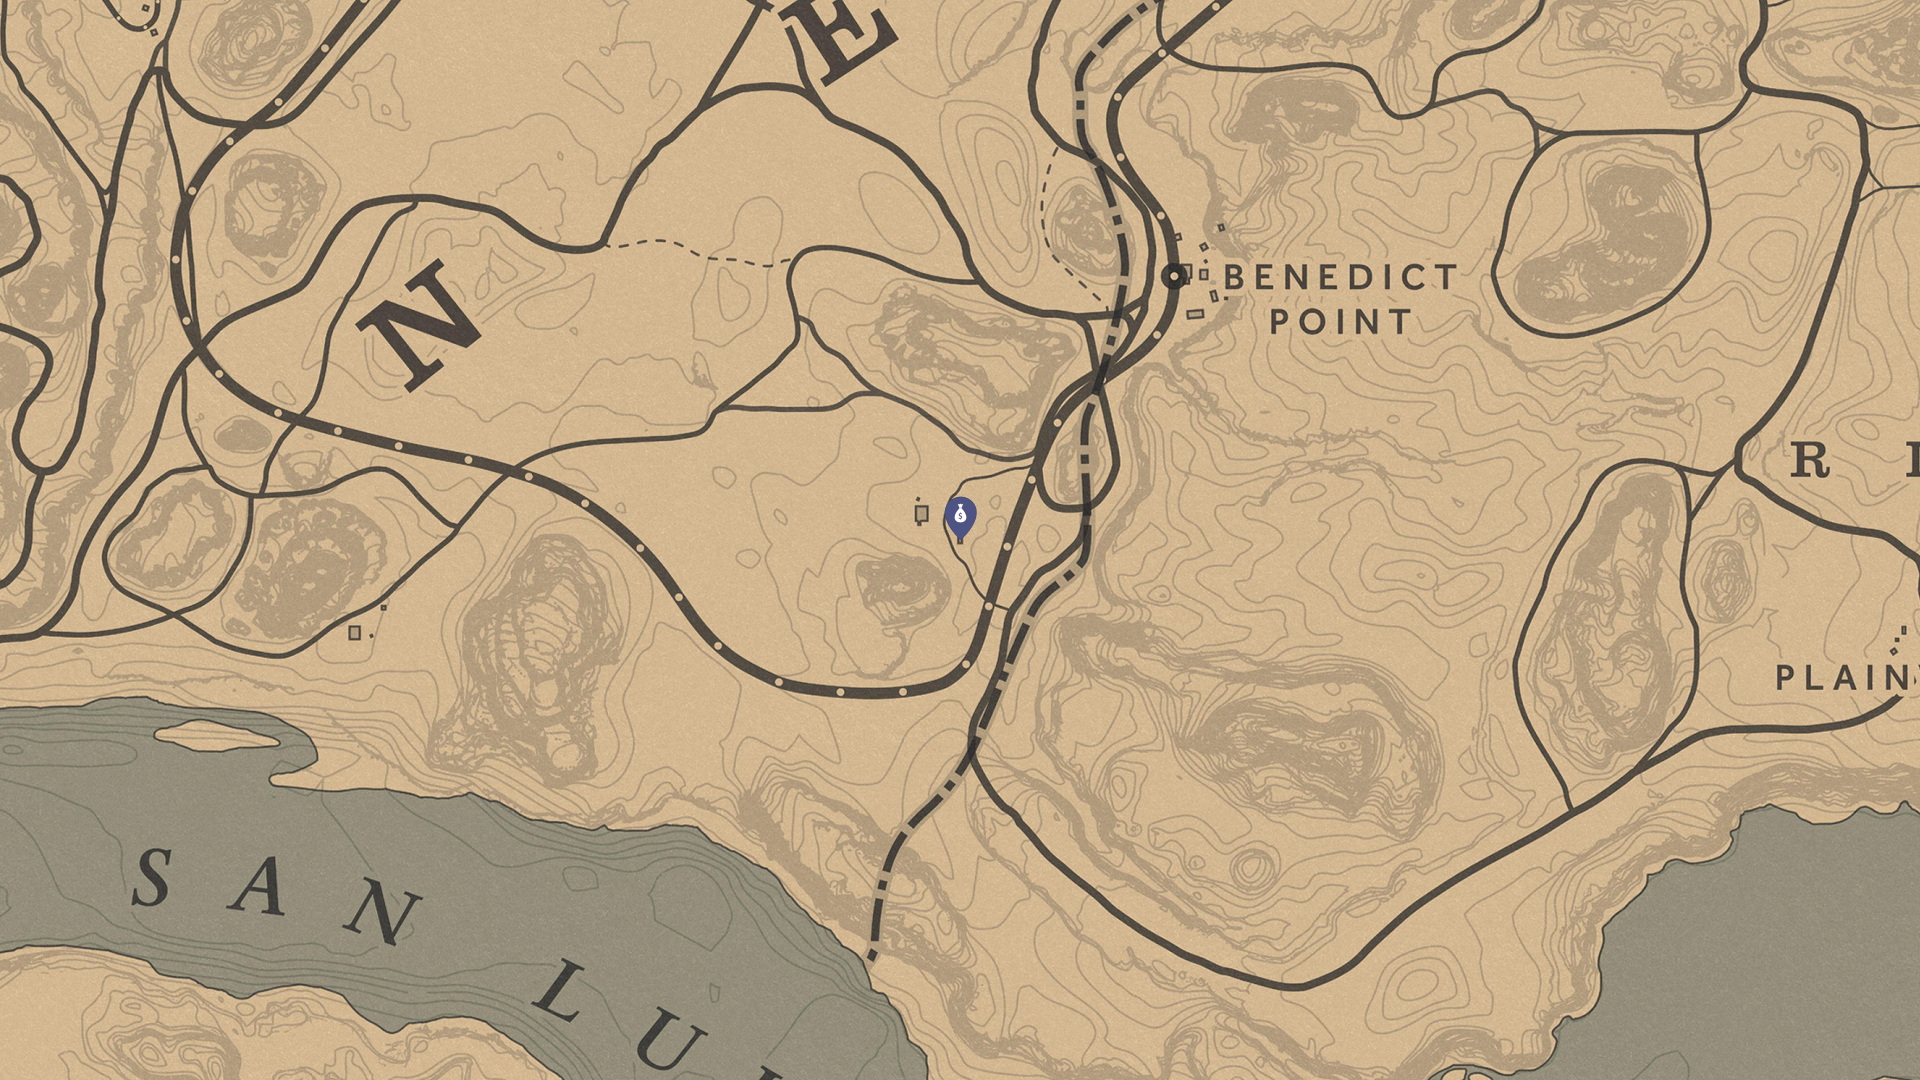
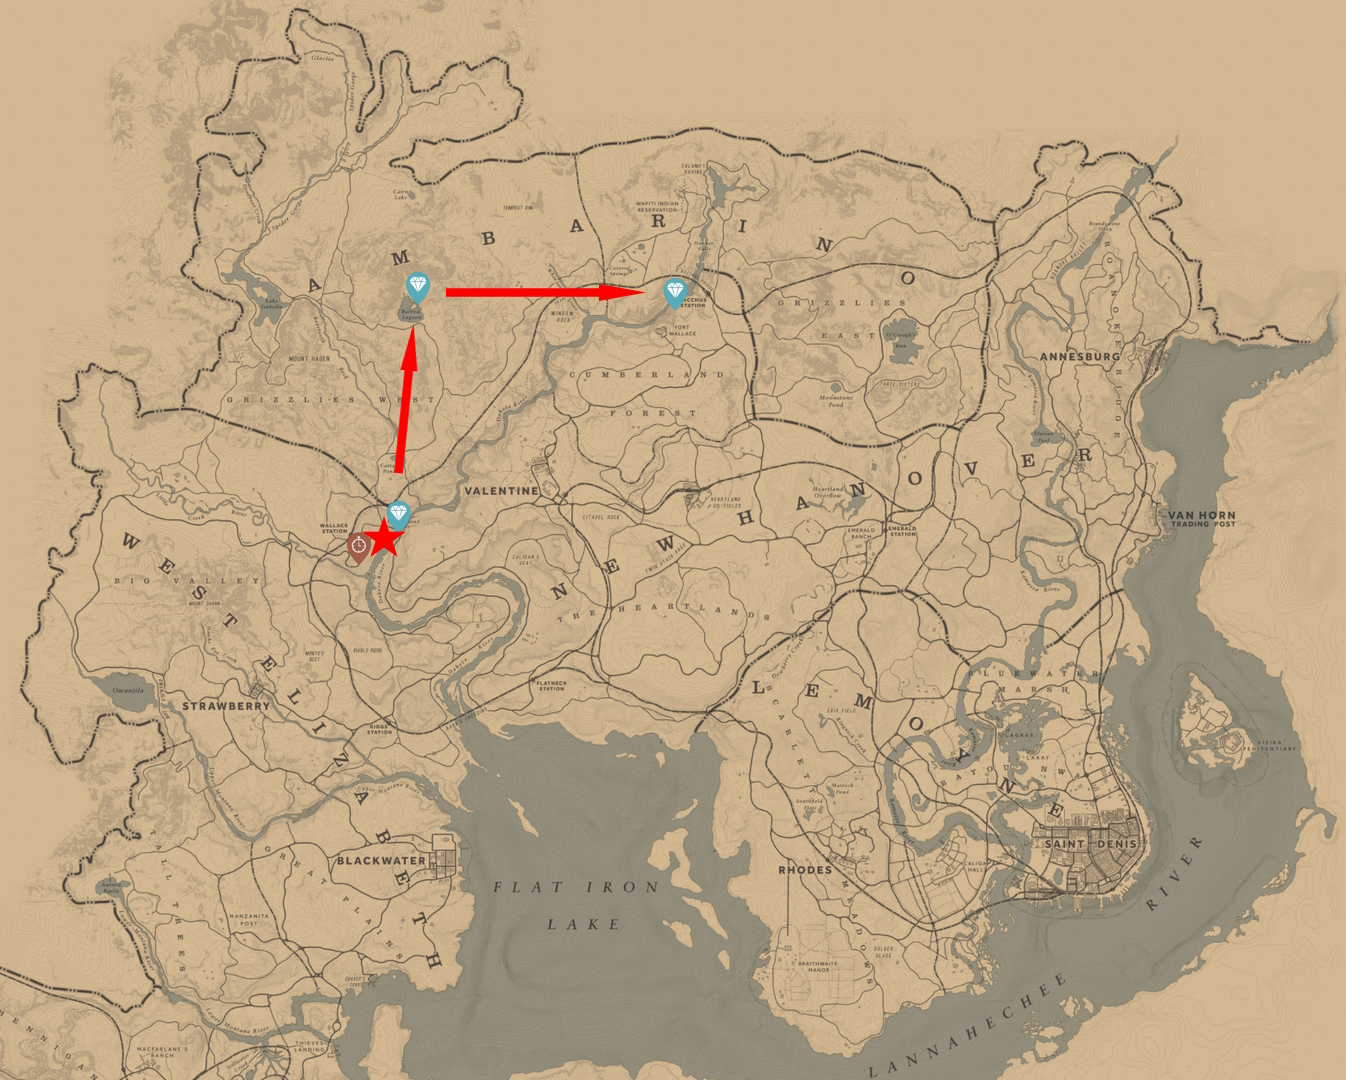
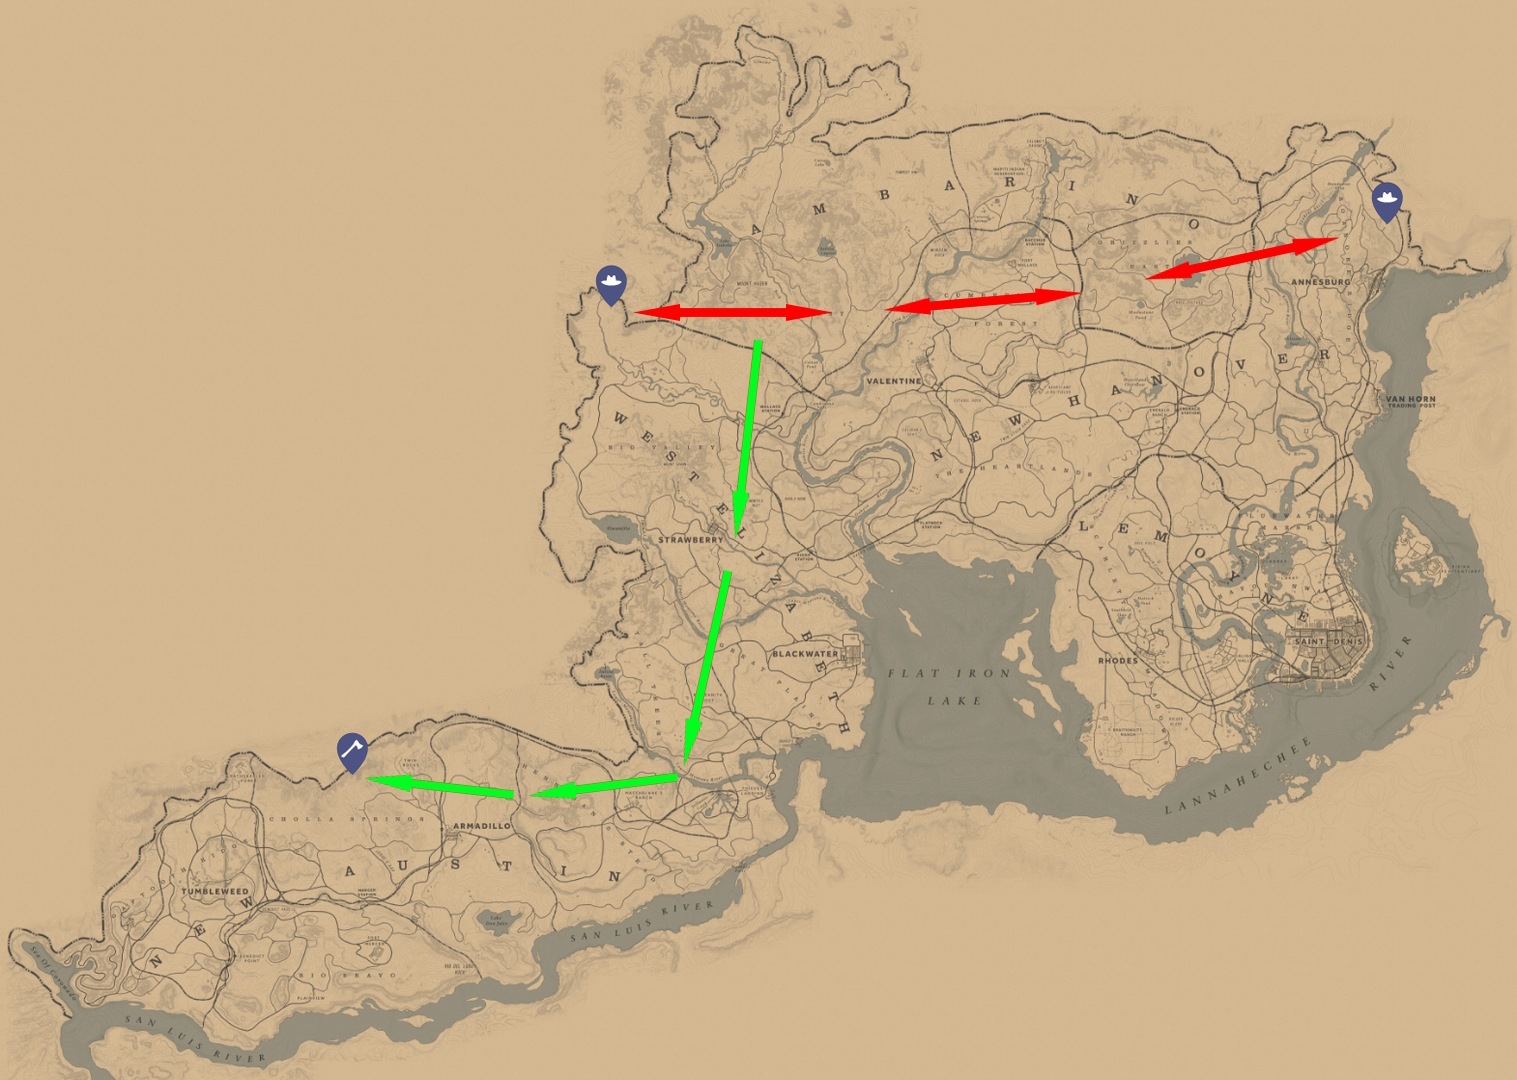
Early Access Gold basically requires nothing more than just going to the locations to collect the gold.
All Treasure Hunts require multiple steps to be taken for the treasure to be found. You must find and view each map in the series before you can successfully find the next location in the series. The treasure hunt treasures are all mostly gold, however, the treasures in New Austin are not.
Money, Gold, Weapons, & Jewelry have two categories, one that the payout is worth going out of your way to collect and the other that is only worth going to if you’re already in the area.
Early Access Gold

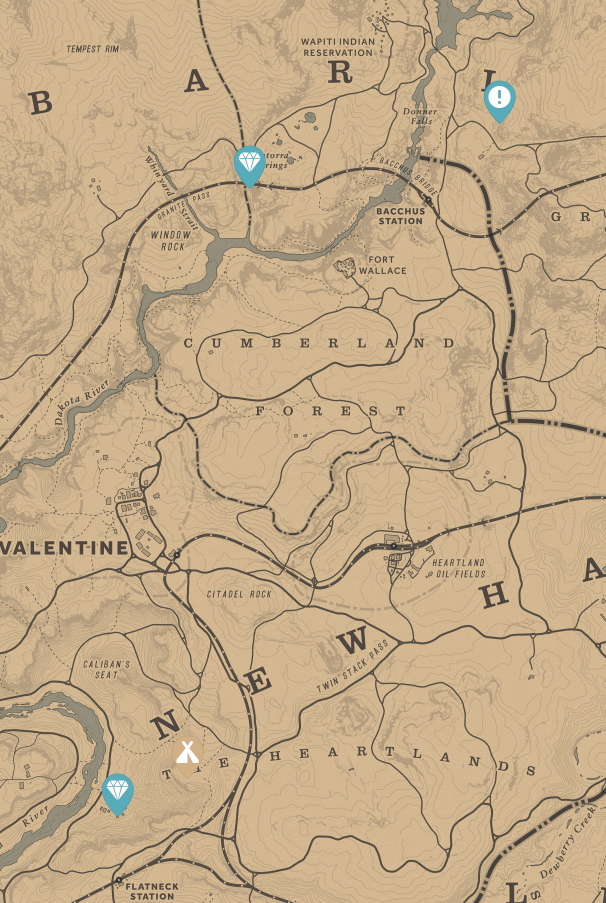
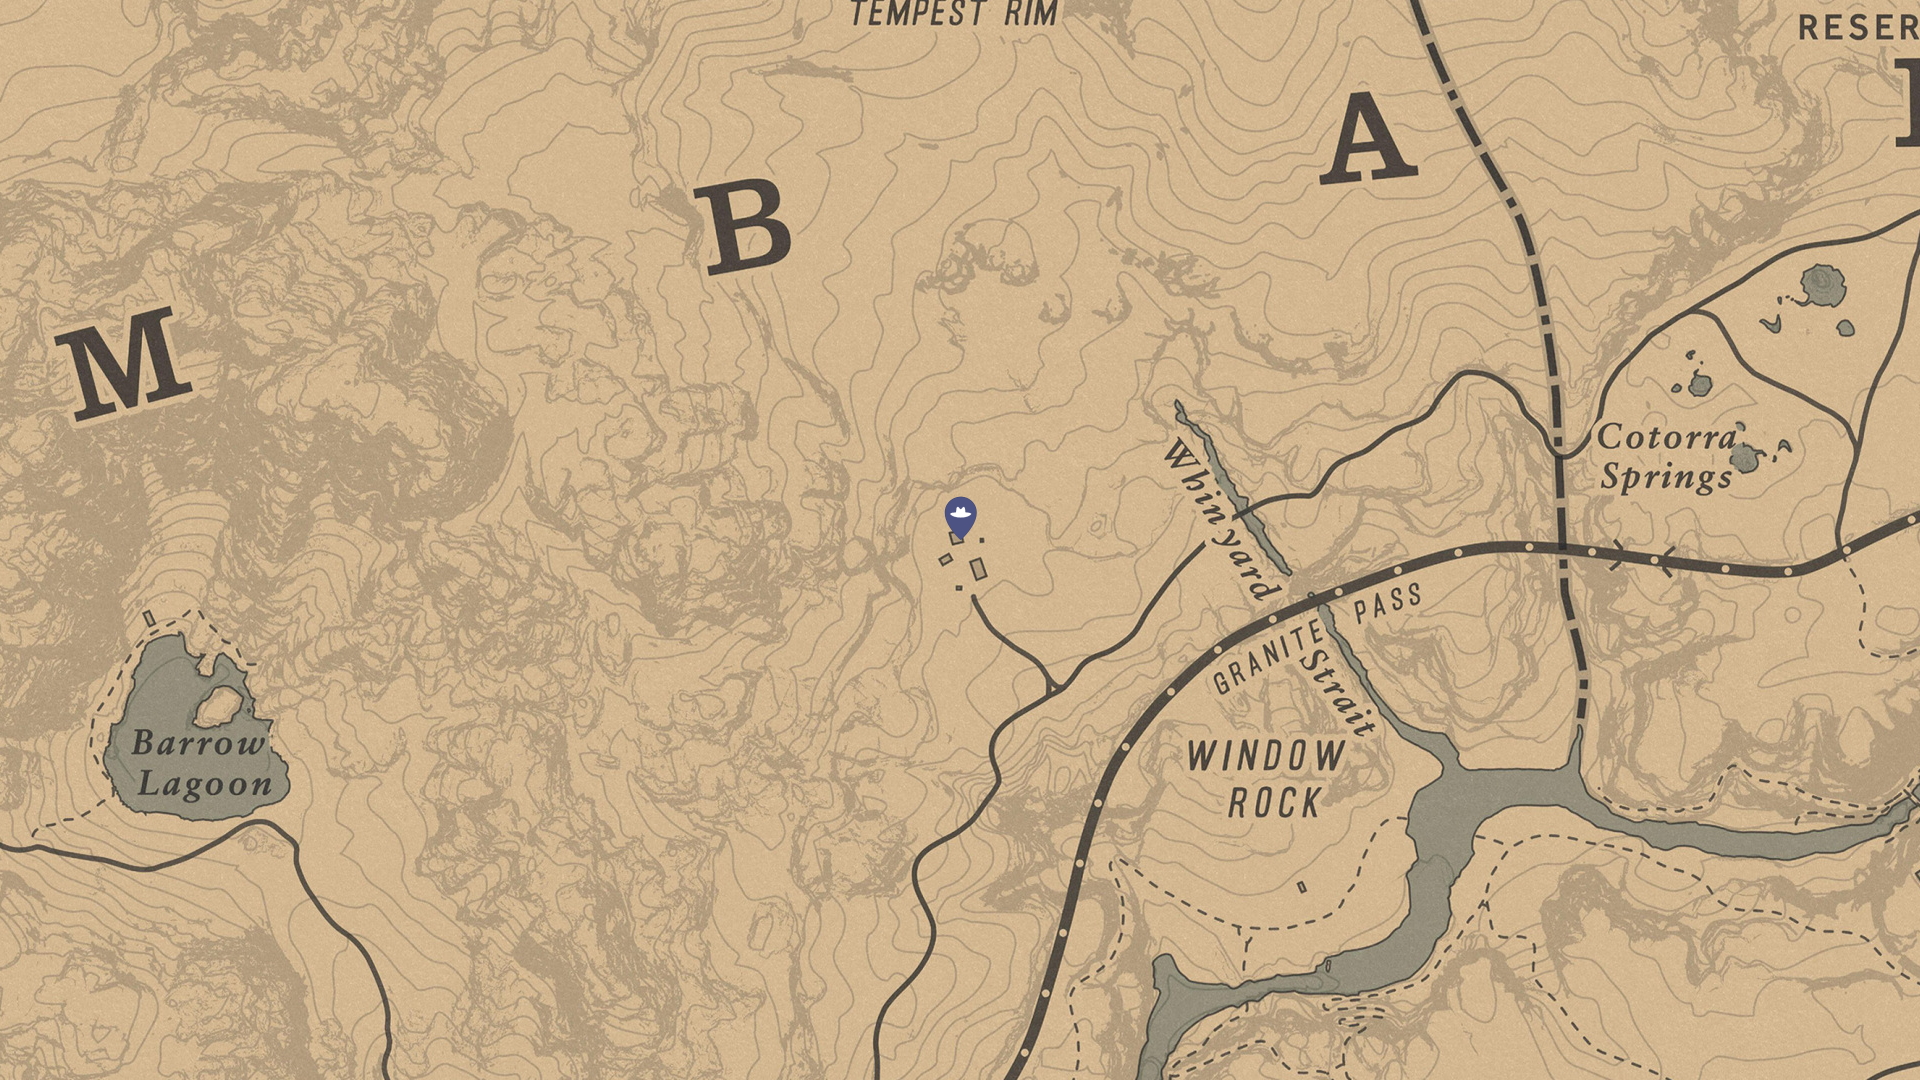
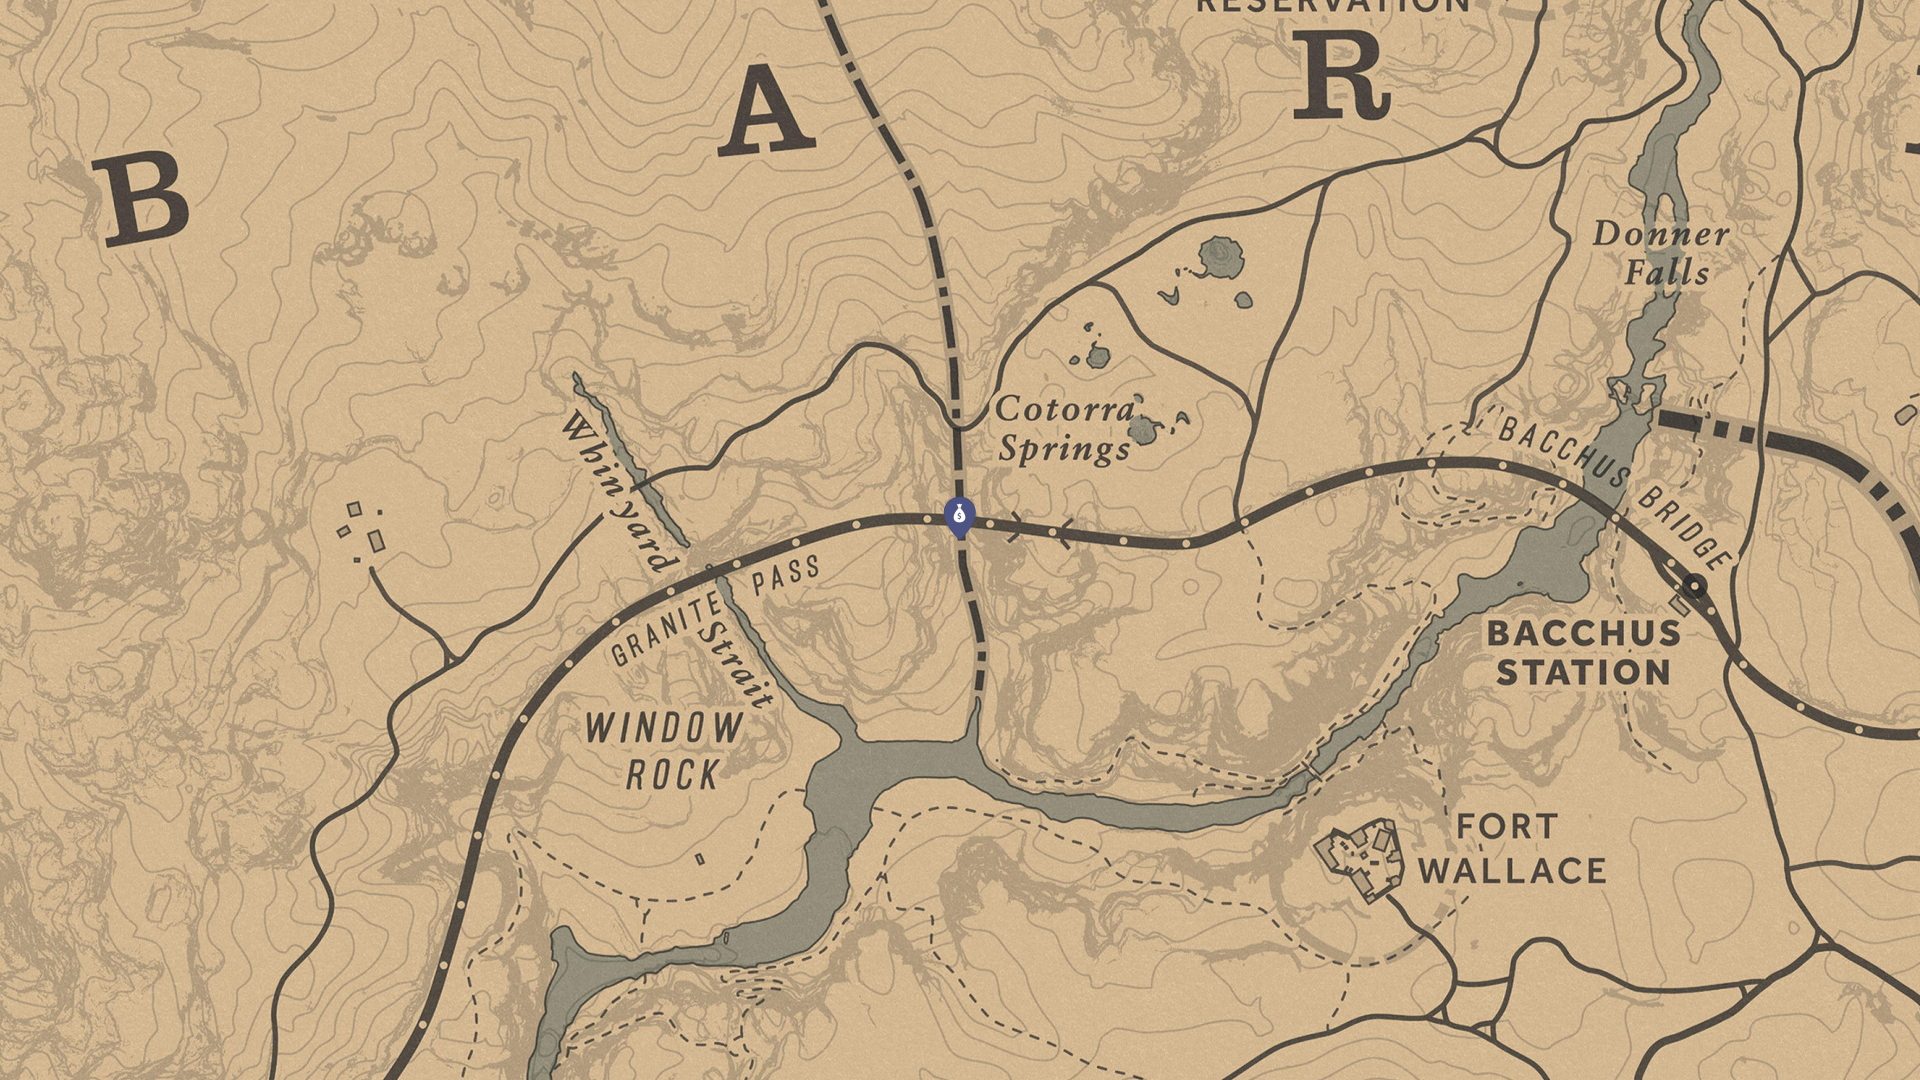
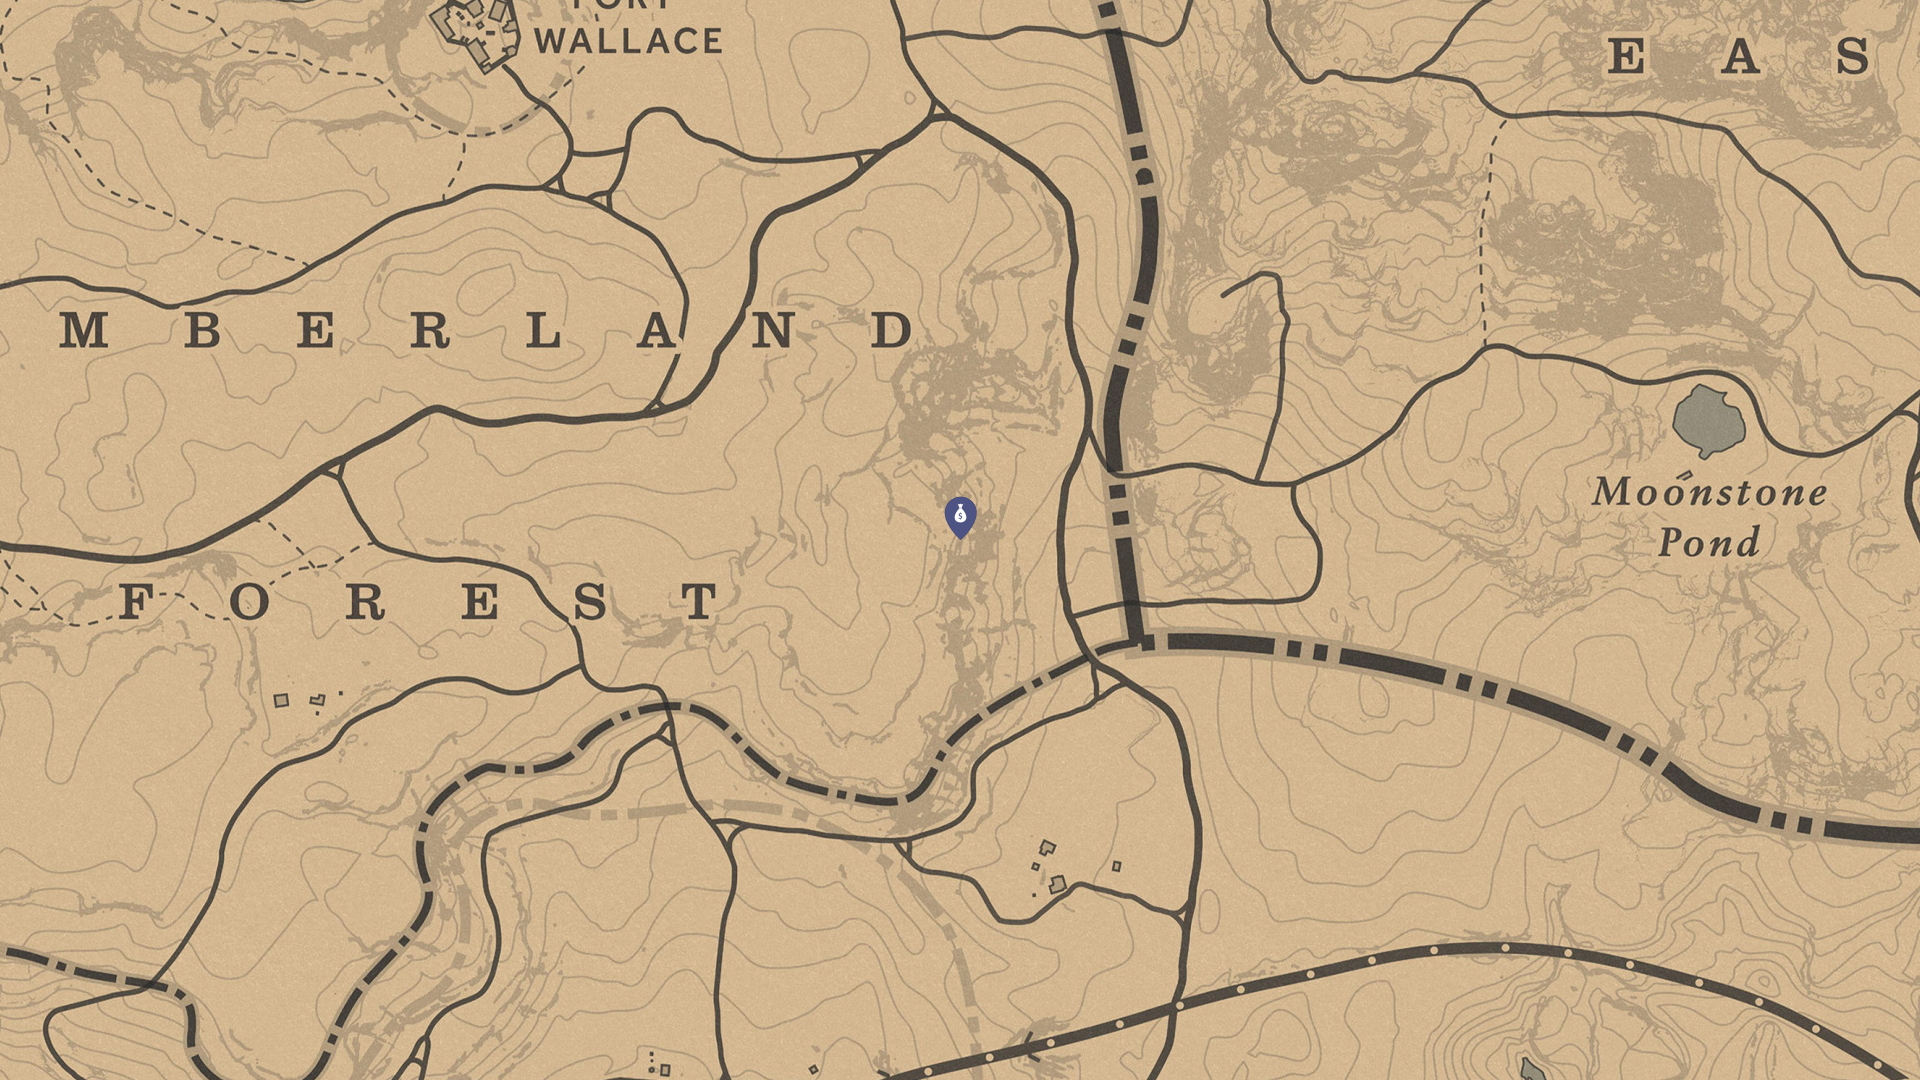
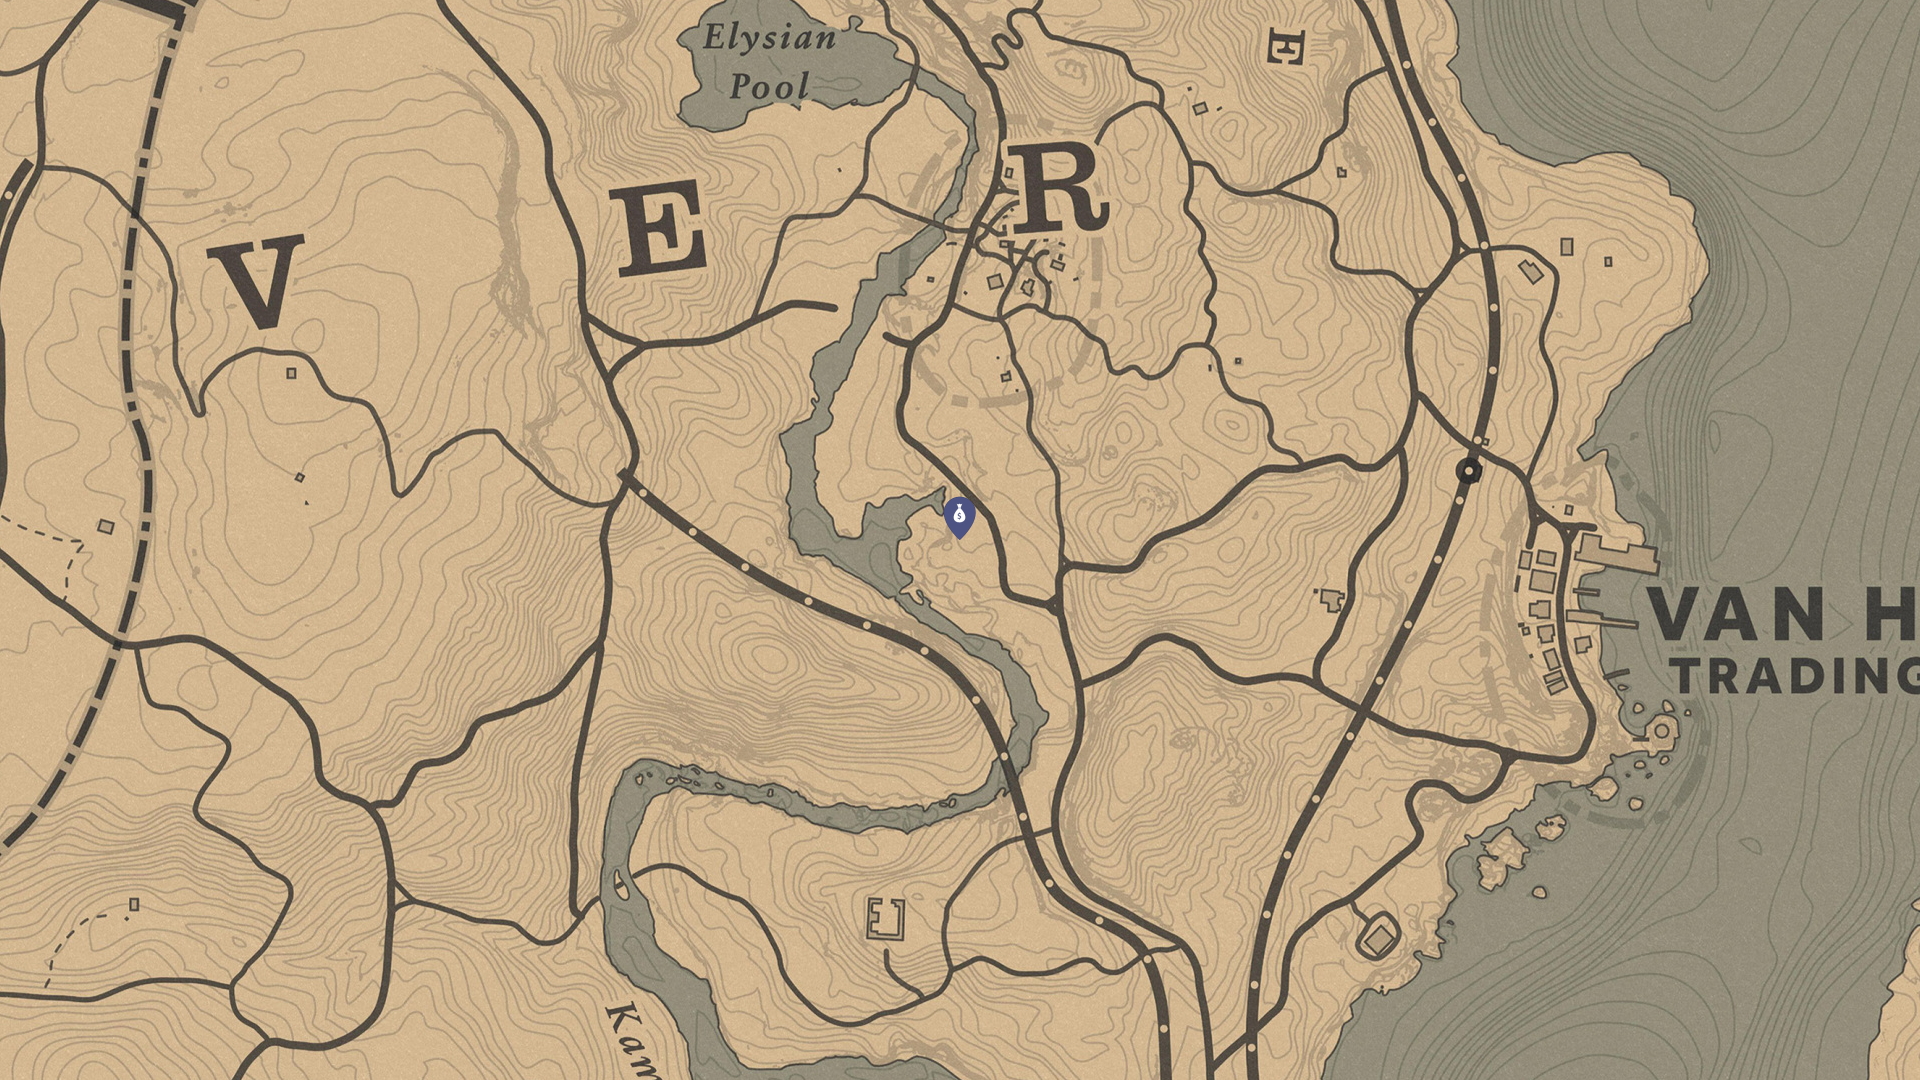
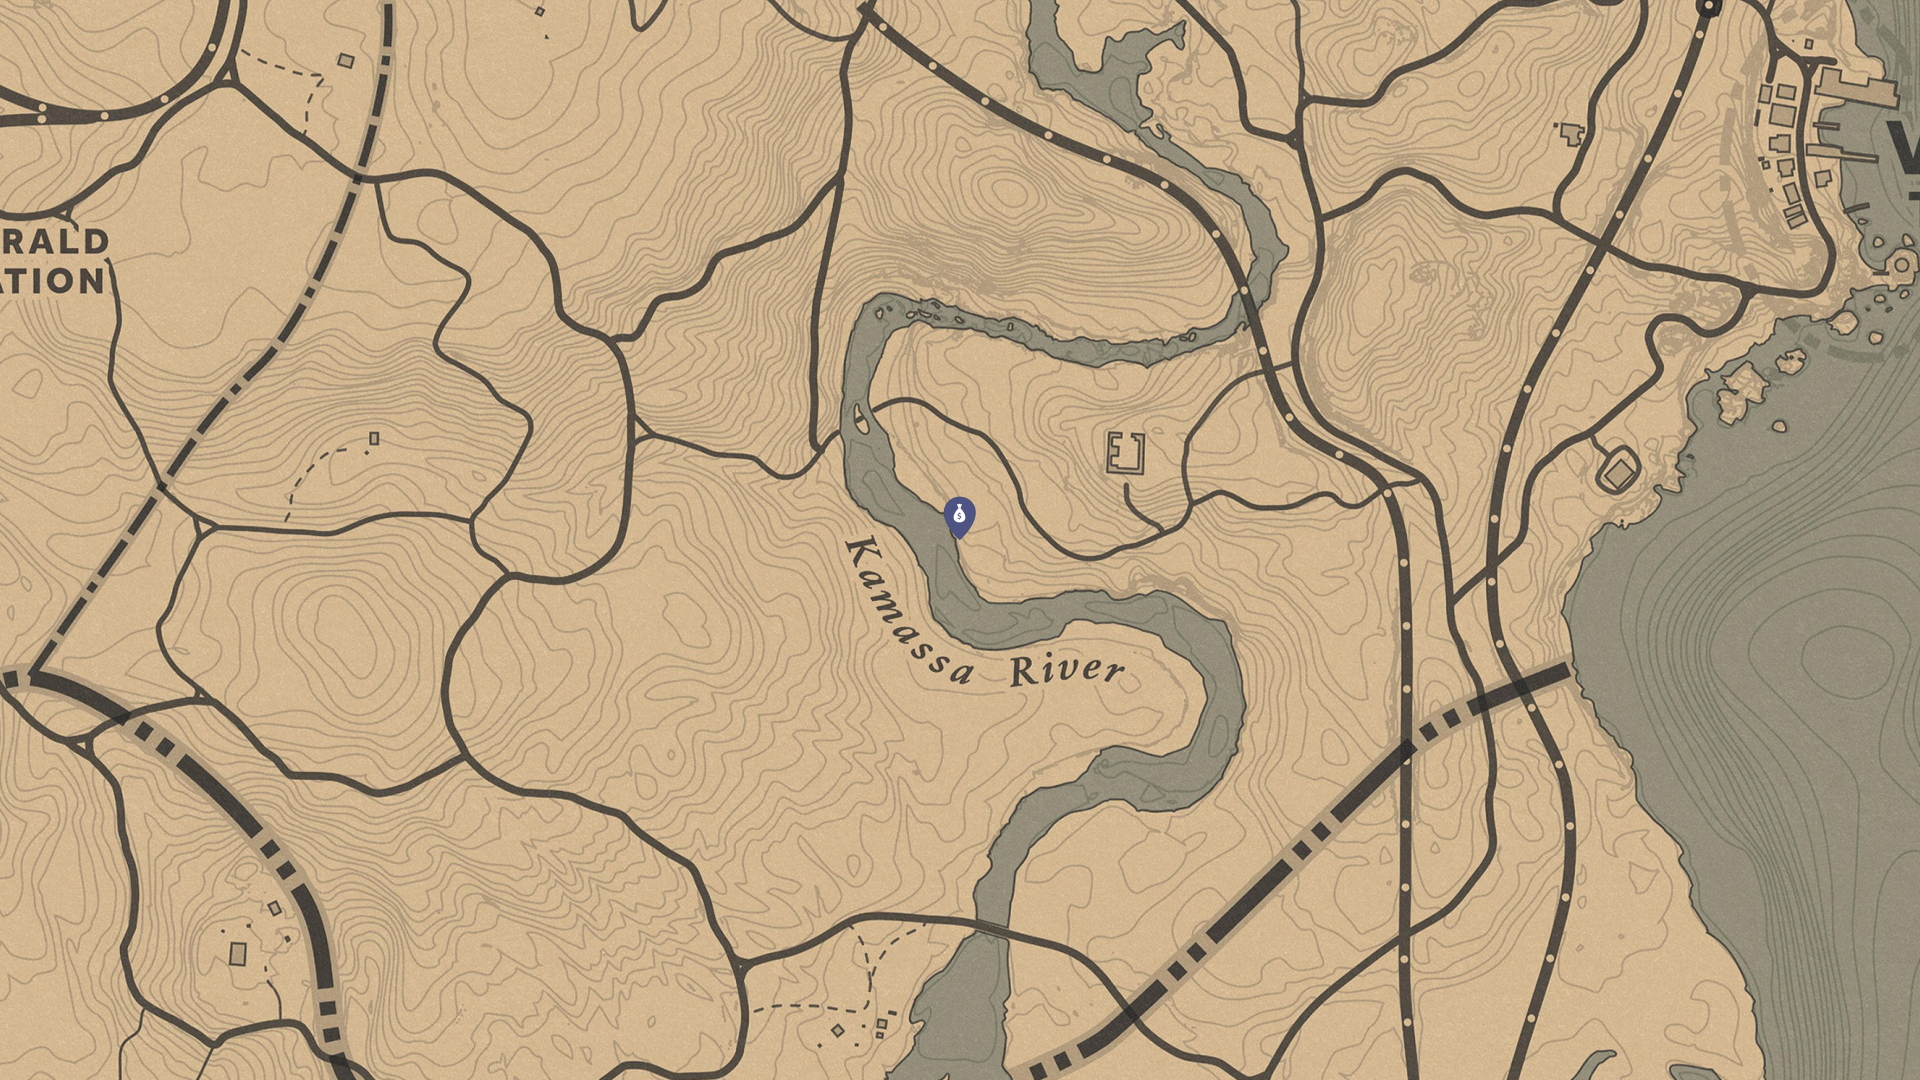
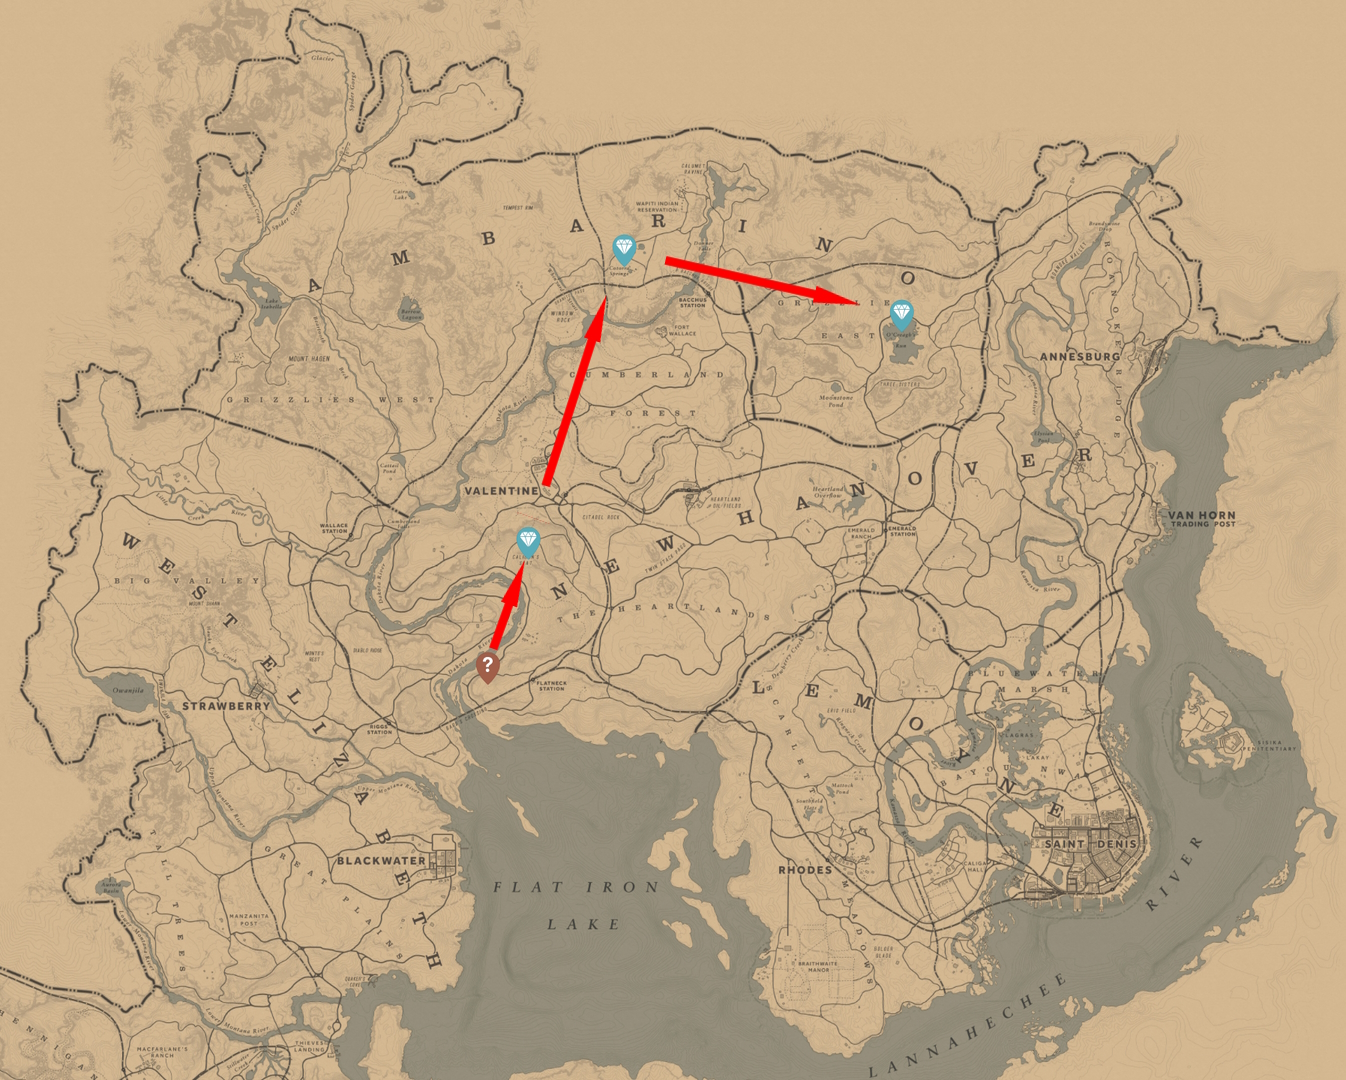
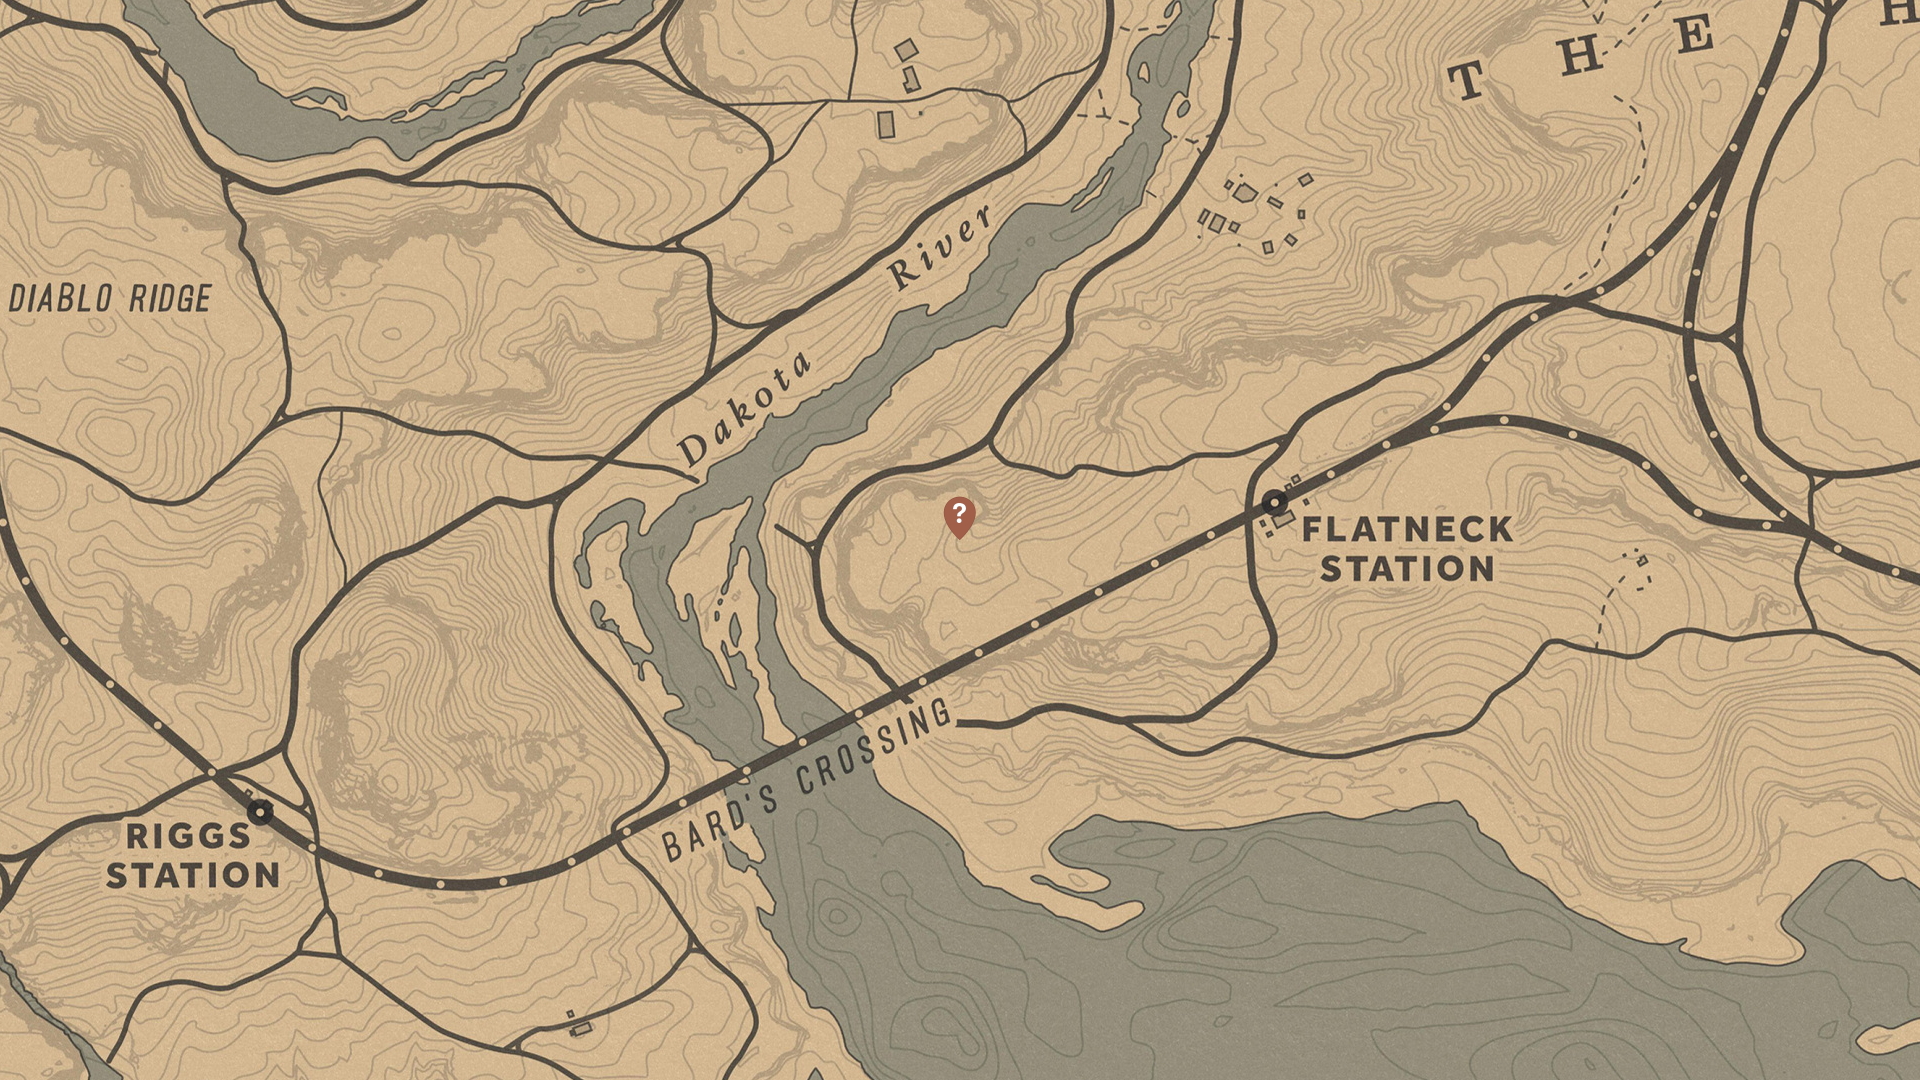
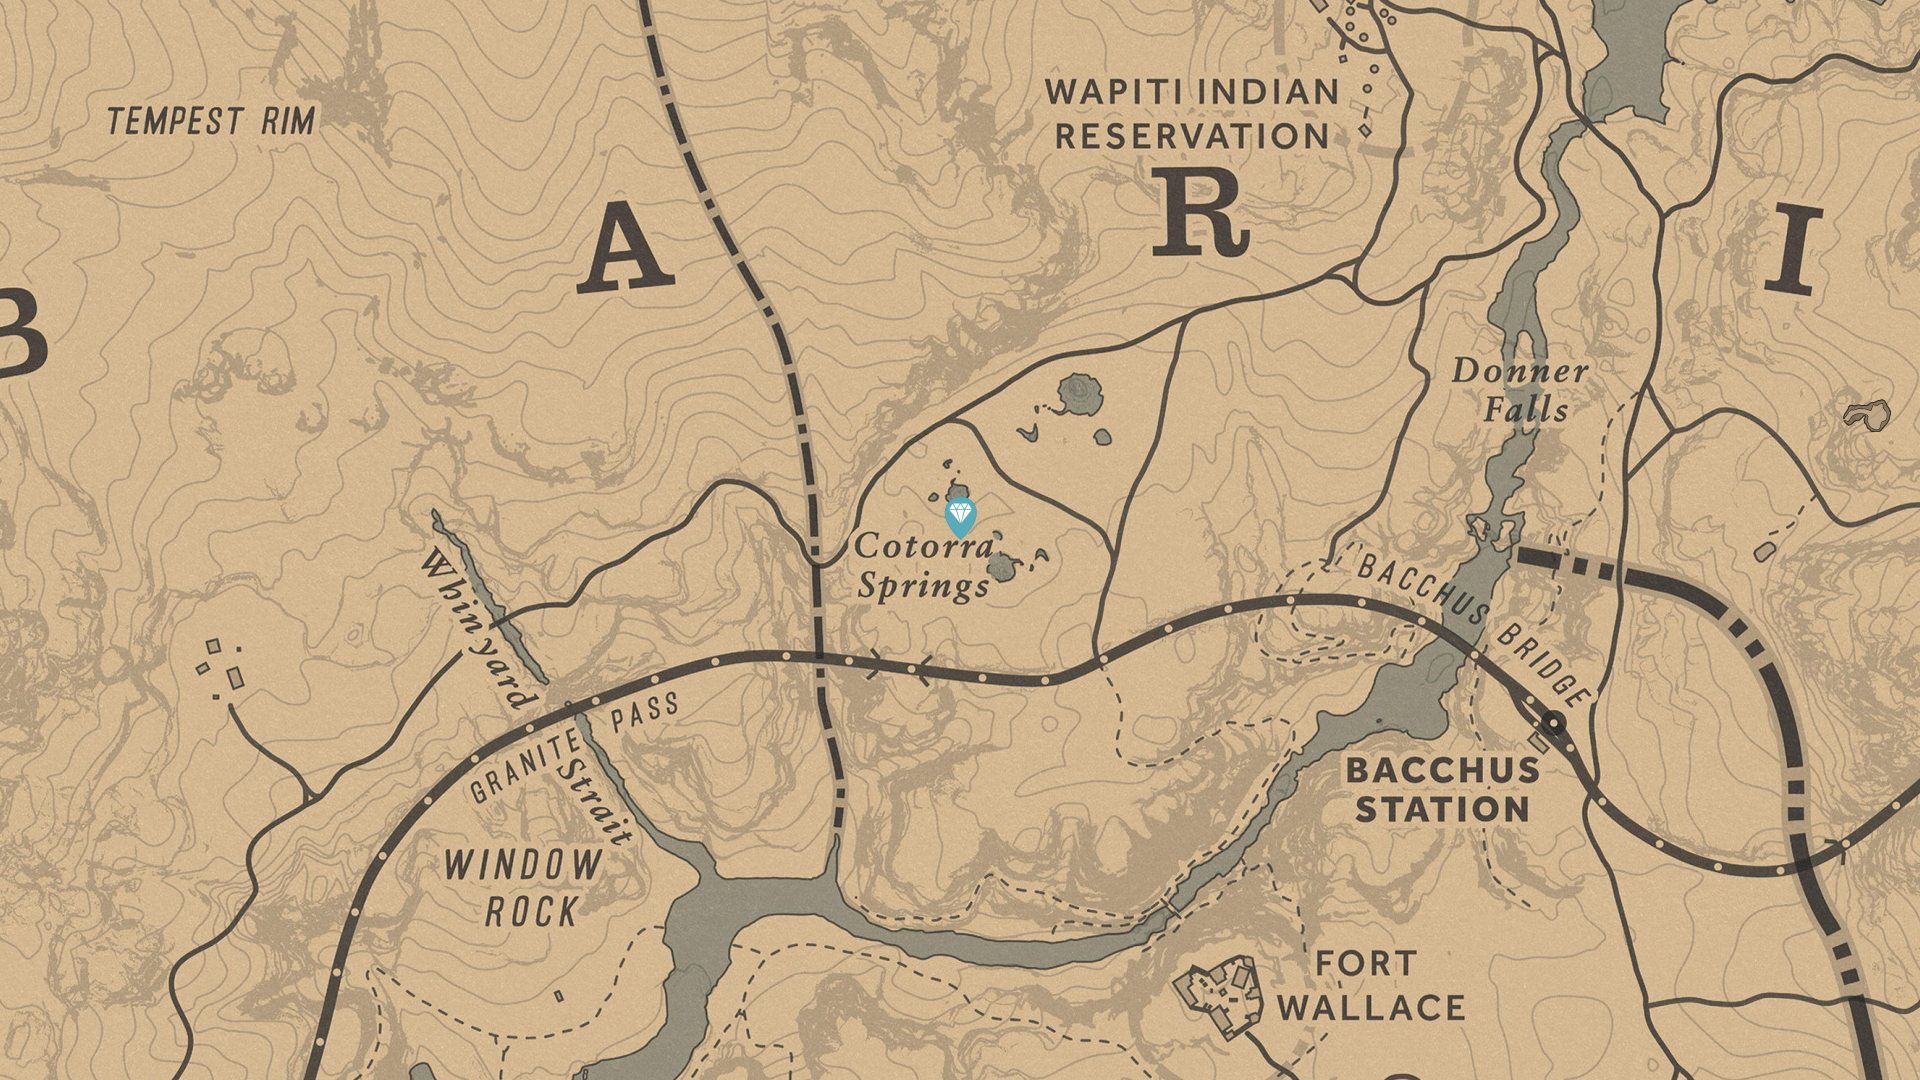
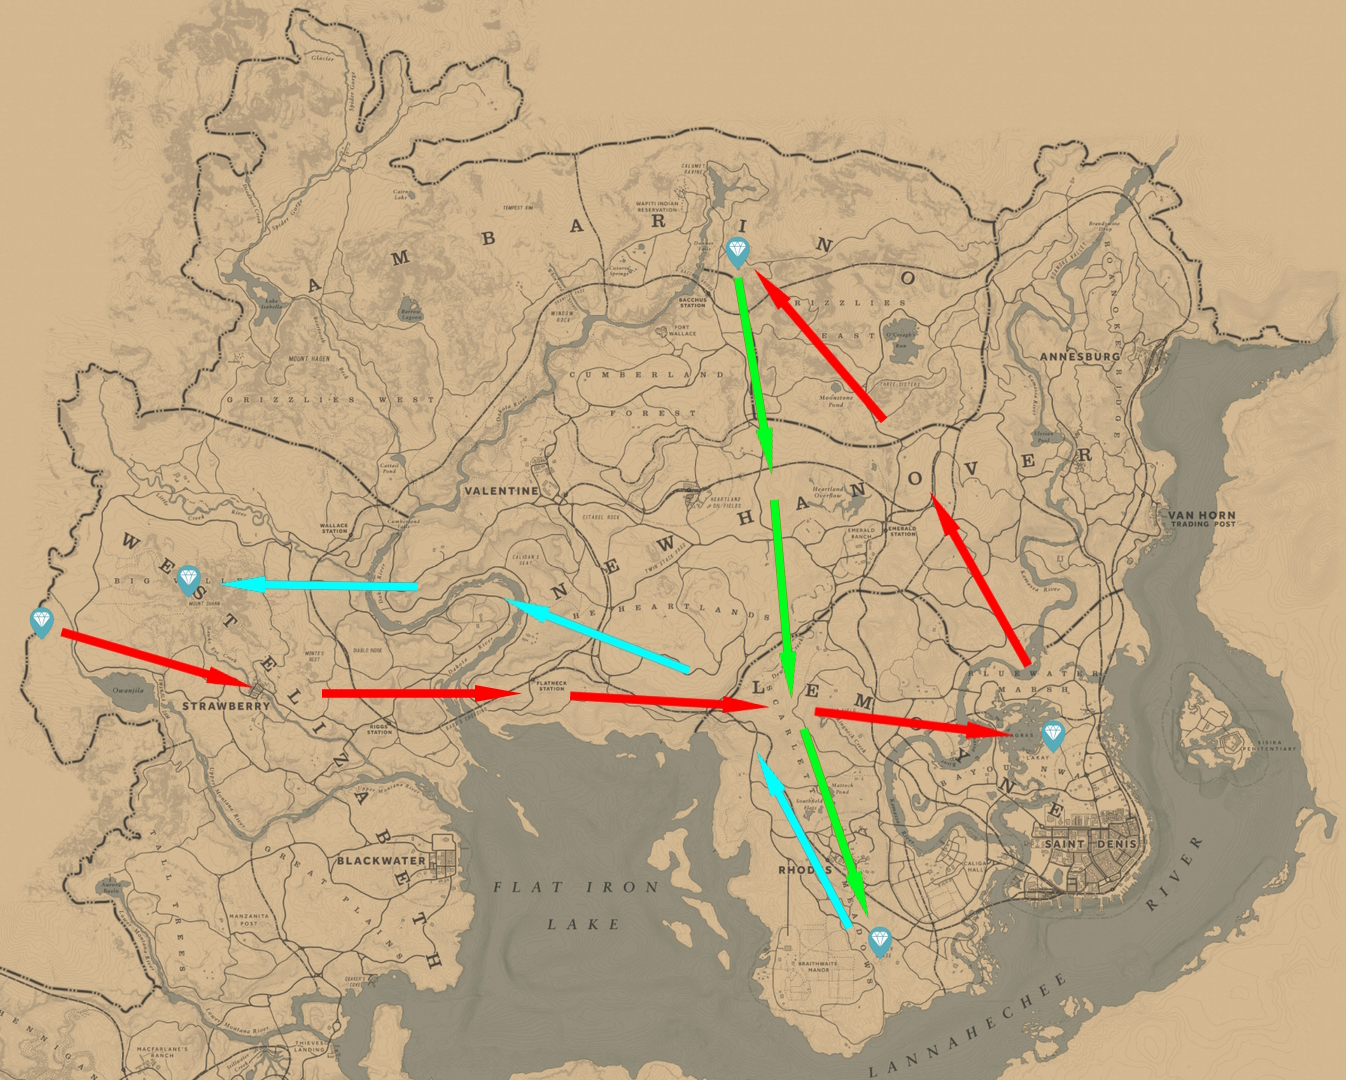
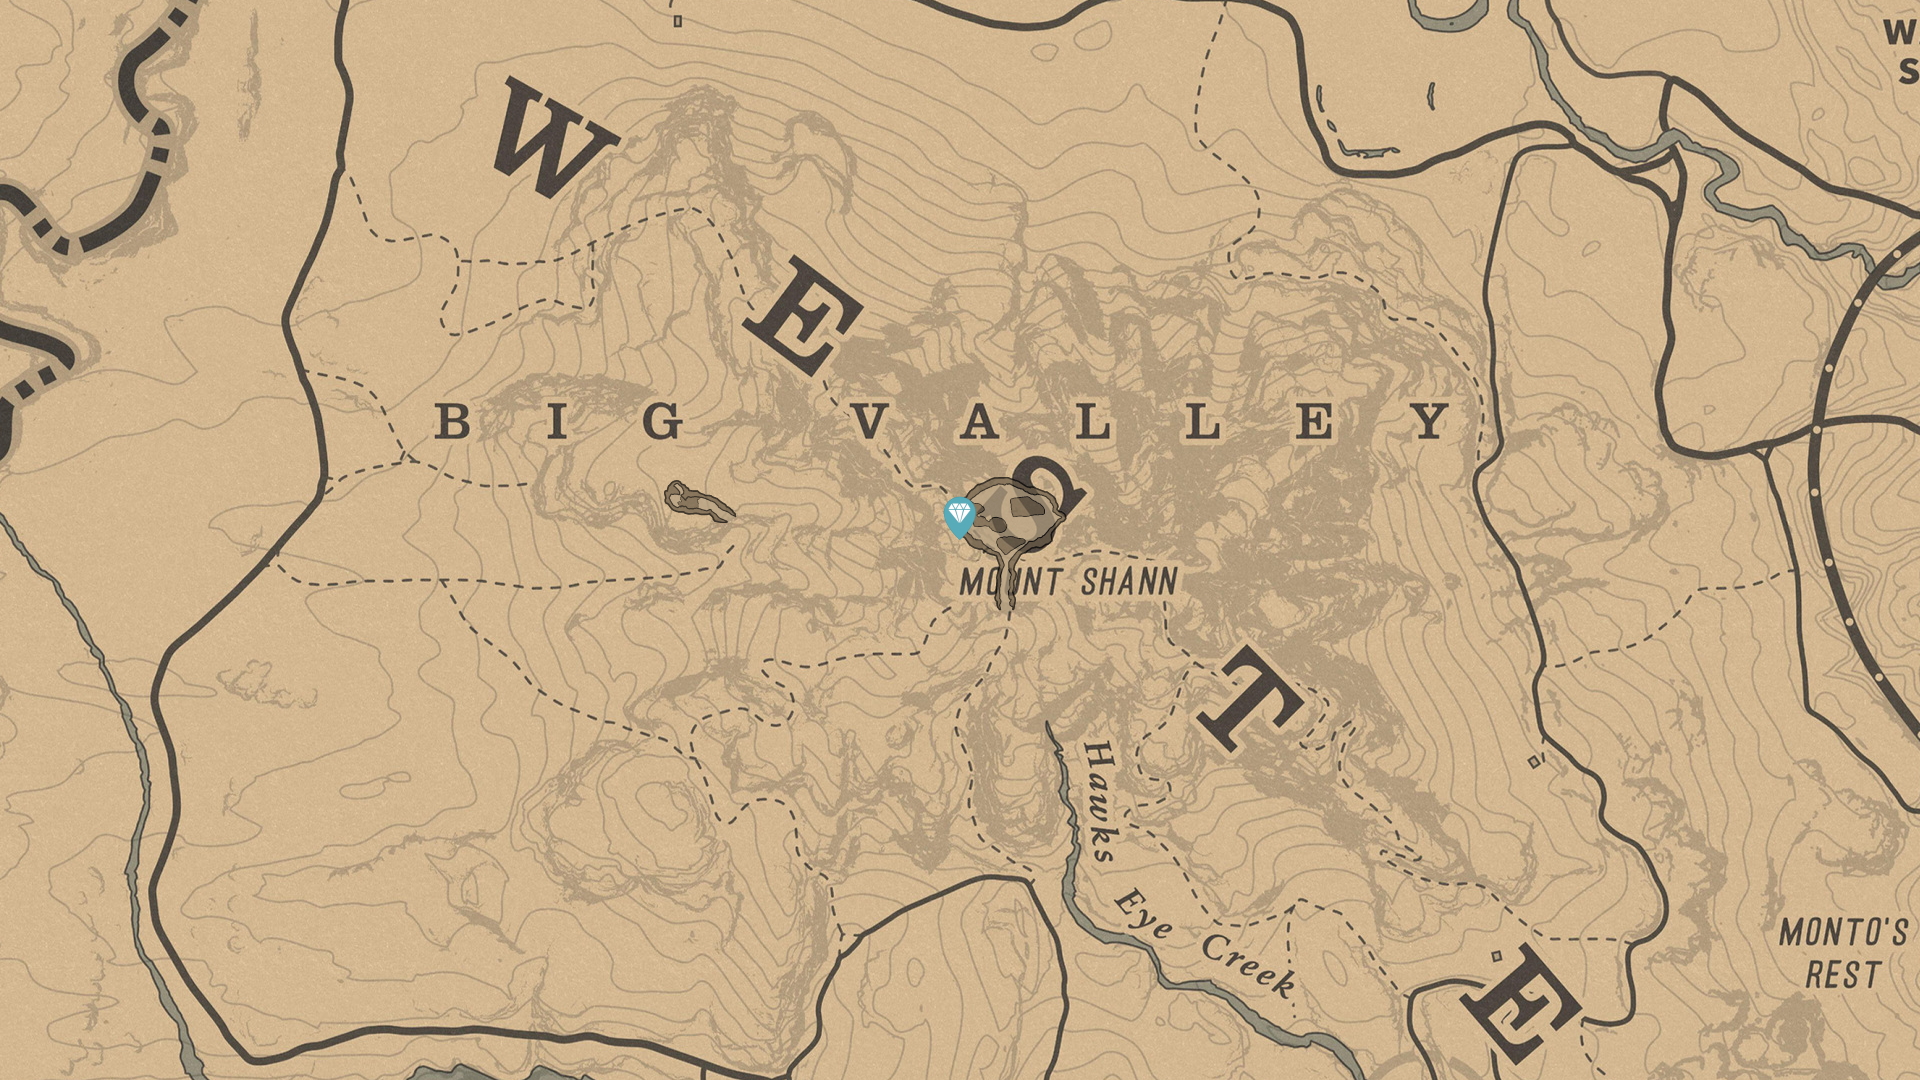
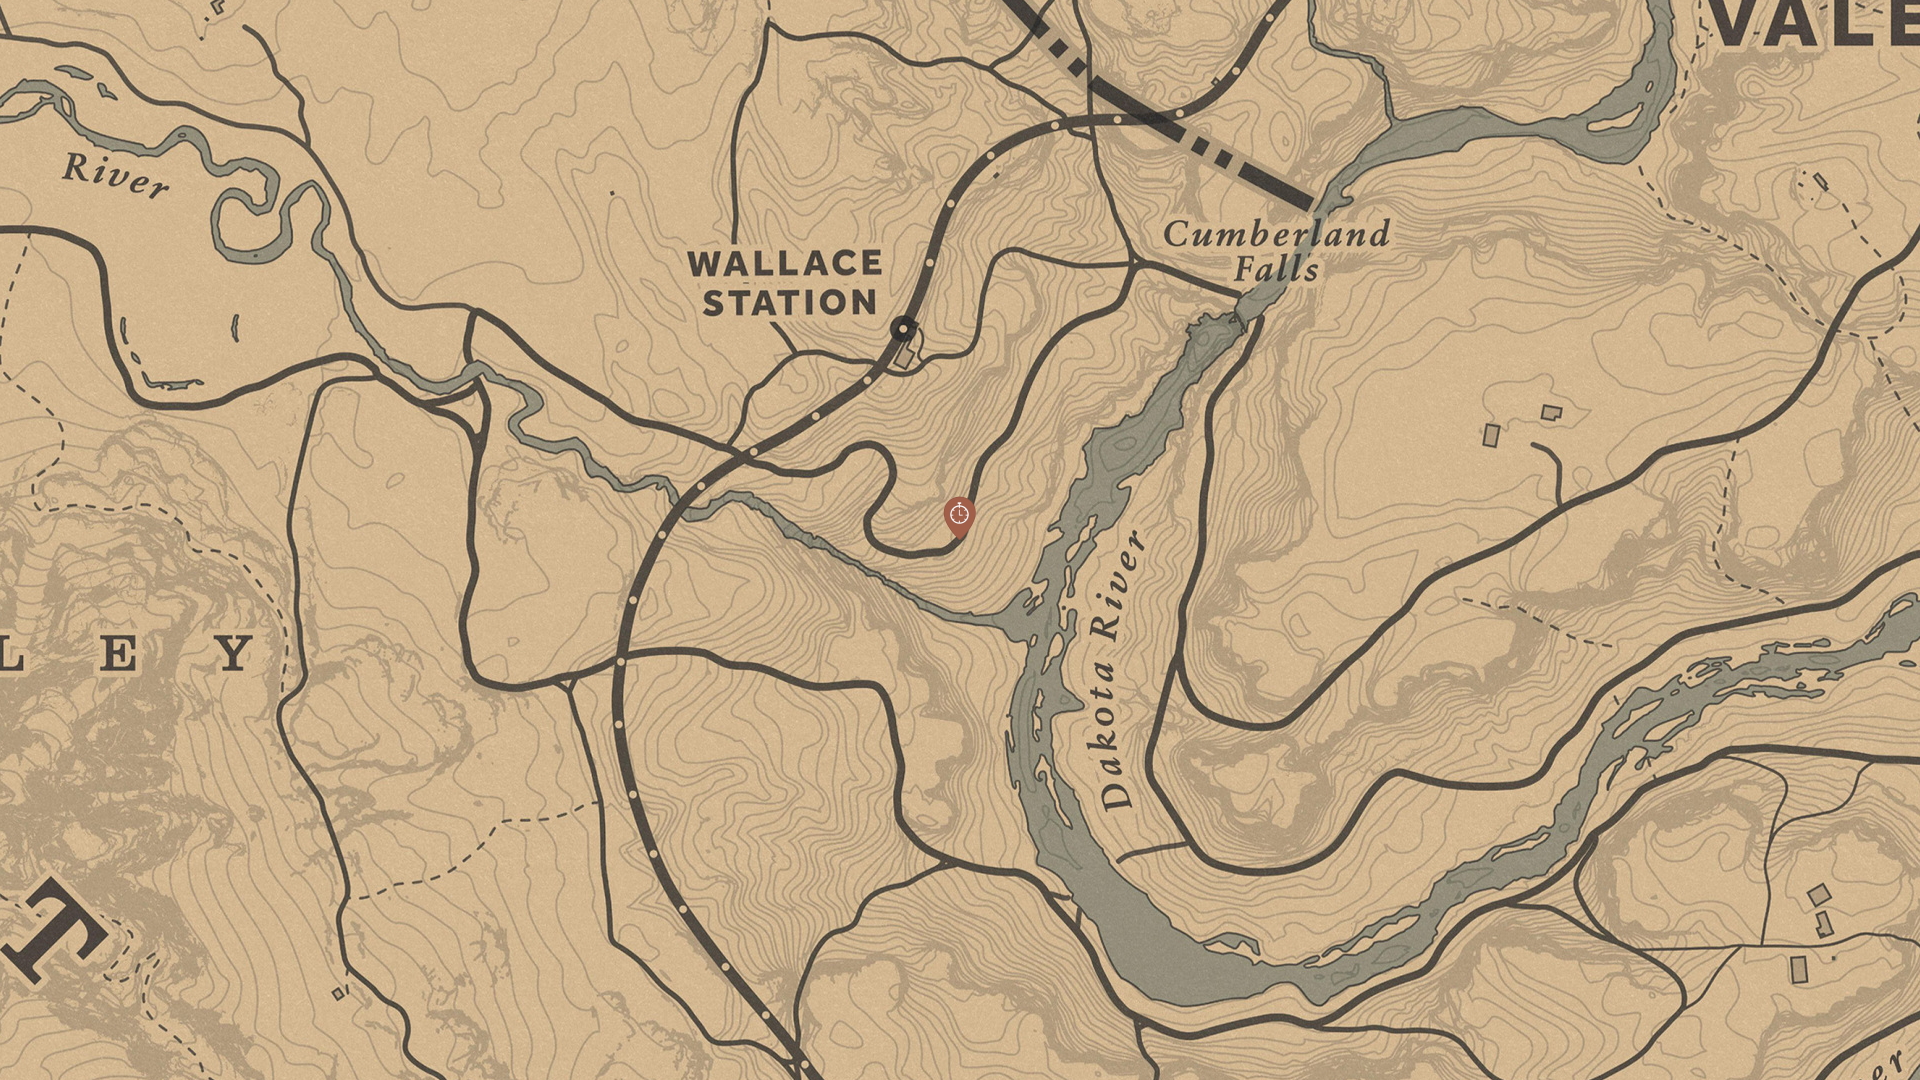
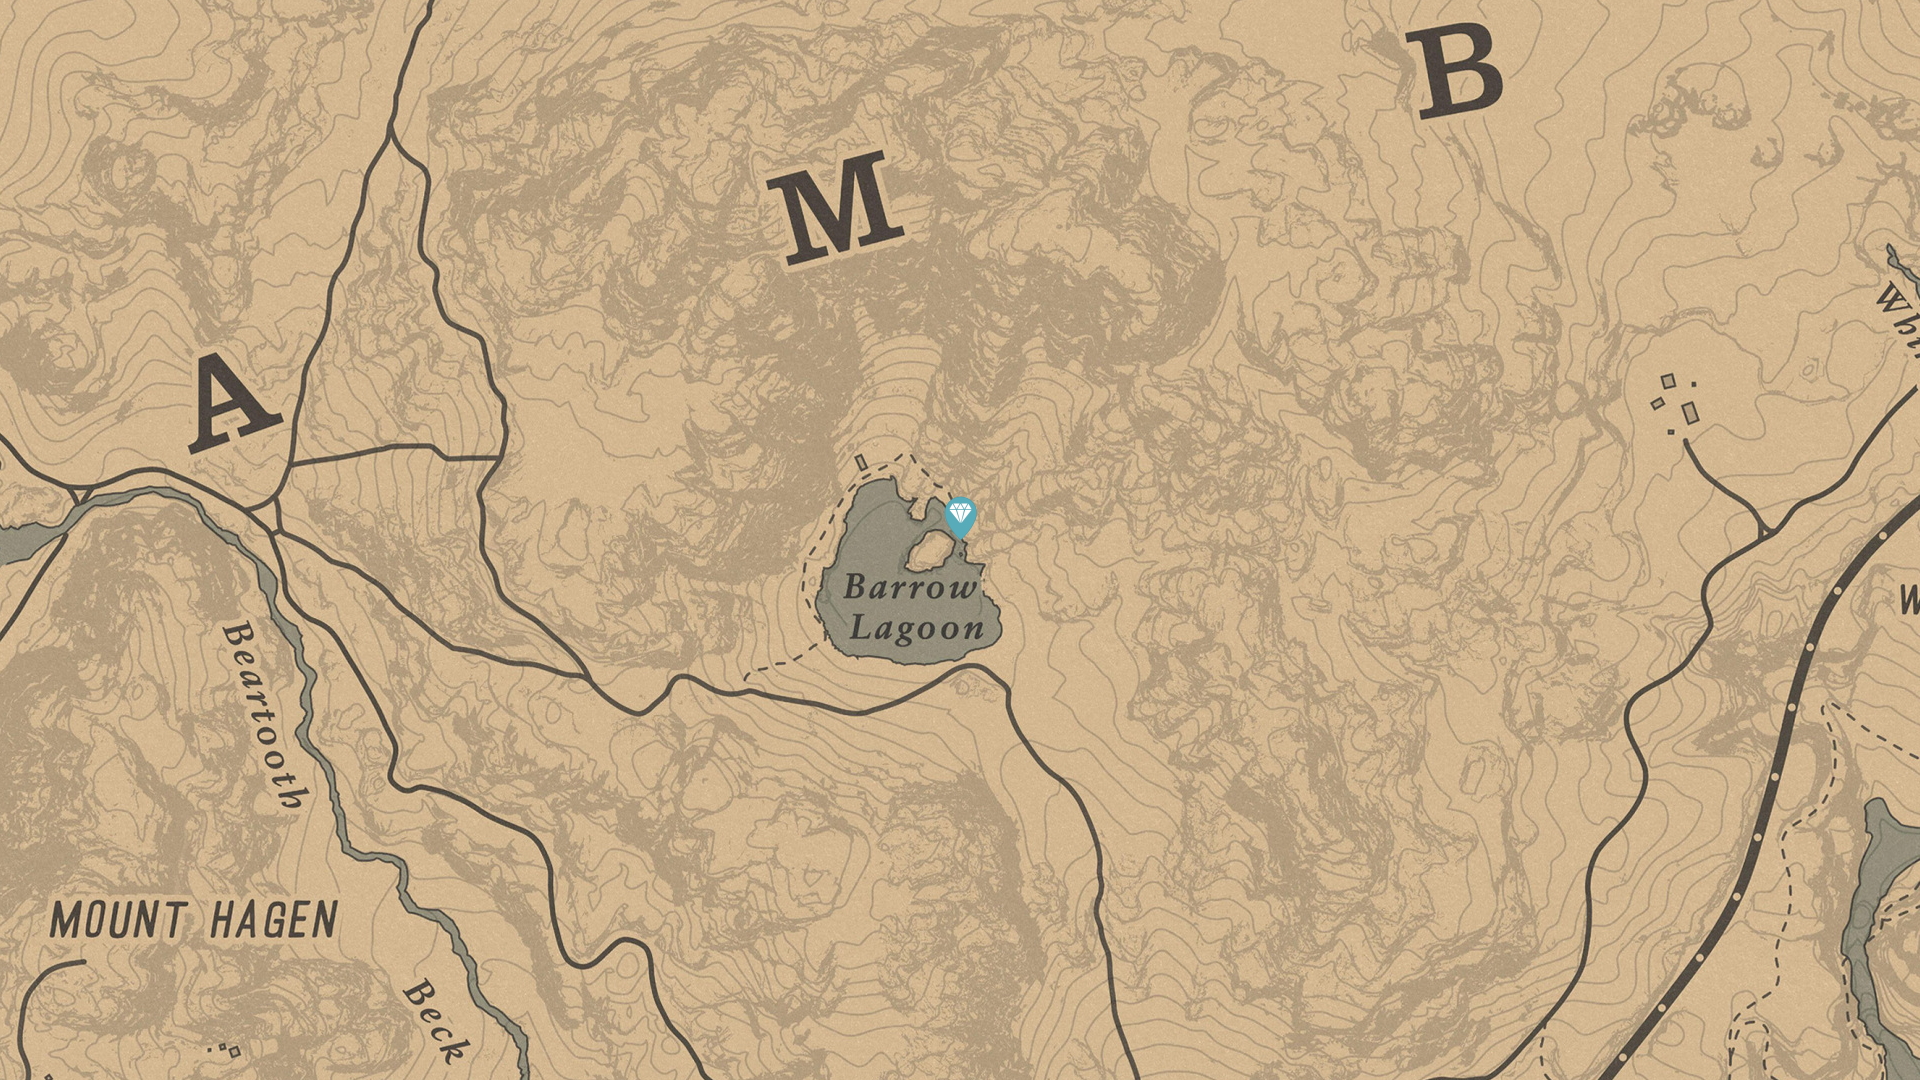
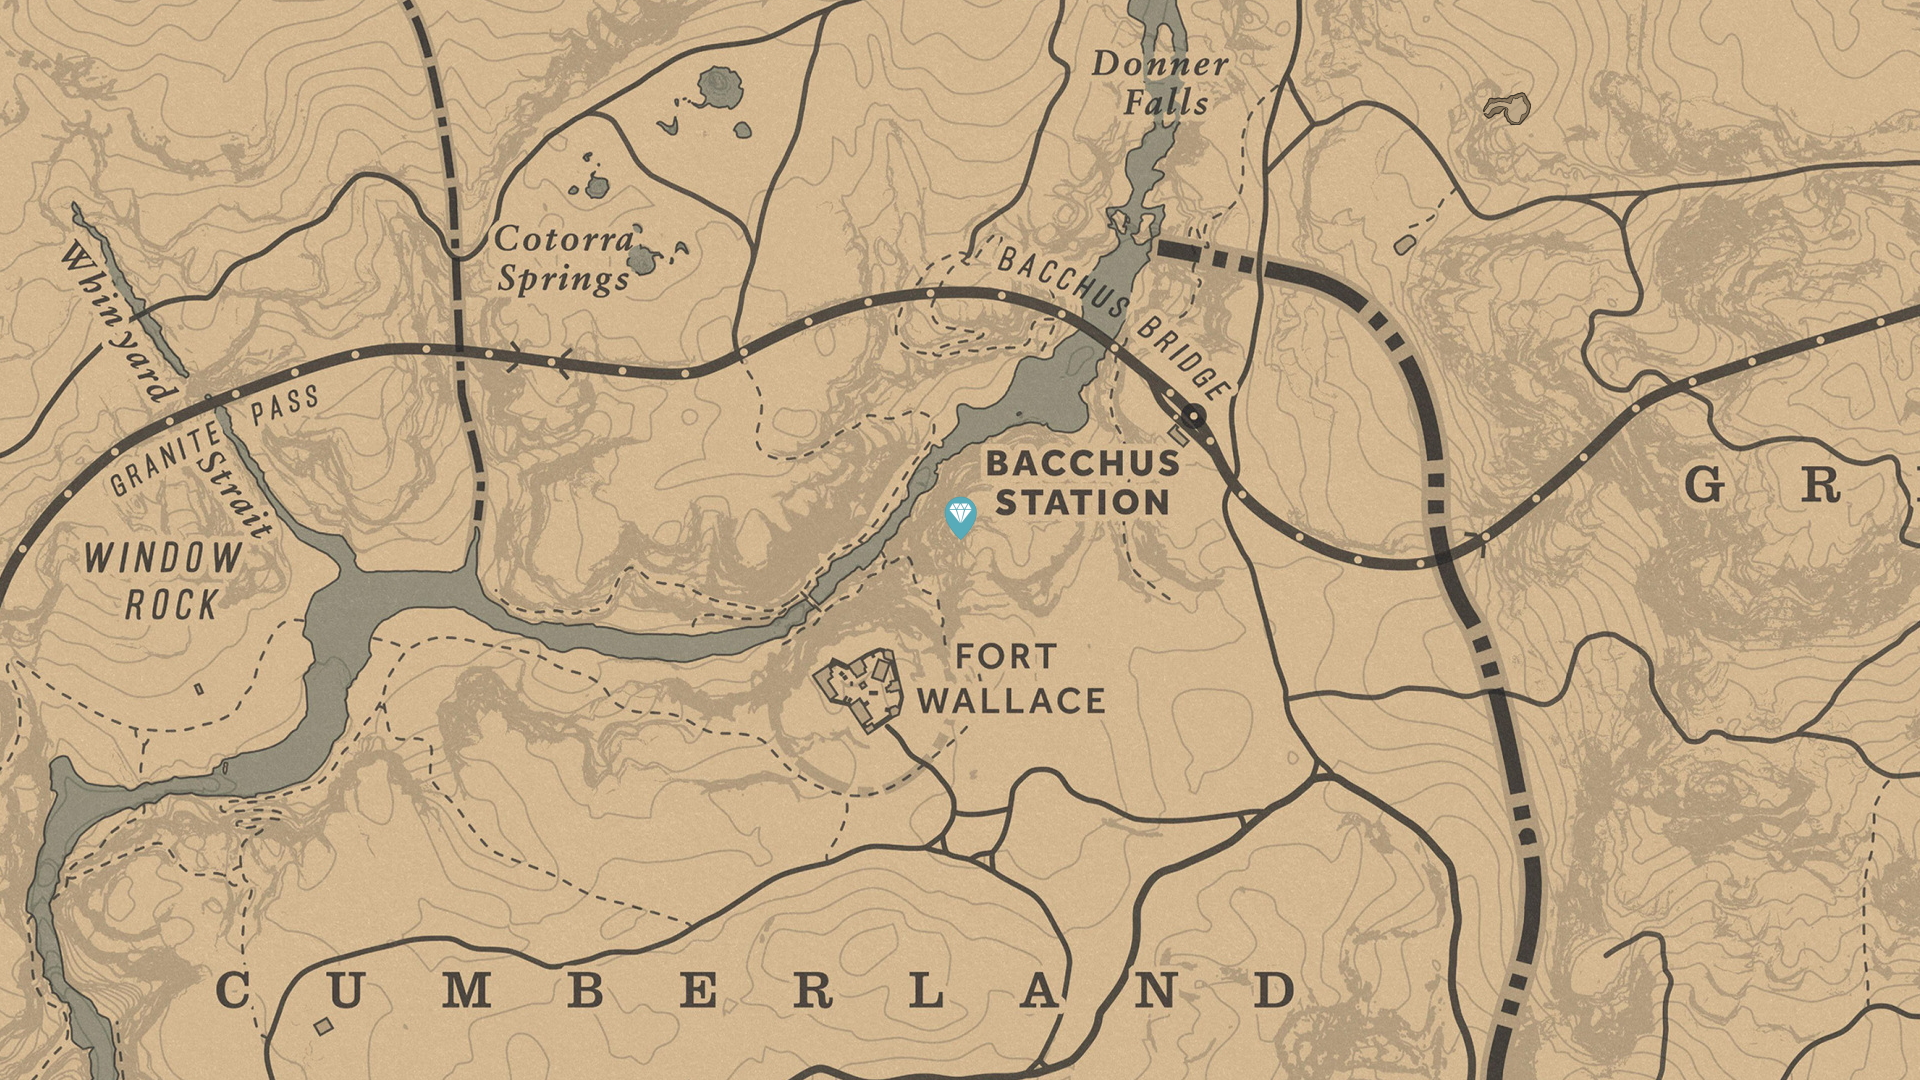
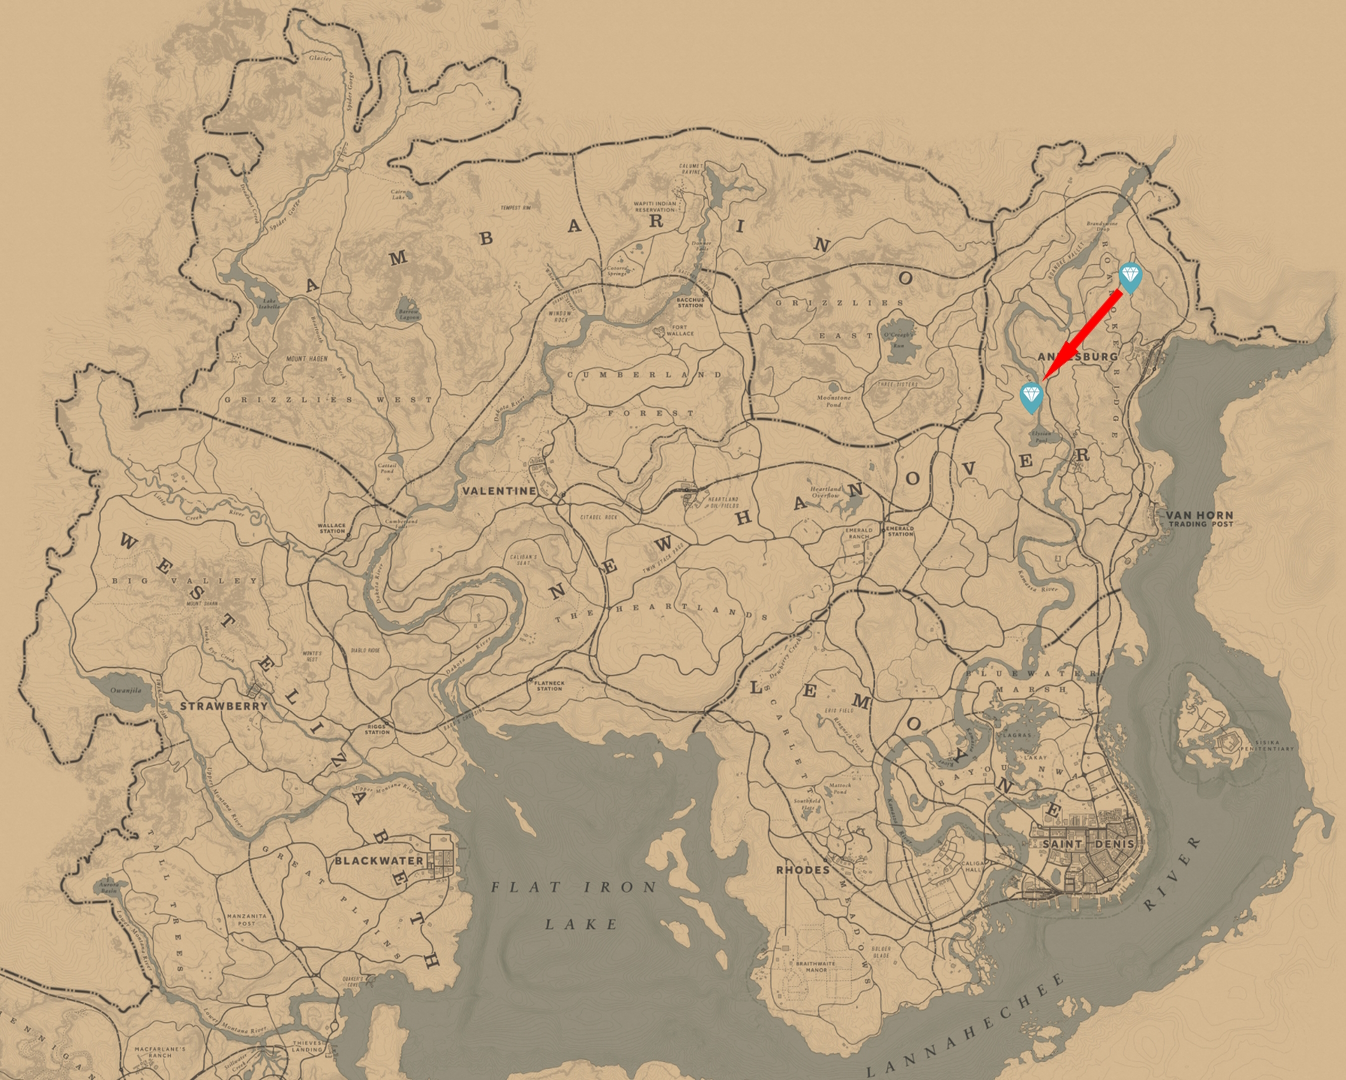
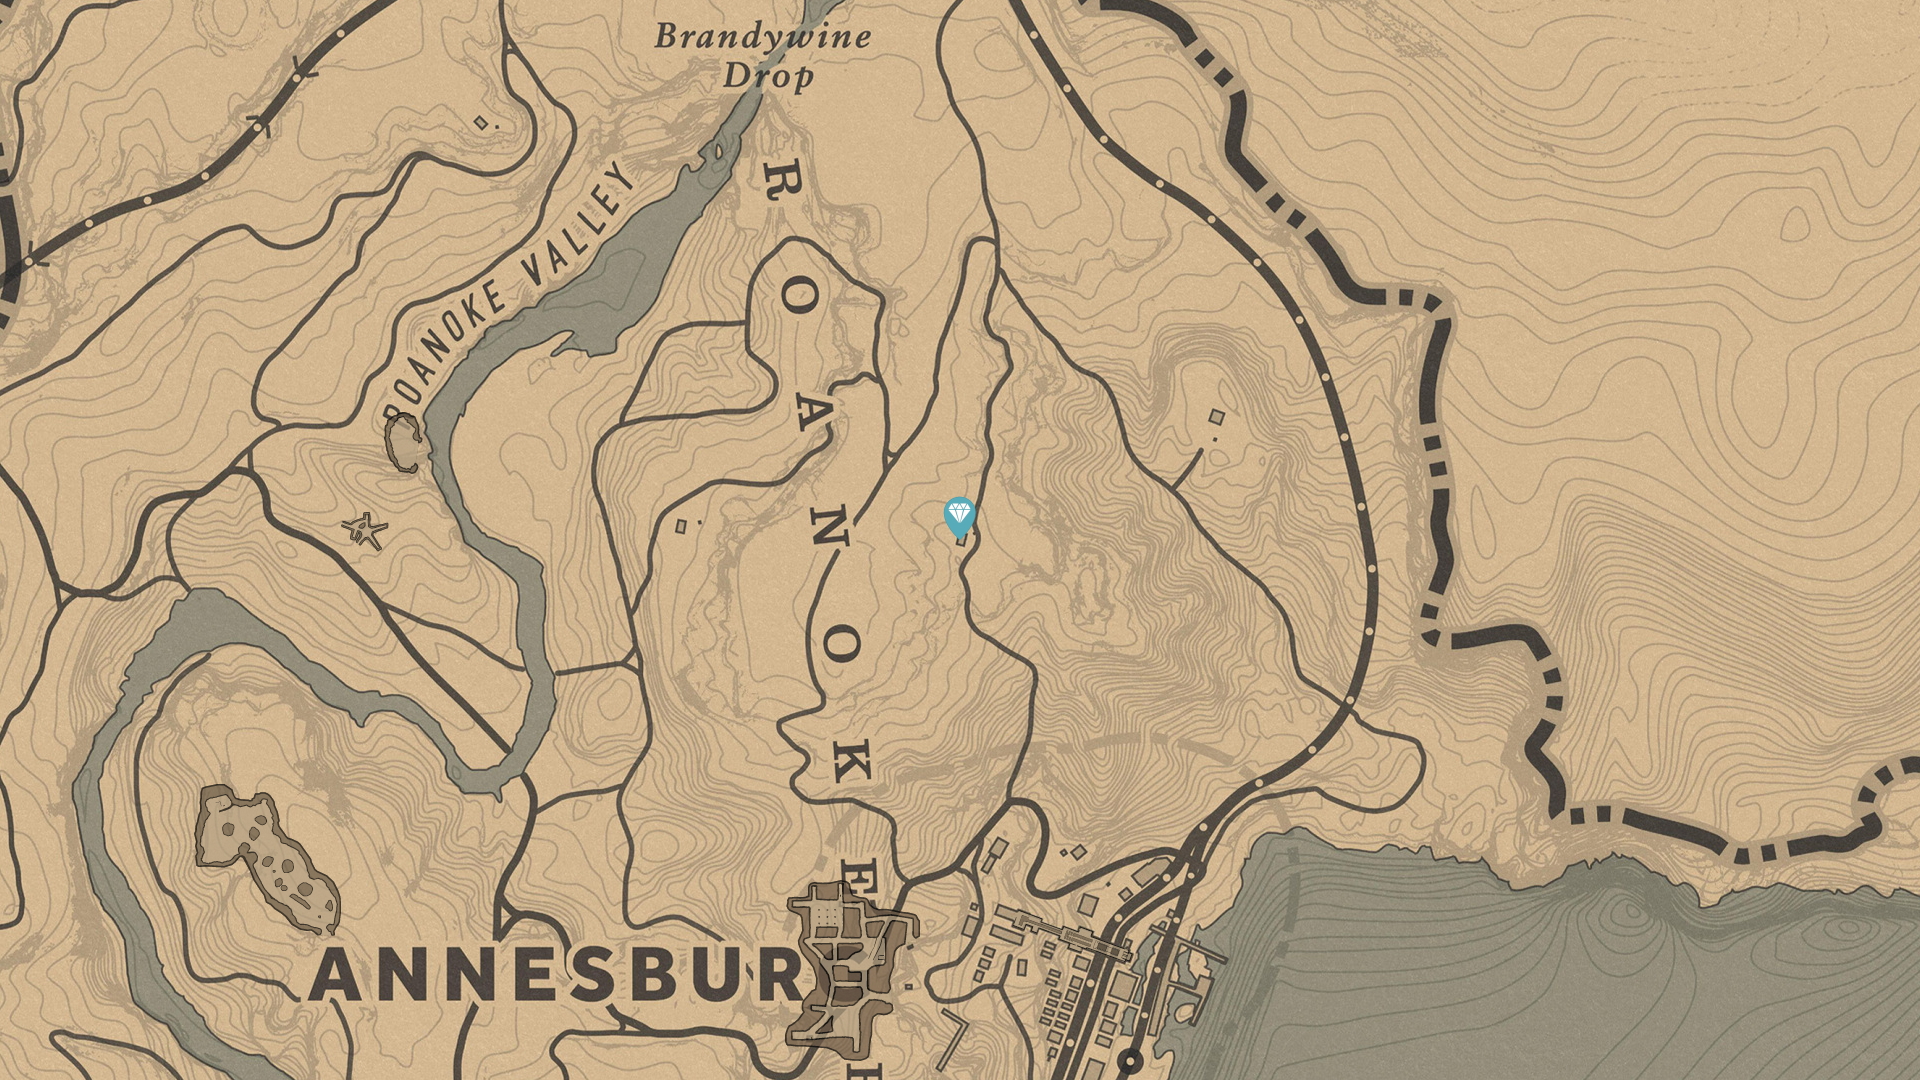
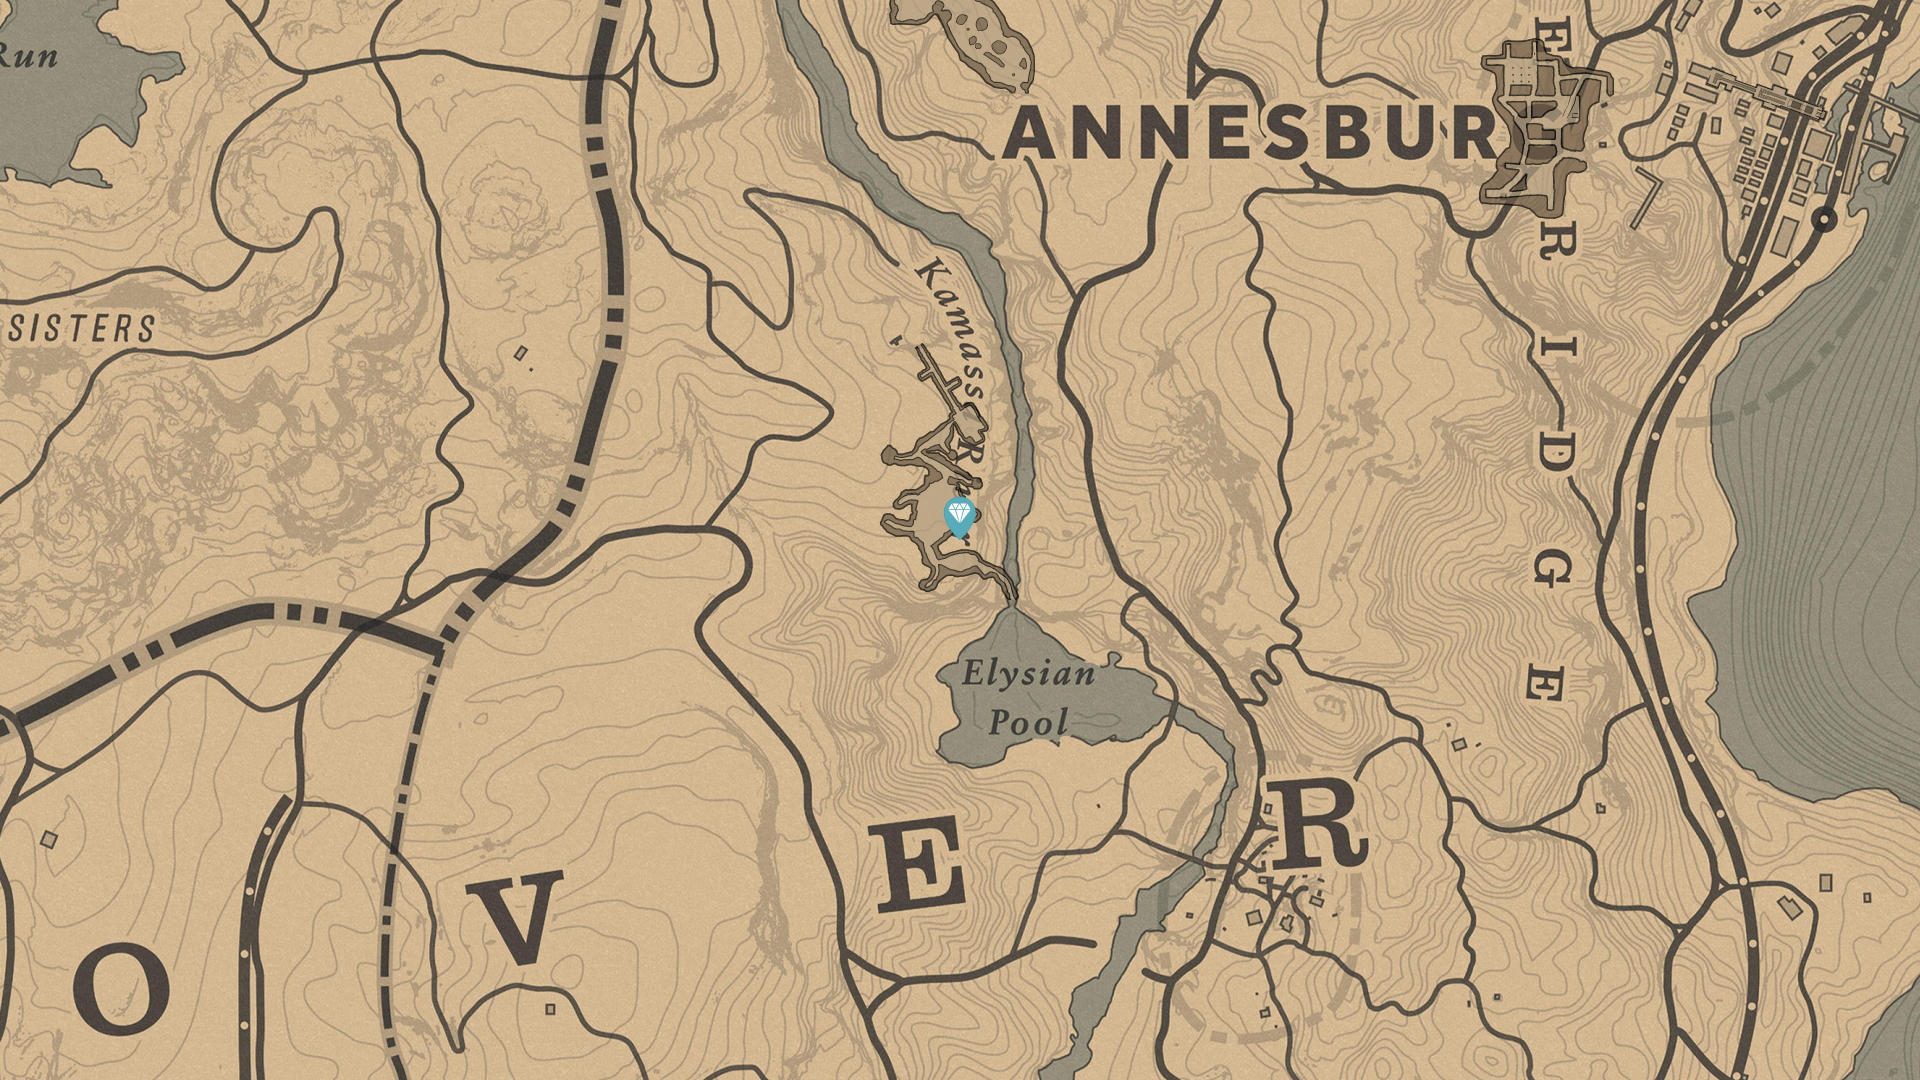
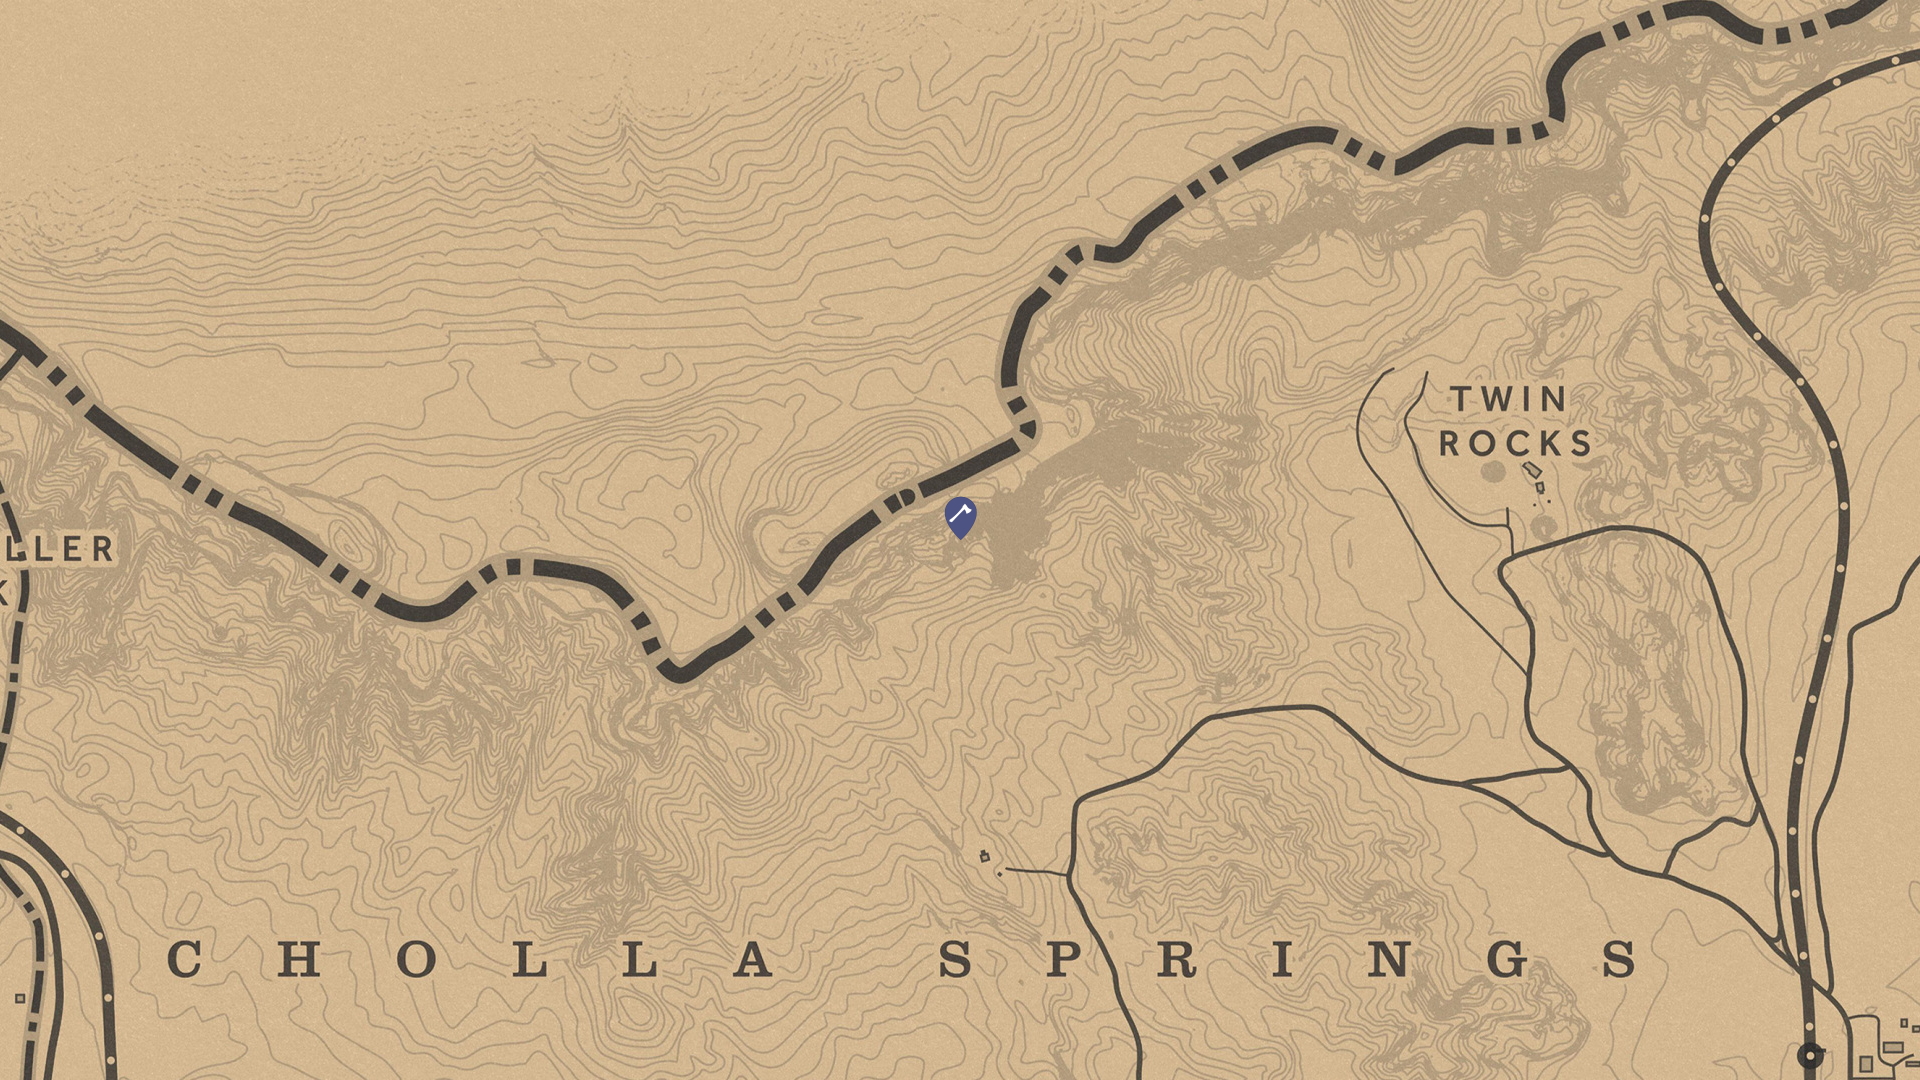
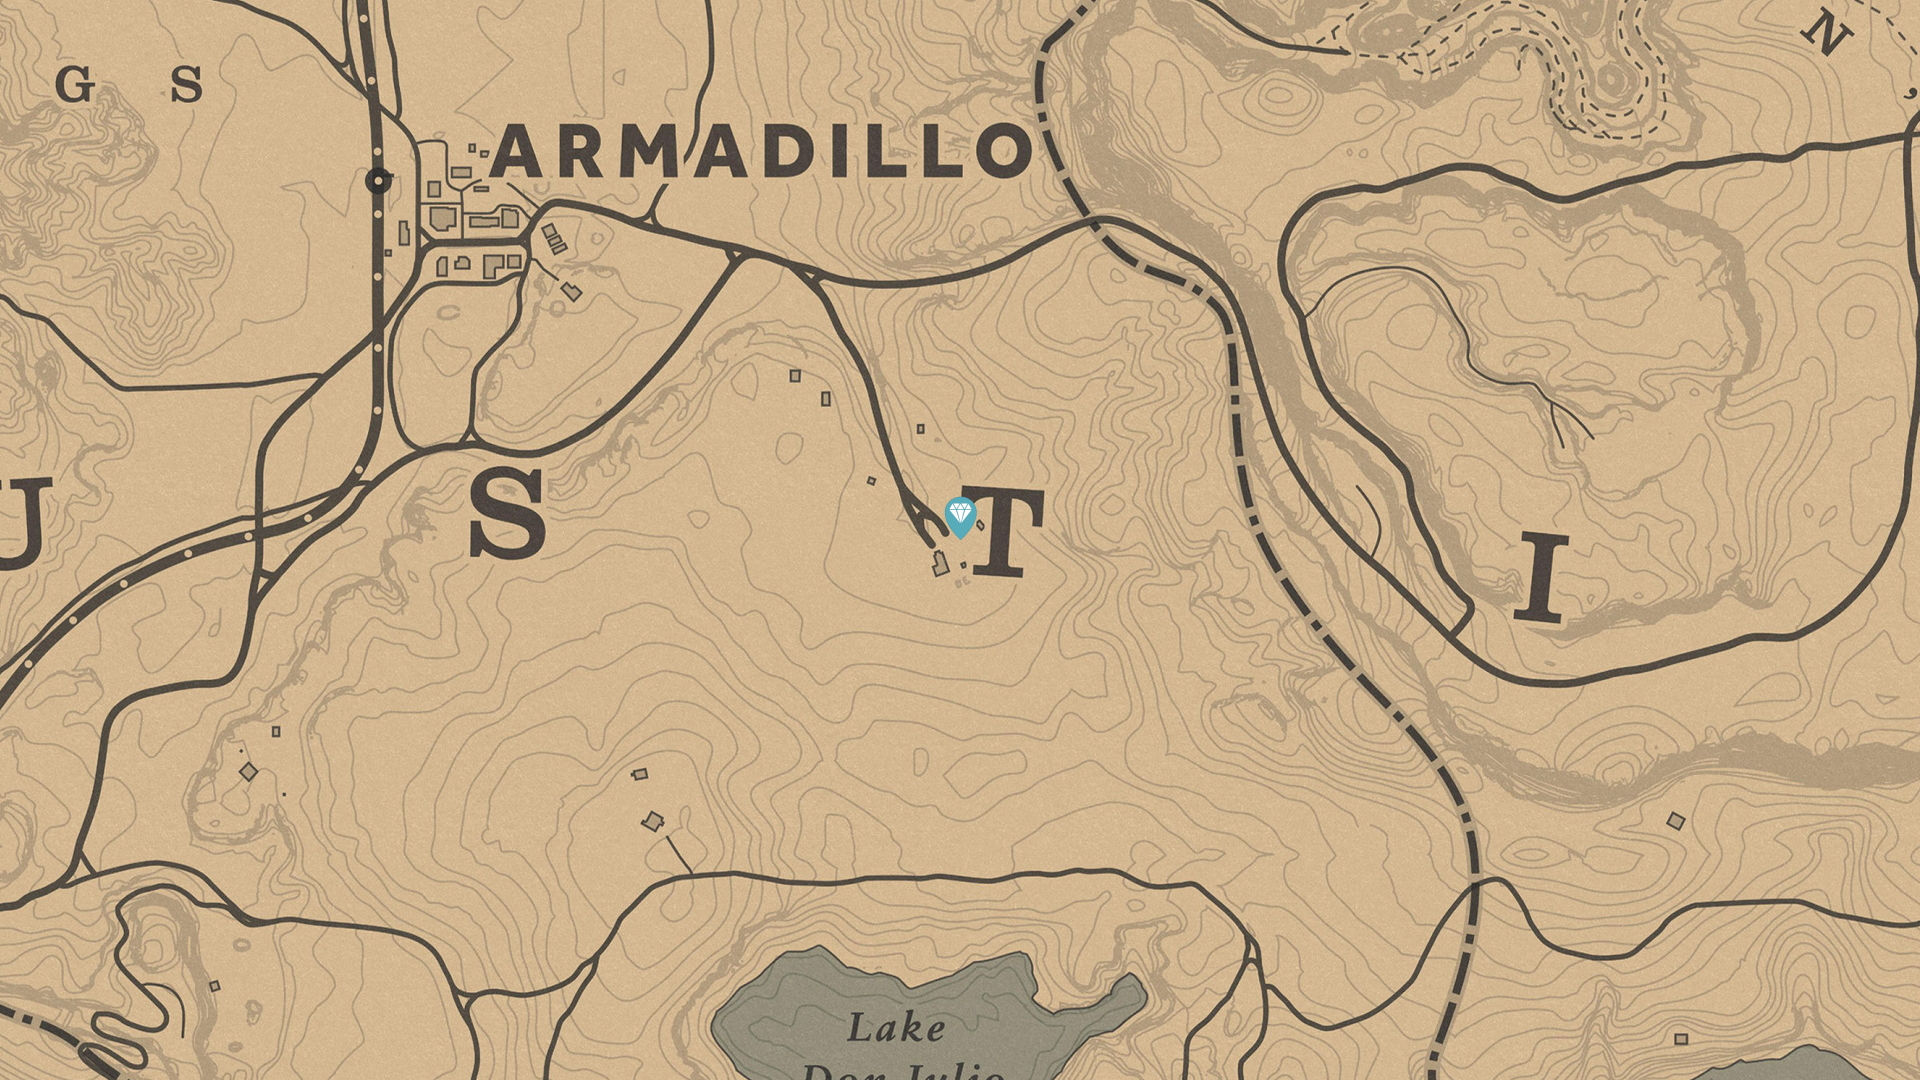
The video above shows how to gather a total of 6 bars of gold from three different locations. The first location is just South West of Horseshoe Overlook, your camp in Chapter 2, and provides you with a single bar. The second location is and old train wreck, near Cotorra Springs which is to the North, and gives two bars. Your task will be to get into the car that is standing on its’ end. Watch the video for a tip on how to get in. NOTE: If you take some extra time searching the other train cars, you should find some additional valuables. The third location is almost due East and is inside a cave. This location yields three bars but involves a mini puzzle of pushing buttons on the statues to gain access to the gold. I’ve found this a rather aggravating task, so I have included both some hints and the solution. If you are doing this near the beginning of the game, head to Rhodes to sell the gold so you can quickly acquire a free Lancaster Repeater.
STRANGE STATUES HINT: Each of the 7 statues has a certain number of fingers. You need to push the buttons on the statues that have the correct number of fingers: 2, 3, 5 and 7. The statue that is missing it’s arm is the 7 fingered statue. The missing arm can be found in a pile of rocks in the corner of the cave.
STRANGE STATUES SOLUTION: Start with looking at the statue with the missing arm. Click that statue and move clockwise skipping every other statue. There are seven outer statues, so you should have clicked on 4 of them. If you did this correctly, you will hear a stone door slide open and the gold will be in the support of the center statue thing.
Chick’s Treasure Hunt
This is the games official introduction for you into the world of treasure hunting. You are given a list of three debtors from Strauss in the mission ‘Money Lending and Other Sins’. One of these debtors is Chick Matthews and, when you catch him, he gives you the treasure map that you must then go and find. For this particular treasure, the location shows up on your map. Unfortunately for you, as this is a mission, half of the money collected will go back to the gang. NOTE: This is the only time a treasure will show up on your map as a destination.
Jack Hall Gang Treasure Hunt
3 maps leading to 2 gold bars

Landmarks of Riches Treasure Hunt
4 maps leading to 6 gold bars
The Poisonous Trail Treasure Hunt
3 maps leading to 4 gold bars

High Stakes Treasure Hunt
3 maps leading to 3 gold bars
A random chance encounter with a treasure hunter must be made to gain this map. I have only found the treasure hunter within sight of the second map location. If you kill and loot the treasure hunter, you will obtain Map 1 at that time. If you choose to not kill the treasure hunter, you will need to meet up with him 3 times total before the map magically becomes available for purchase from any of the fence locations; Emerald Ranch, Rhodes, Saint Denis, Van Horn.

Sketched Map Treasure Hunt
1 map leading to 1 gold ingot
A Prisoner Chained Treasure Hunt
1 chance meeting leading to 1 gold bar
This treasure hunt is a bit different as there is no map. A chance meeting of a chained prisoner triggers this treasure hunt. After a short story, the prisoner asks you to free him. If you do, he’ll tell you the treasure location.
Le Tresor Des Morts Treasure Hunt [Available with the Special or Ultimate Editions only]
2 maps leading to 6 gold bars
This treasure hunt is only available if you are playing the Special or Ultimate editions of the game. It’s worth keeping this treasure hunt in for completeness, however, I understand most will not be able to find this treasure, myself included.
Otis Miller Treasure Hunt
2 maps leading to 1 unique weapon
Once both torn maps have been collected, they automatically turn into the Mended Map. Both torn maps are available at any time after the start of Chapter 2. The treasure can only be found after the start of the Epilogue. NOTE: There is a message on the back of the Mended Map from Otis Miller. NOTE: It is rumored that you can find this treasure without obtaining the Mended Map, however, I cannot confirm at this time.
![Torn Treasure Map [1/2]](media/TornTreasureMap1.jpg)
![Mended Map [2/2]](media/TornTreasureMap2.jpg)
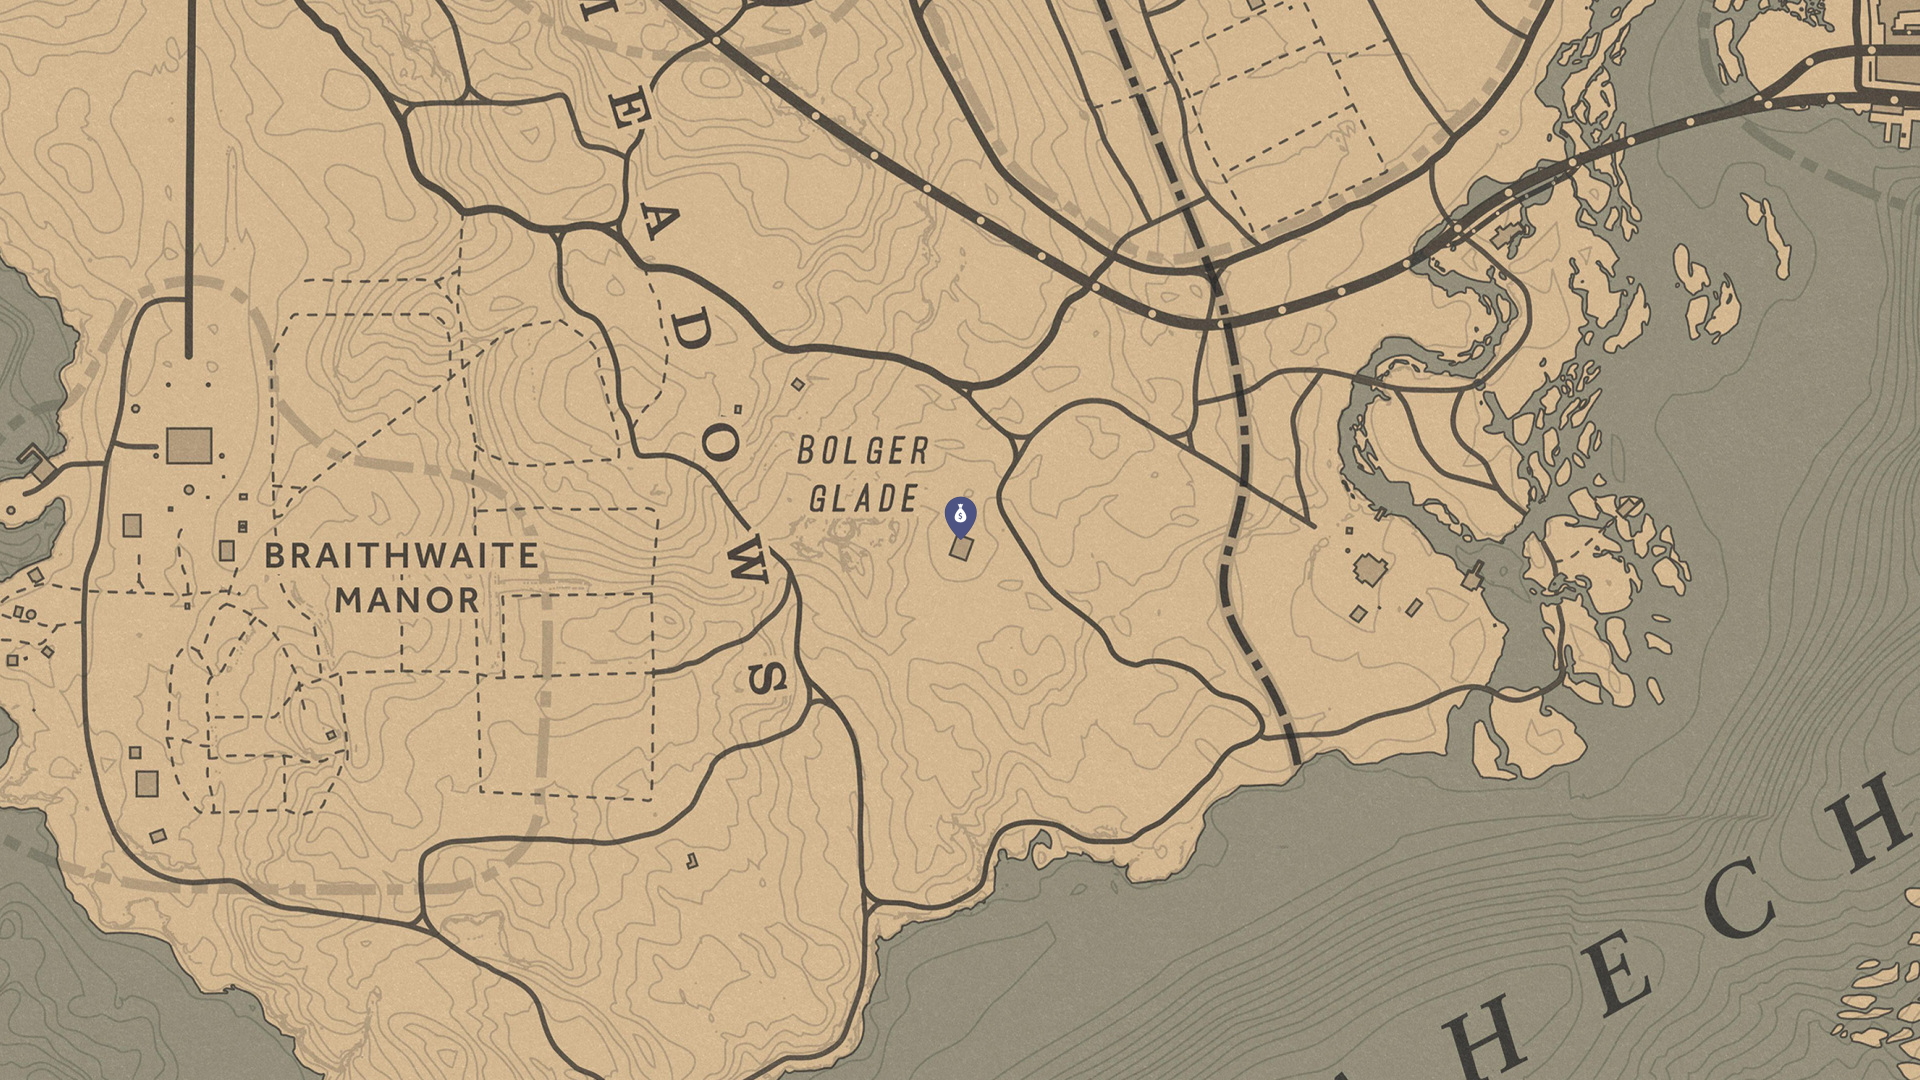
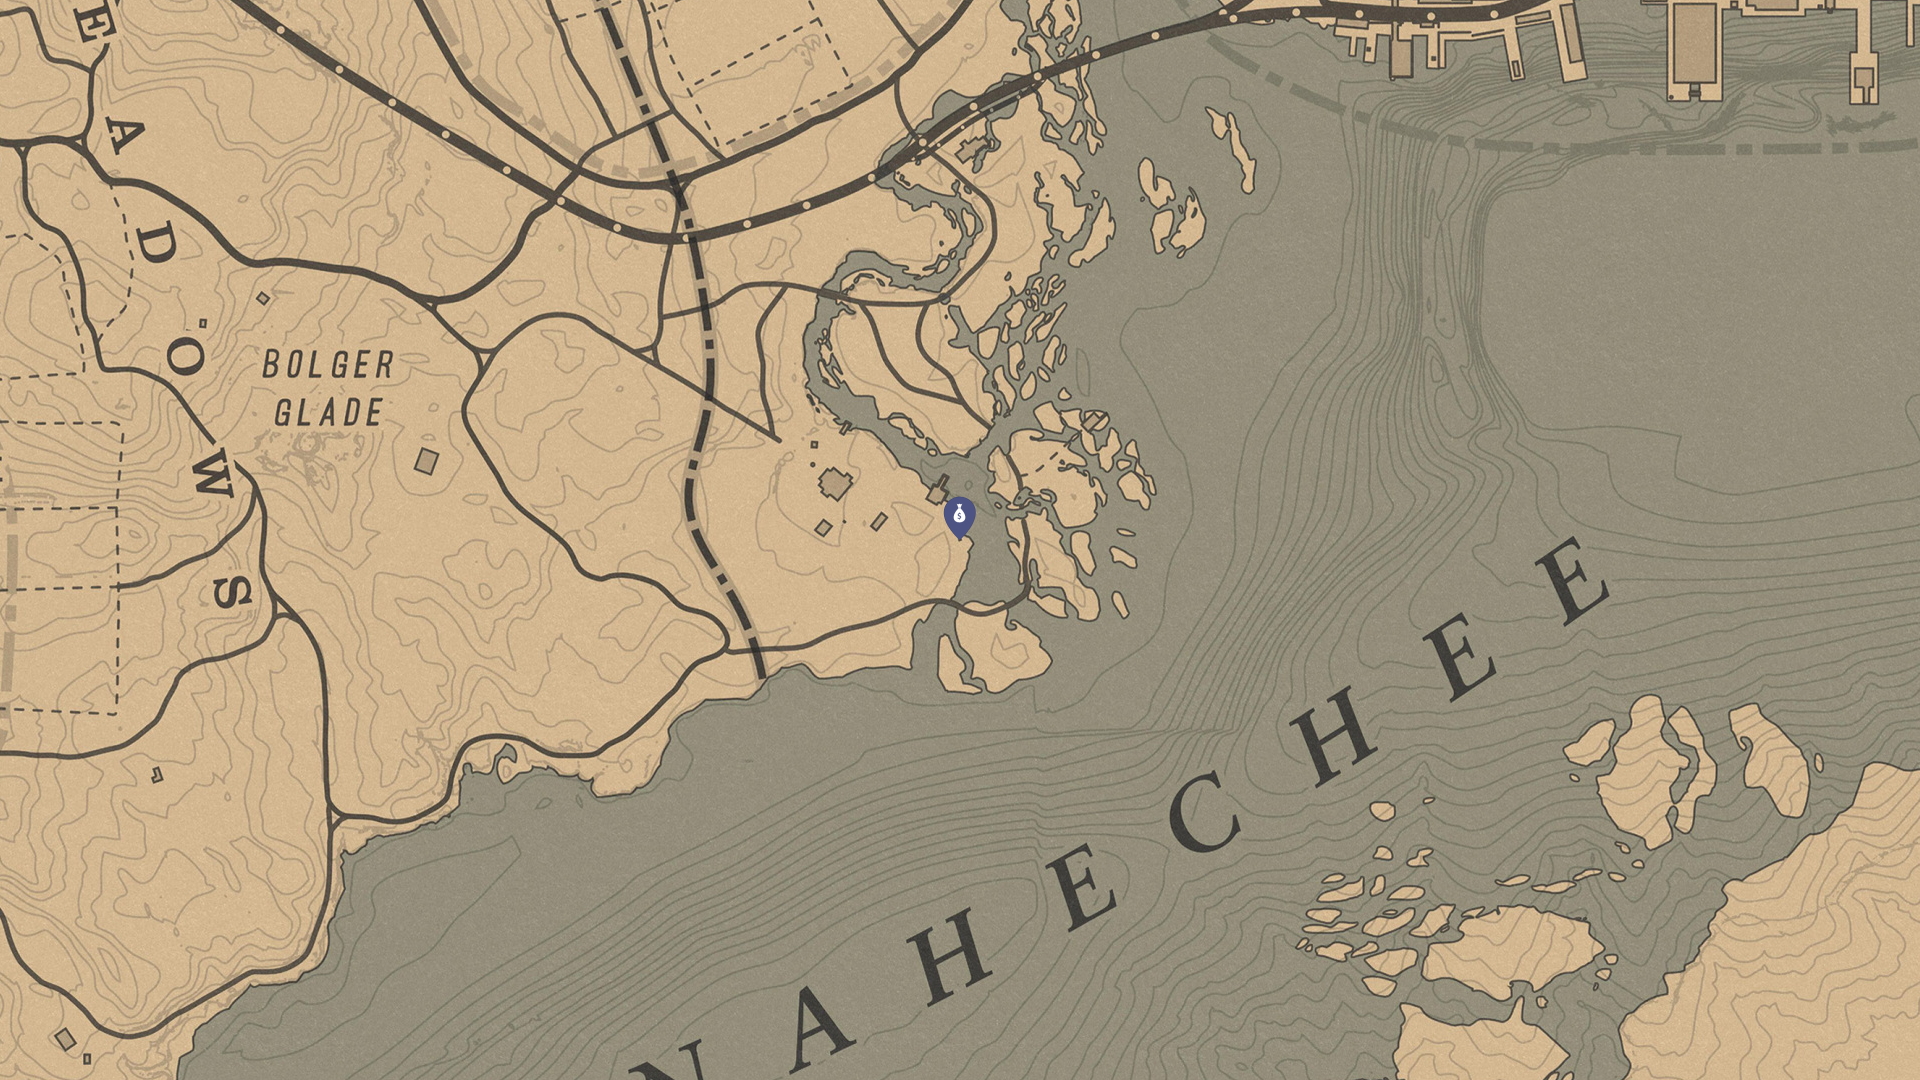
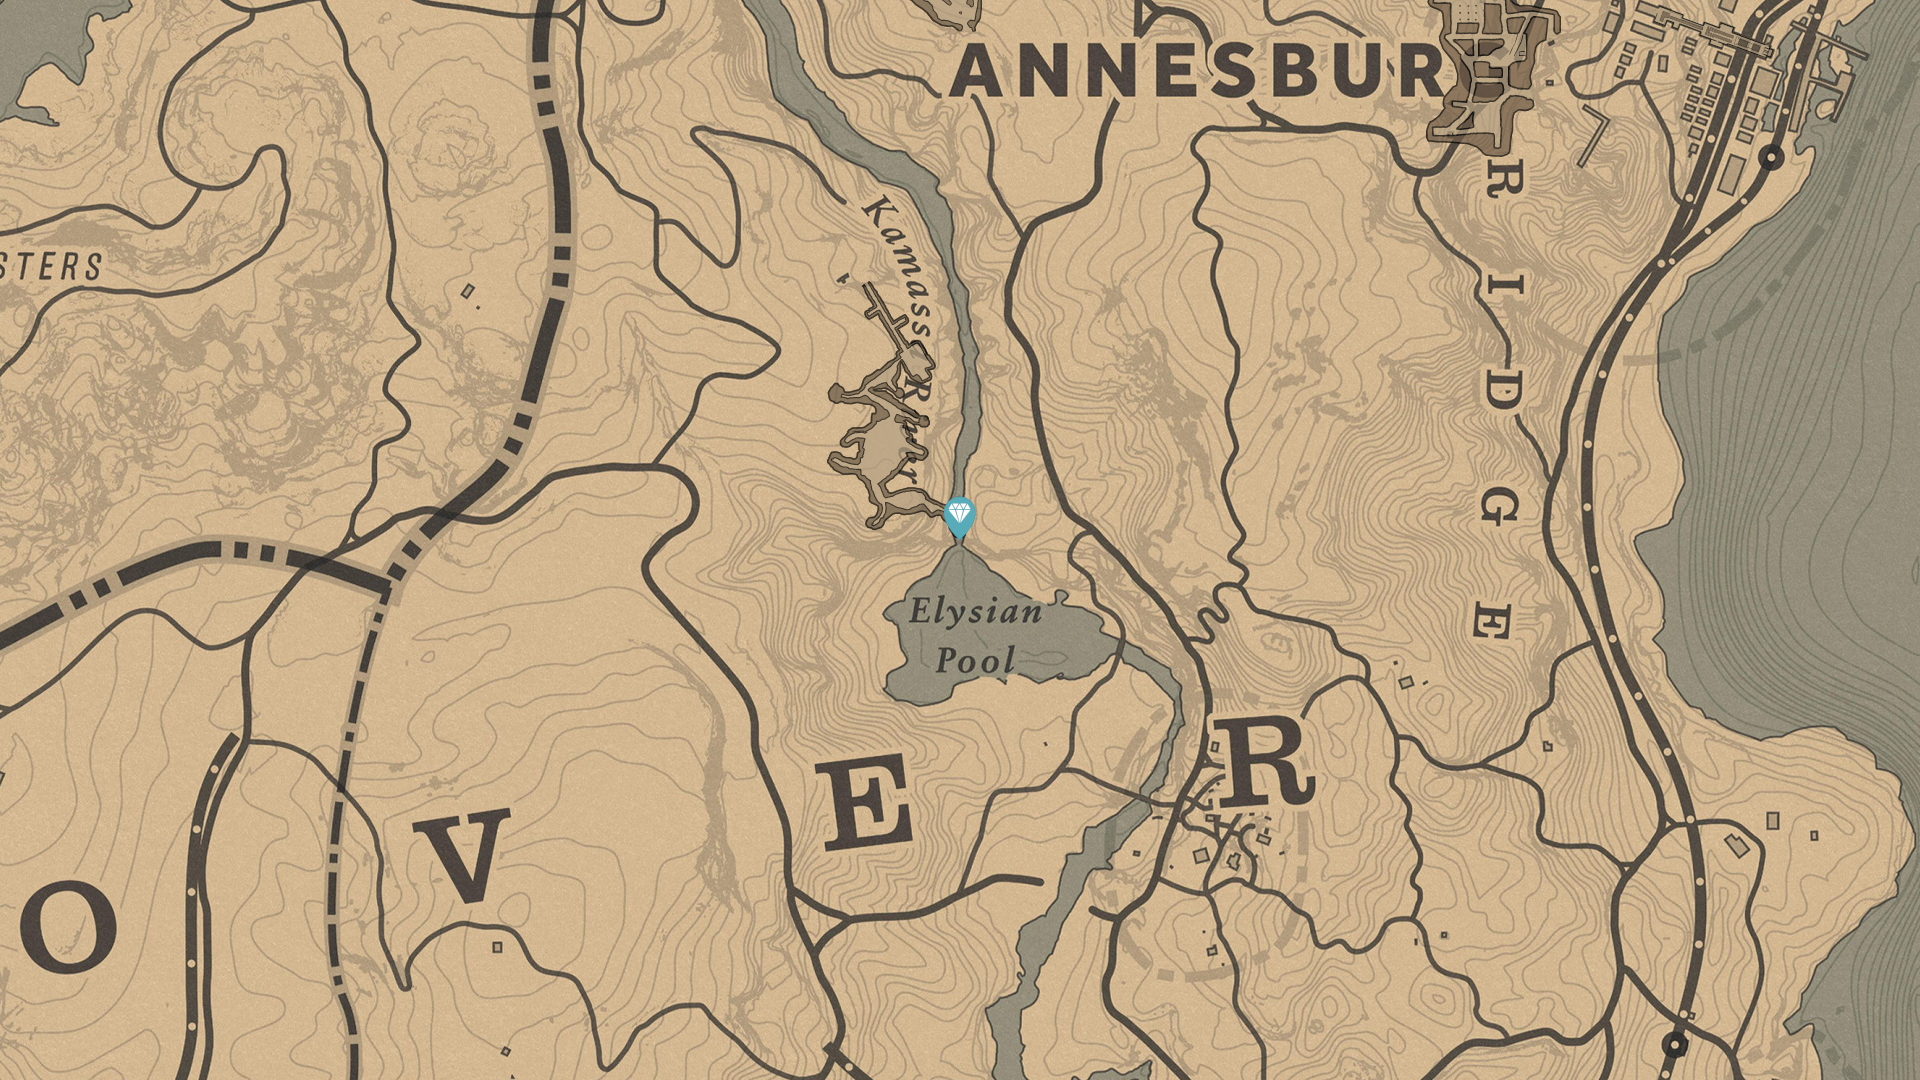
The Elemental Trail Treasure Hunt
3 maps leading to 1 Trinket and 1 gold bar
Only available after the start of the Epilogue.

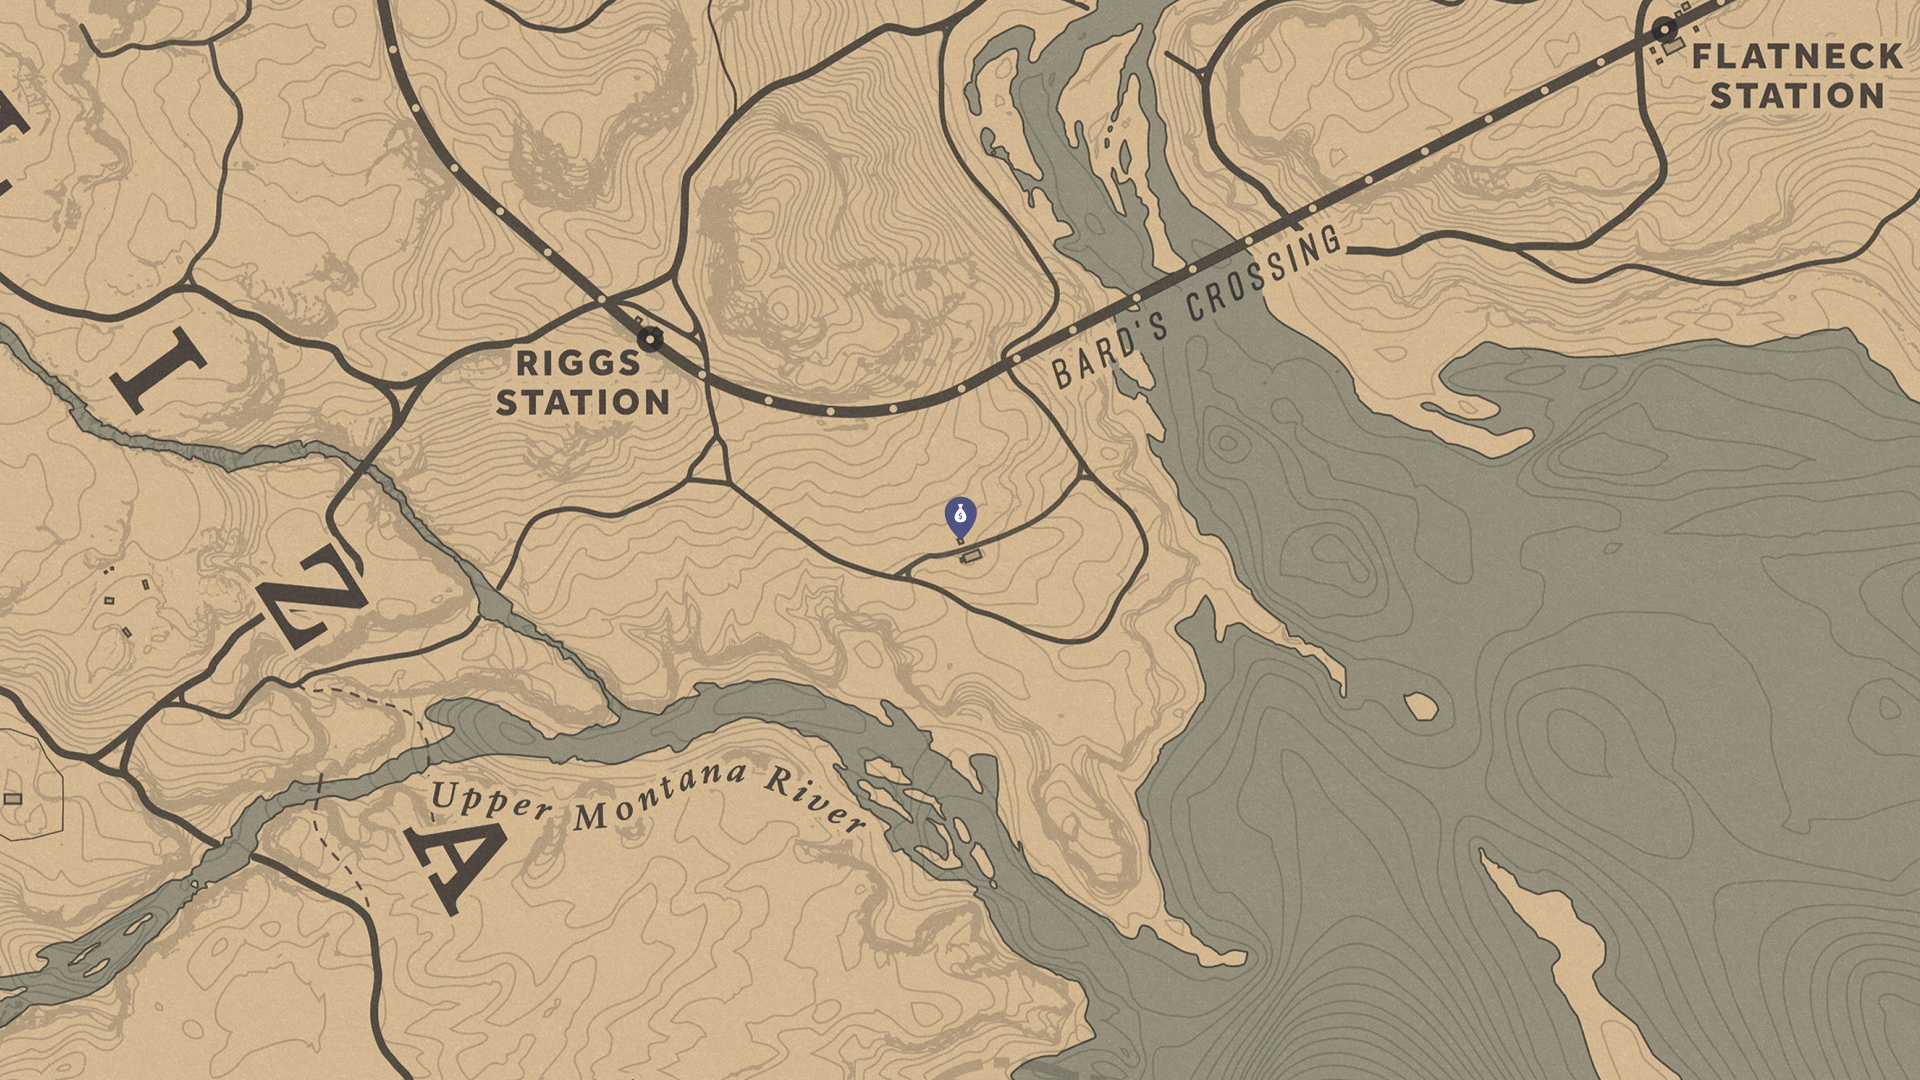
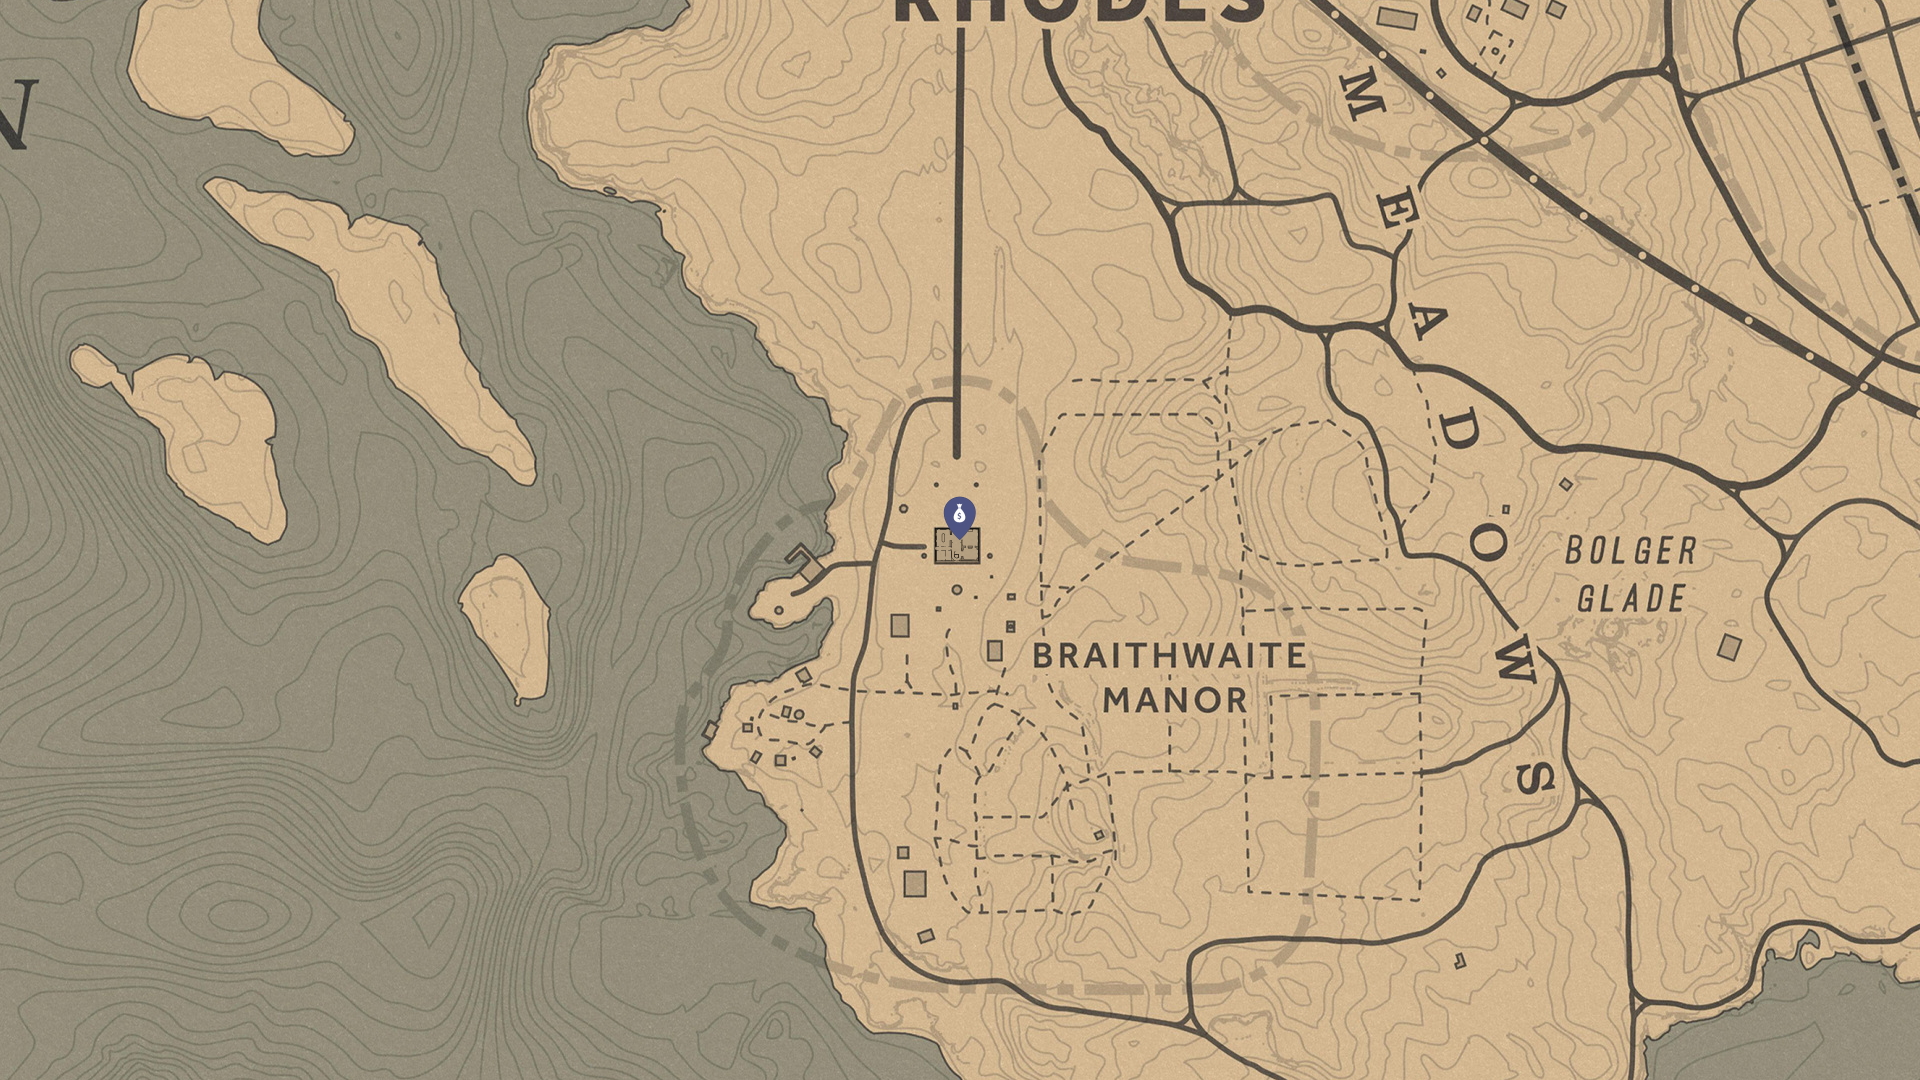
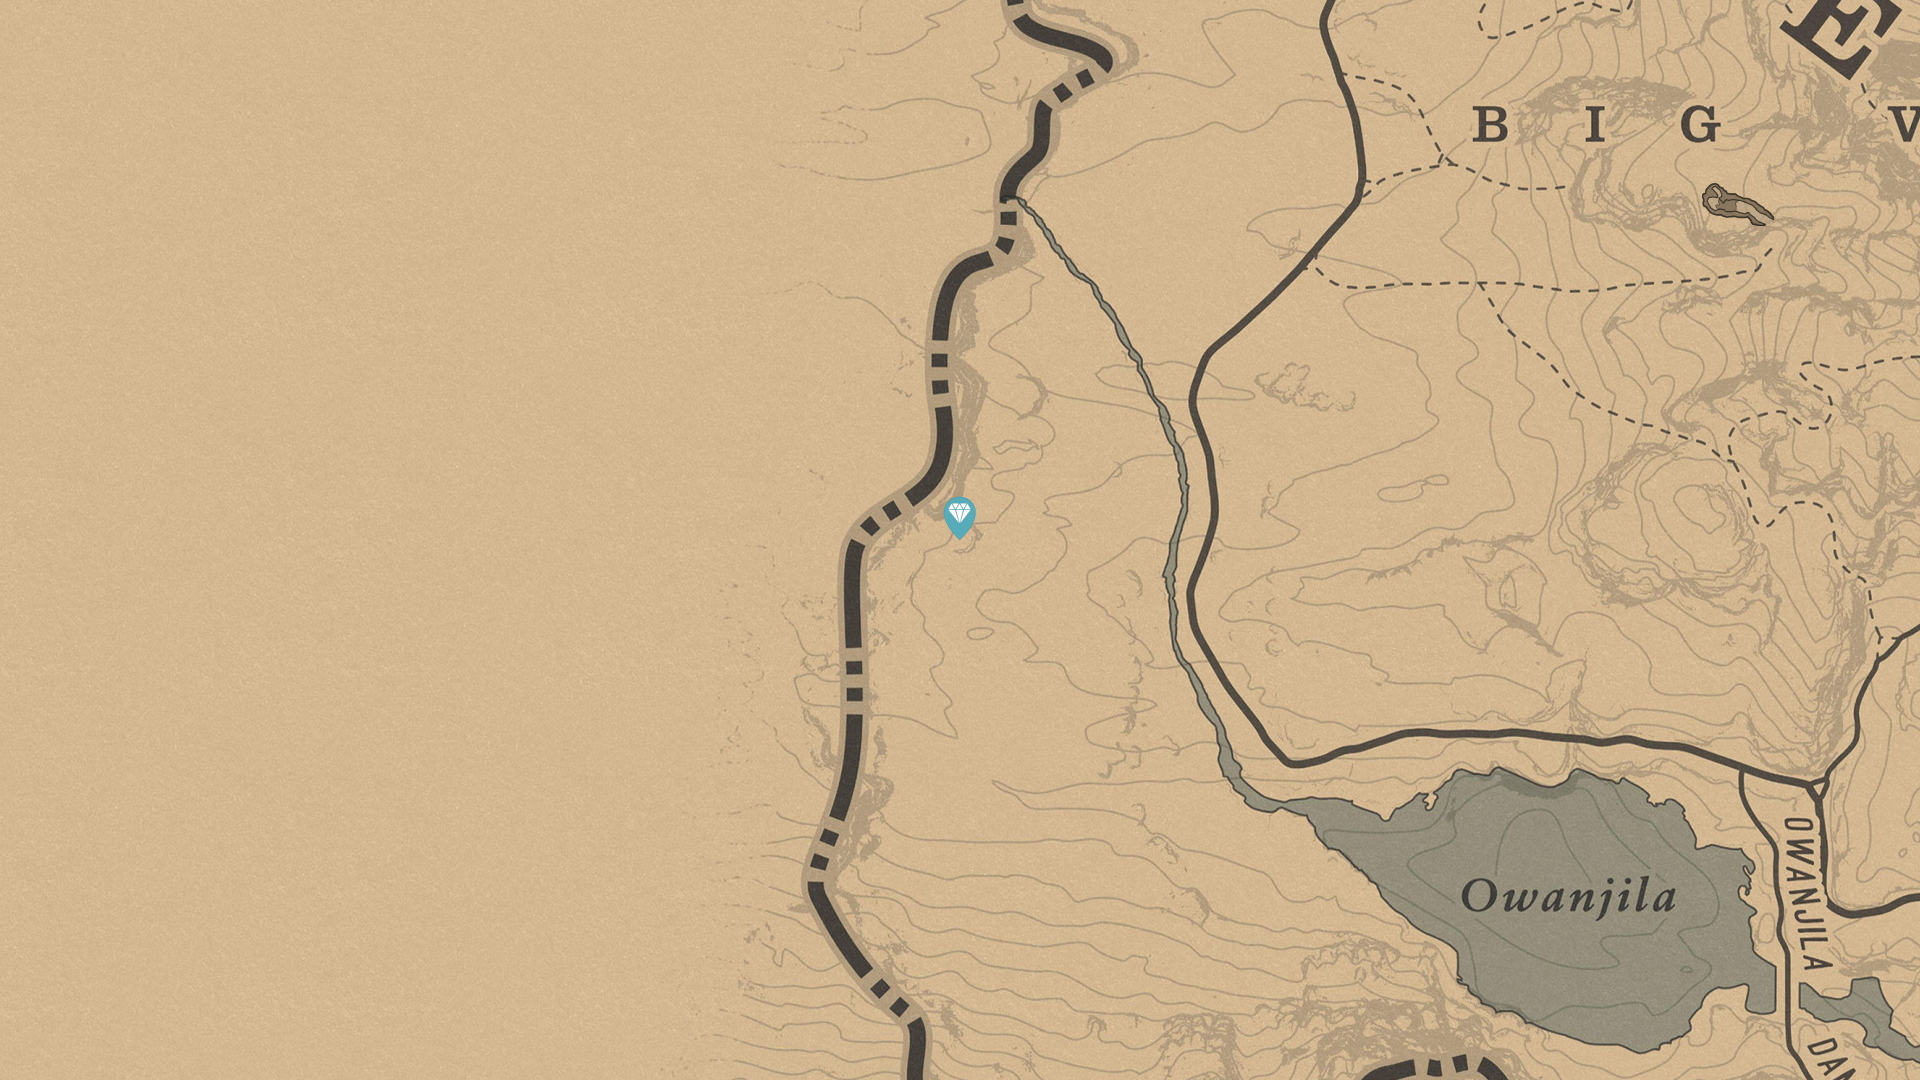
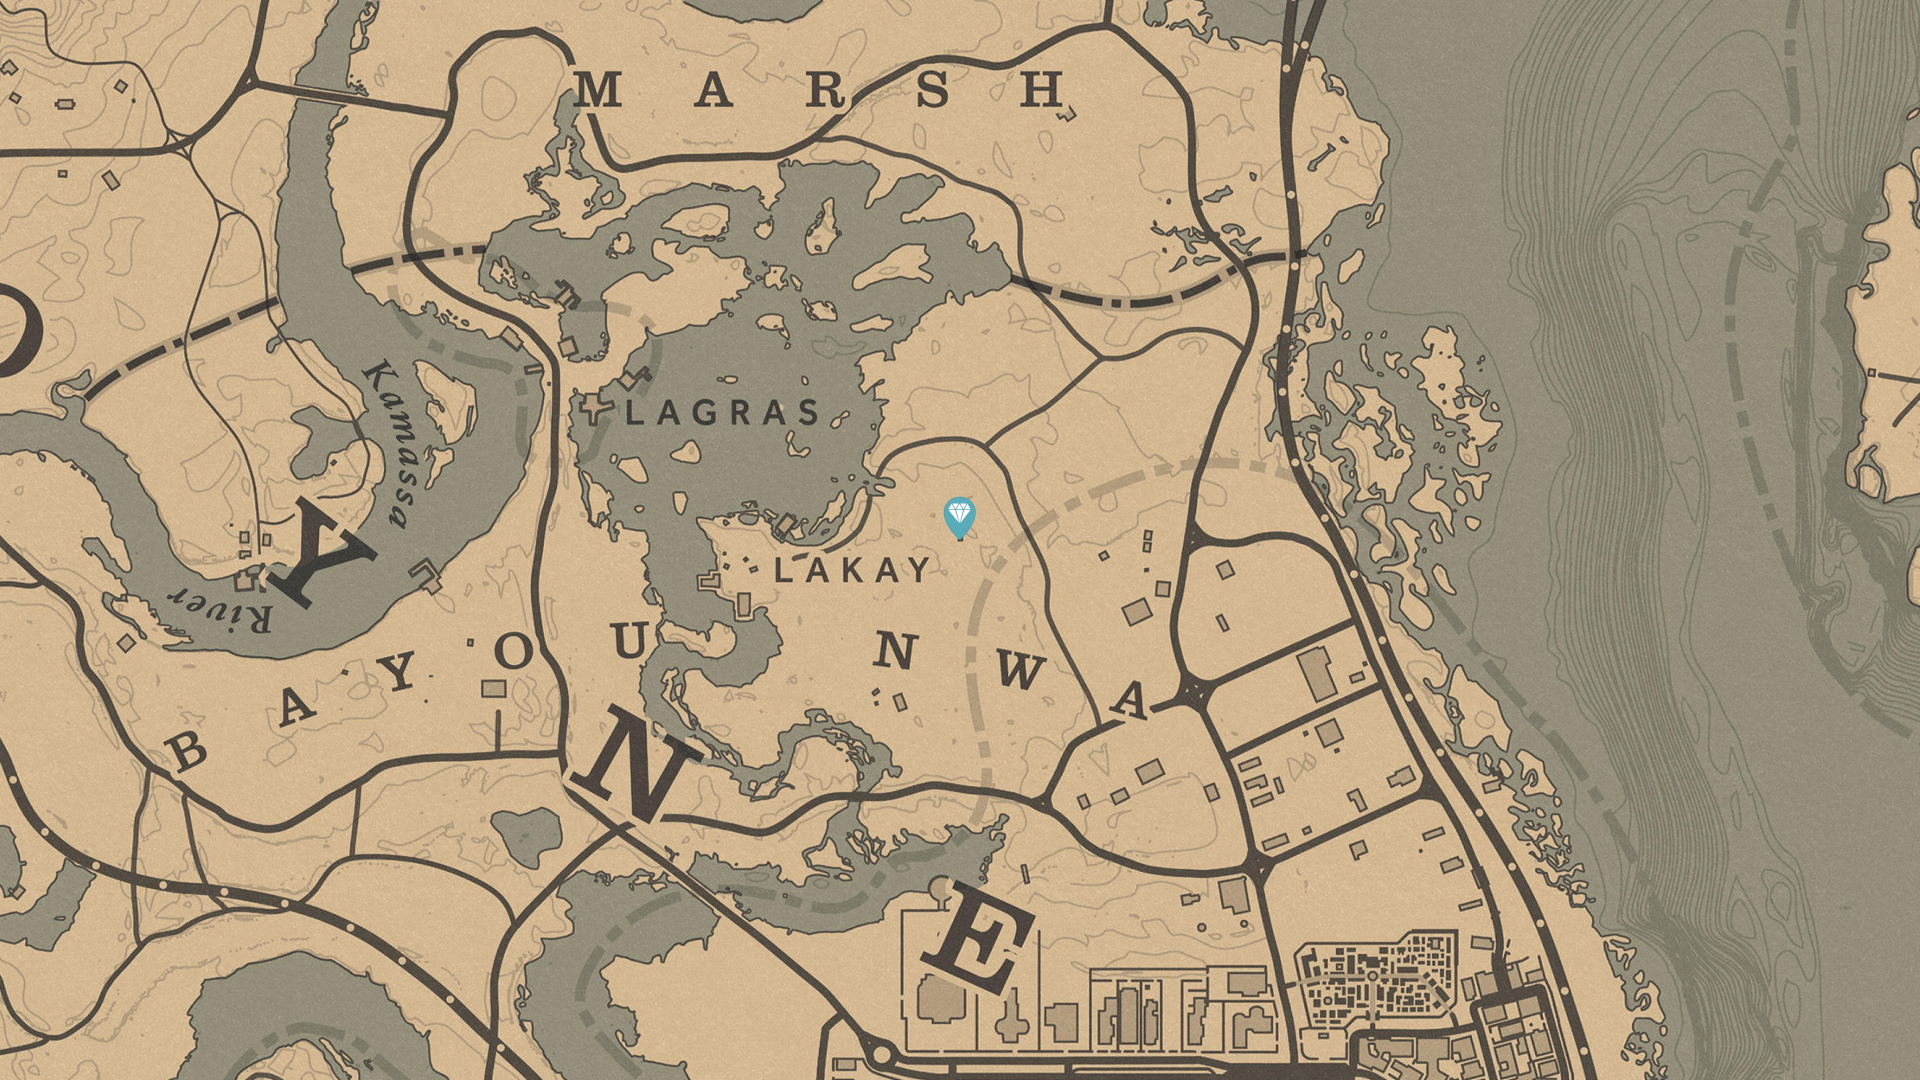
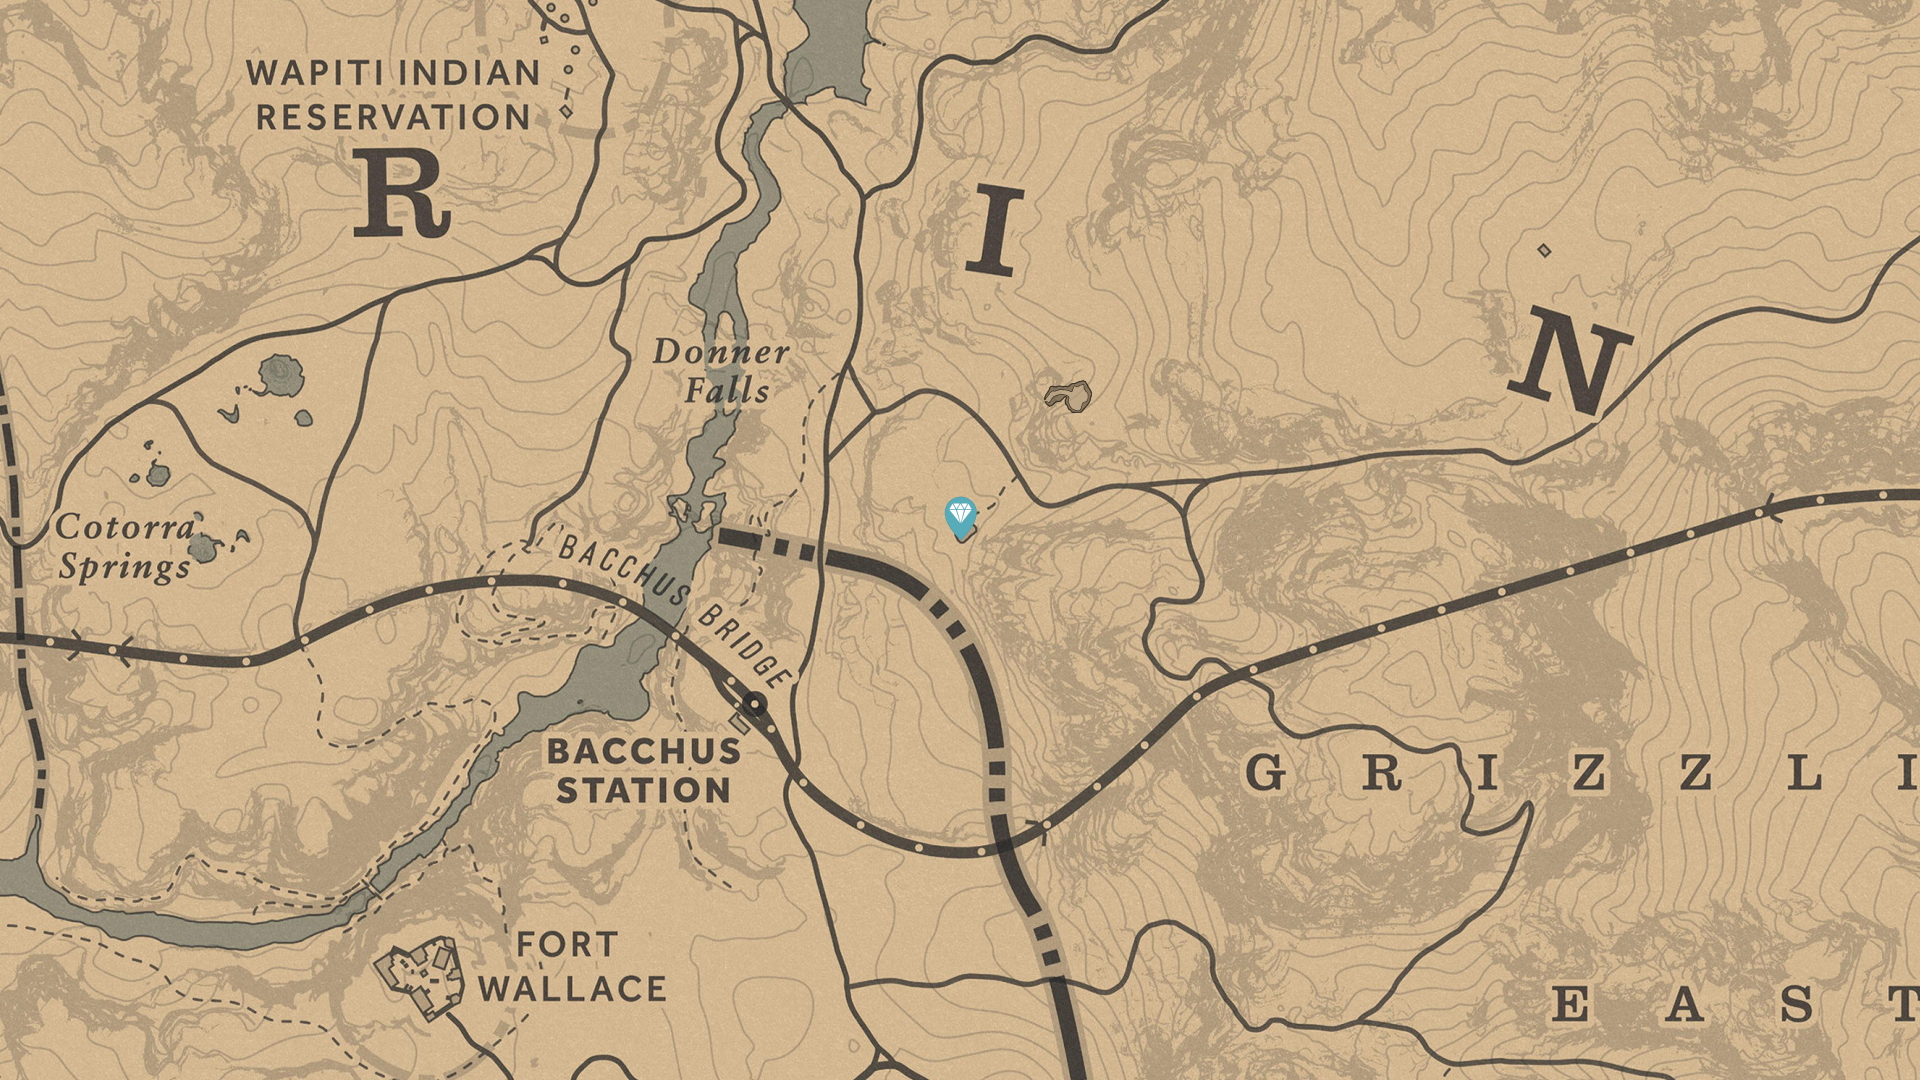
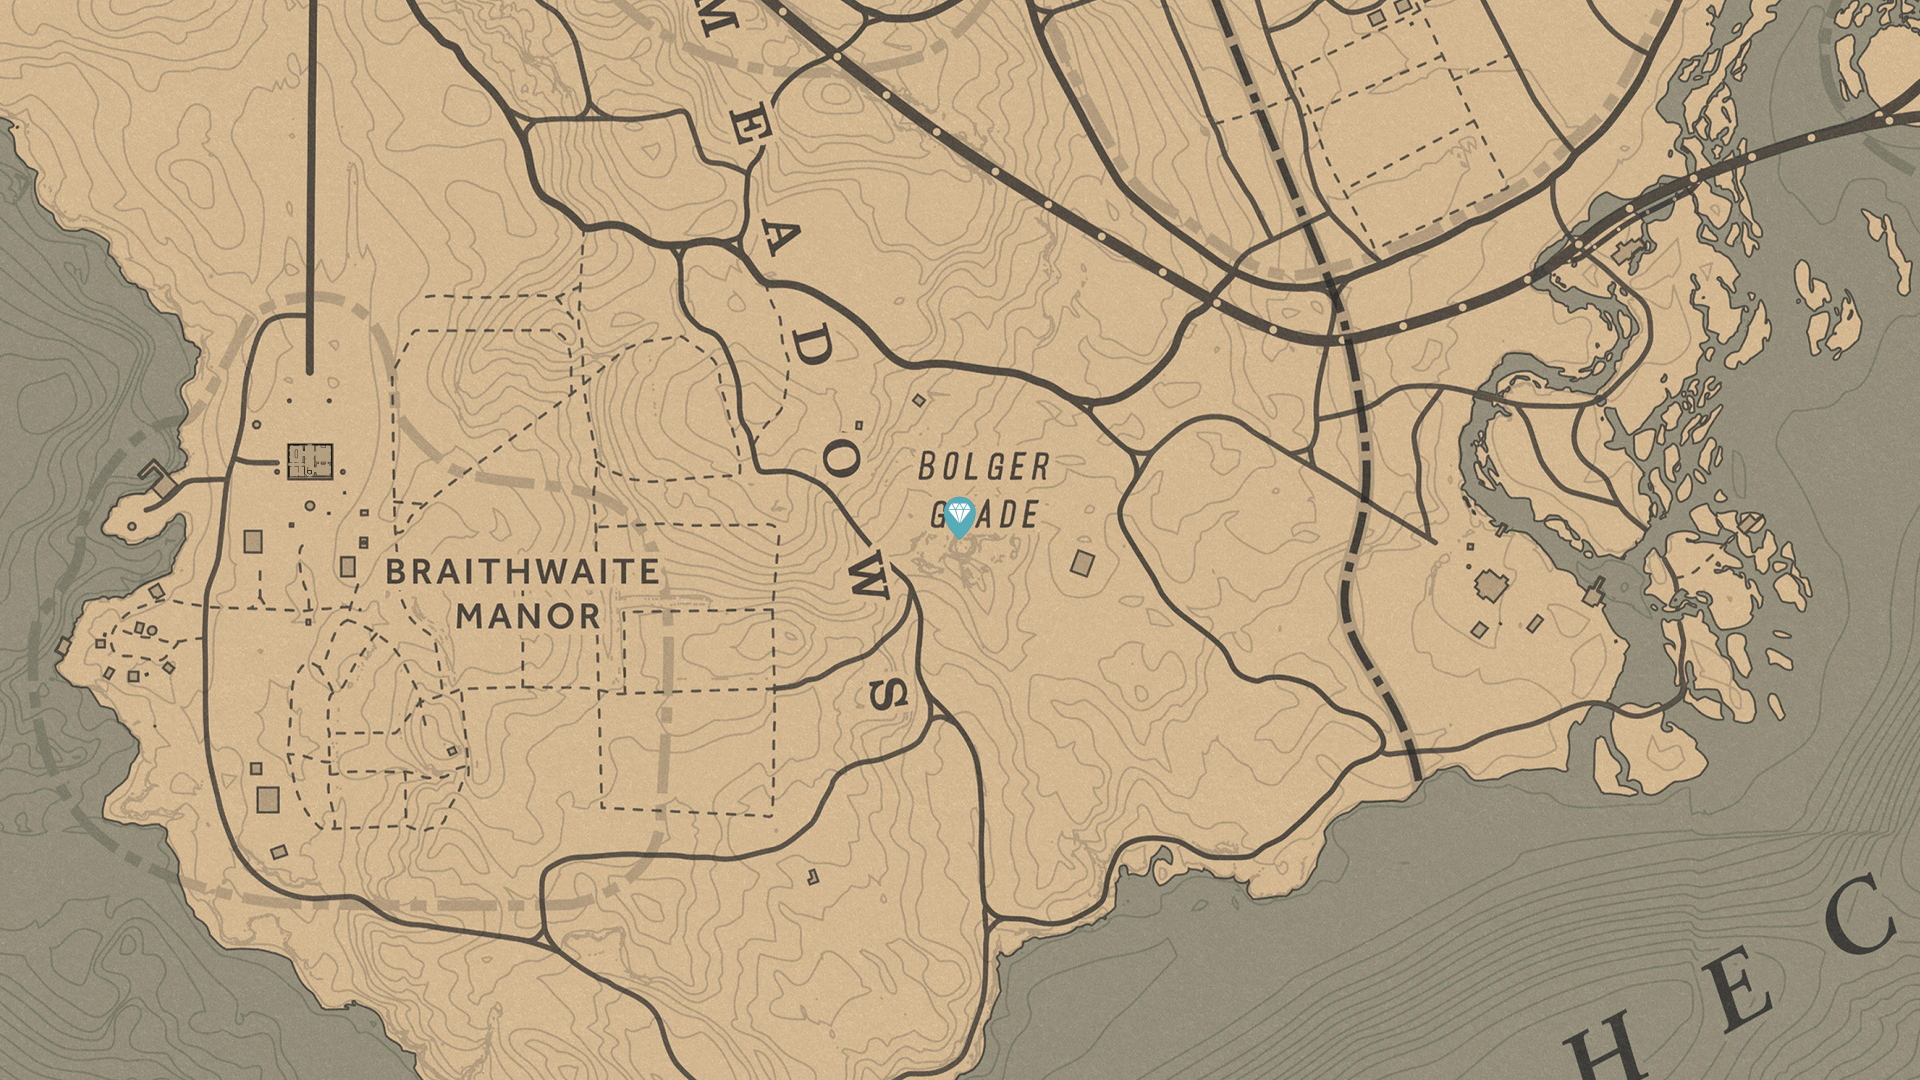
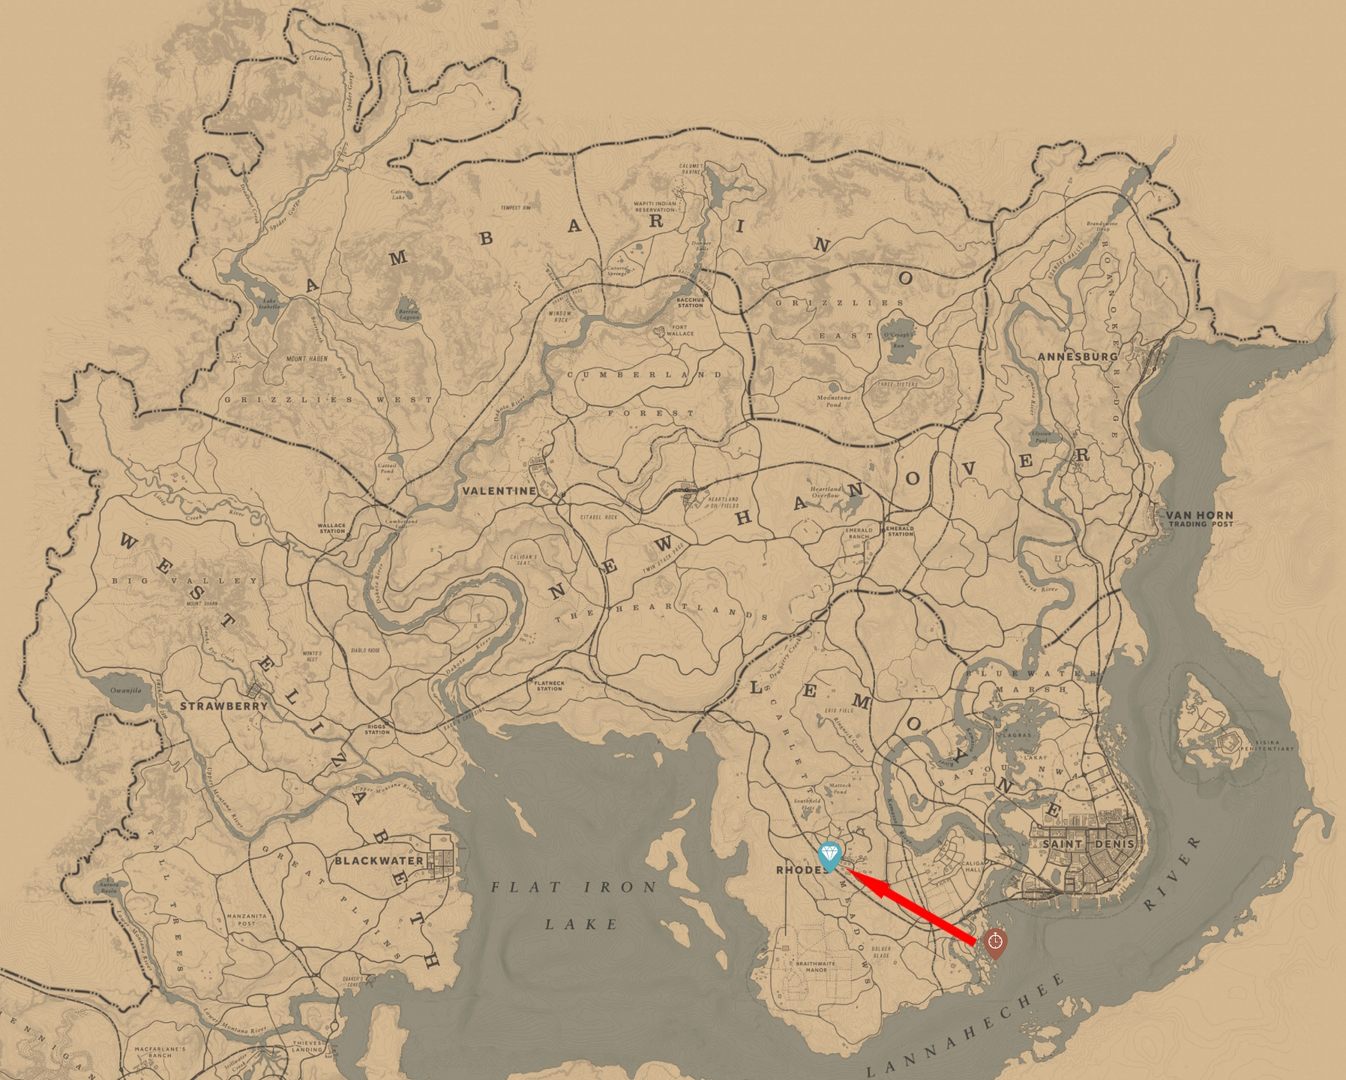
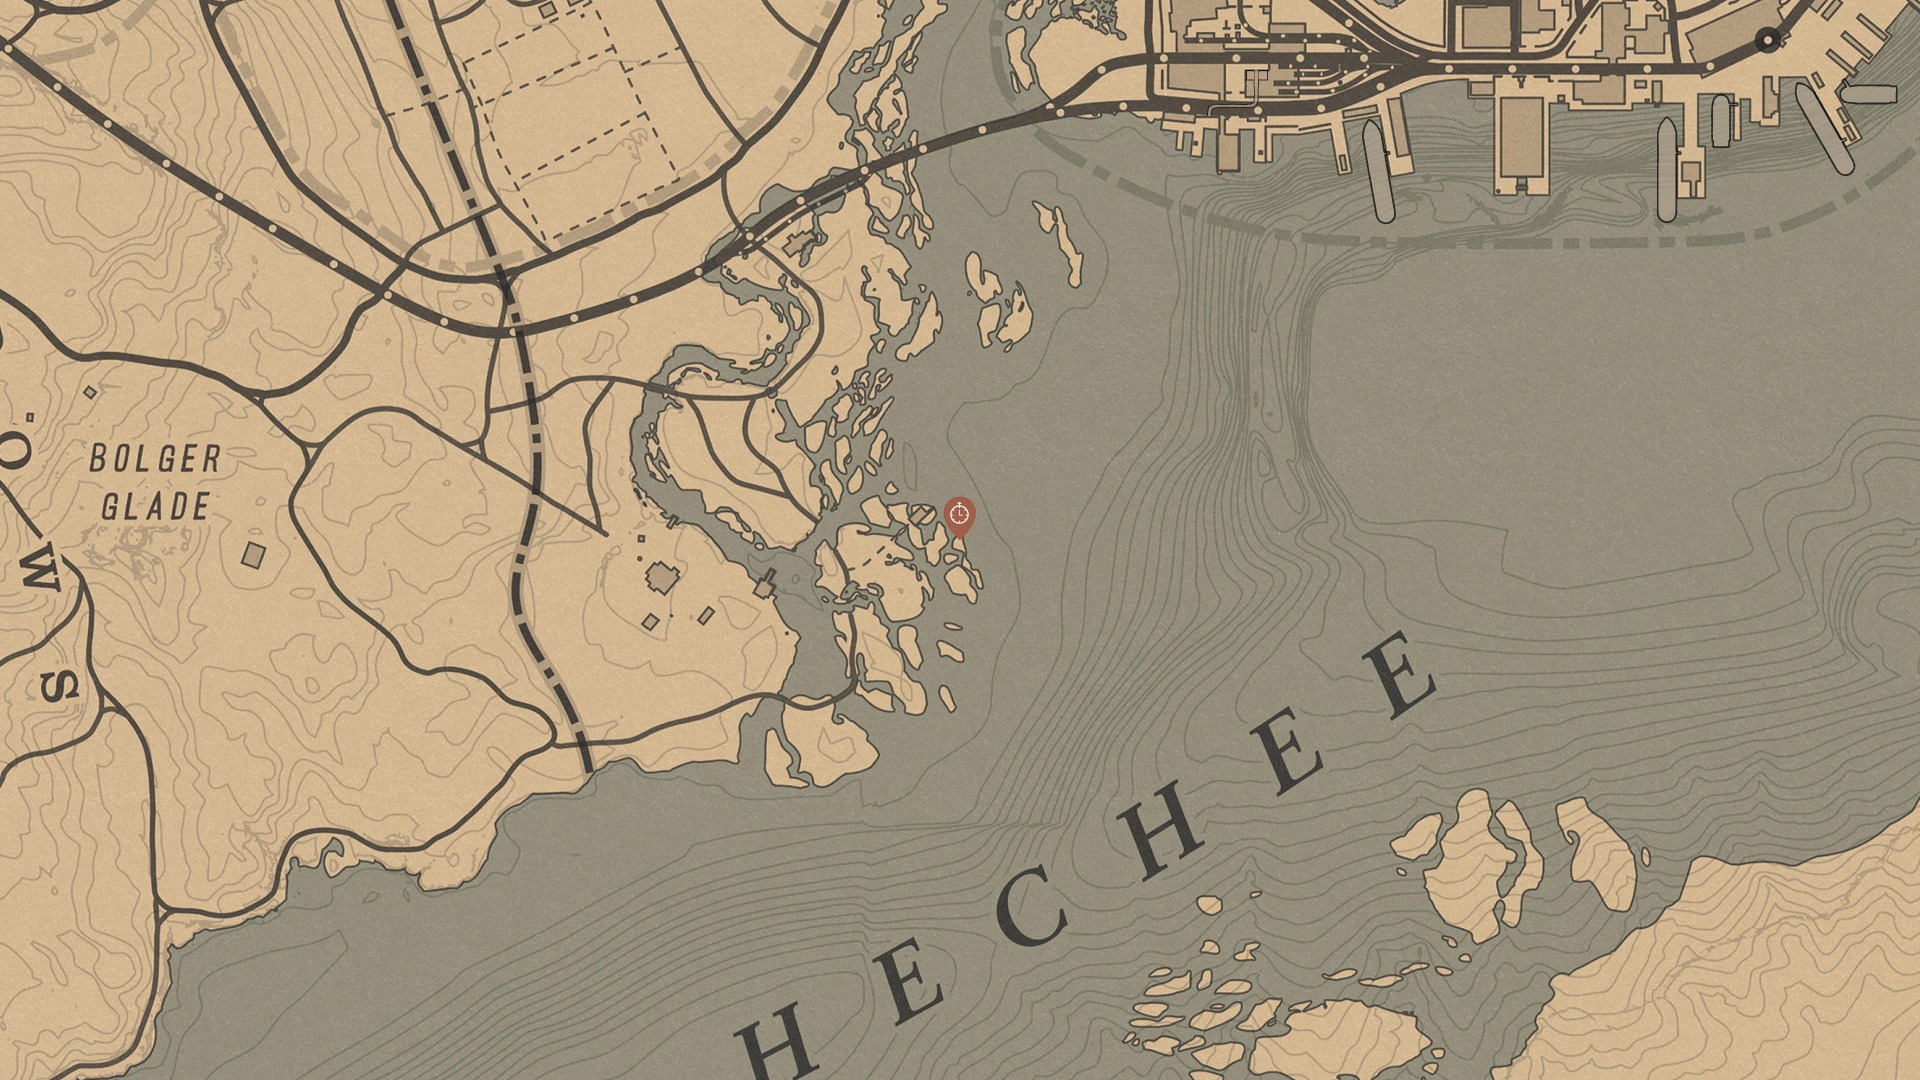
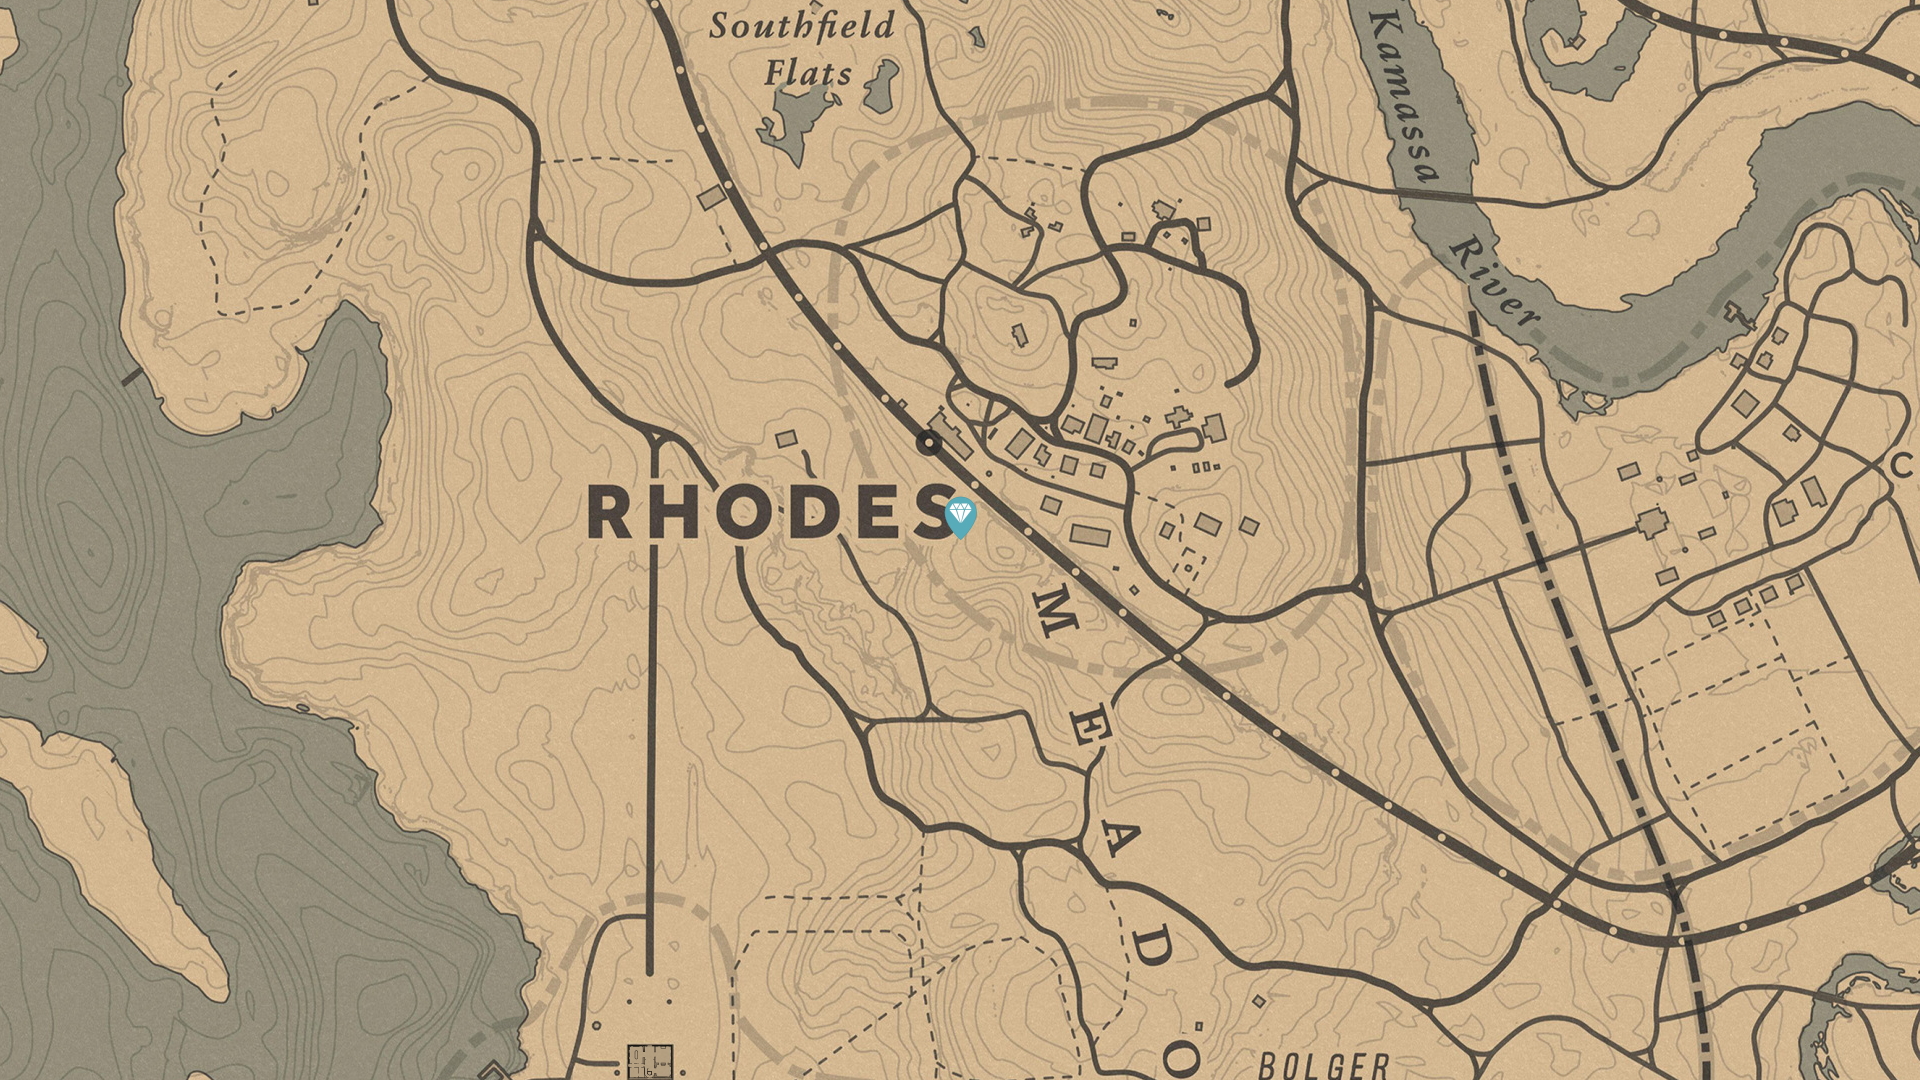
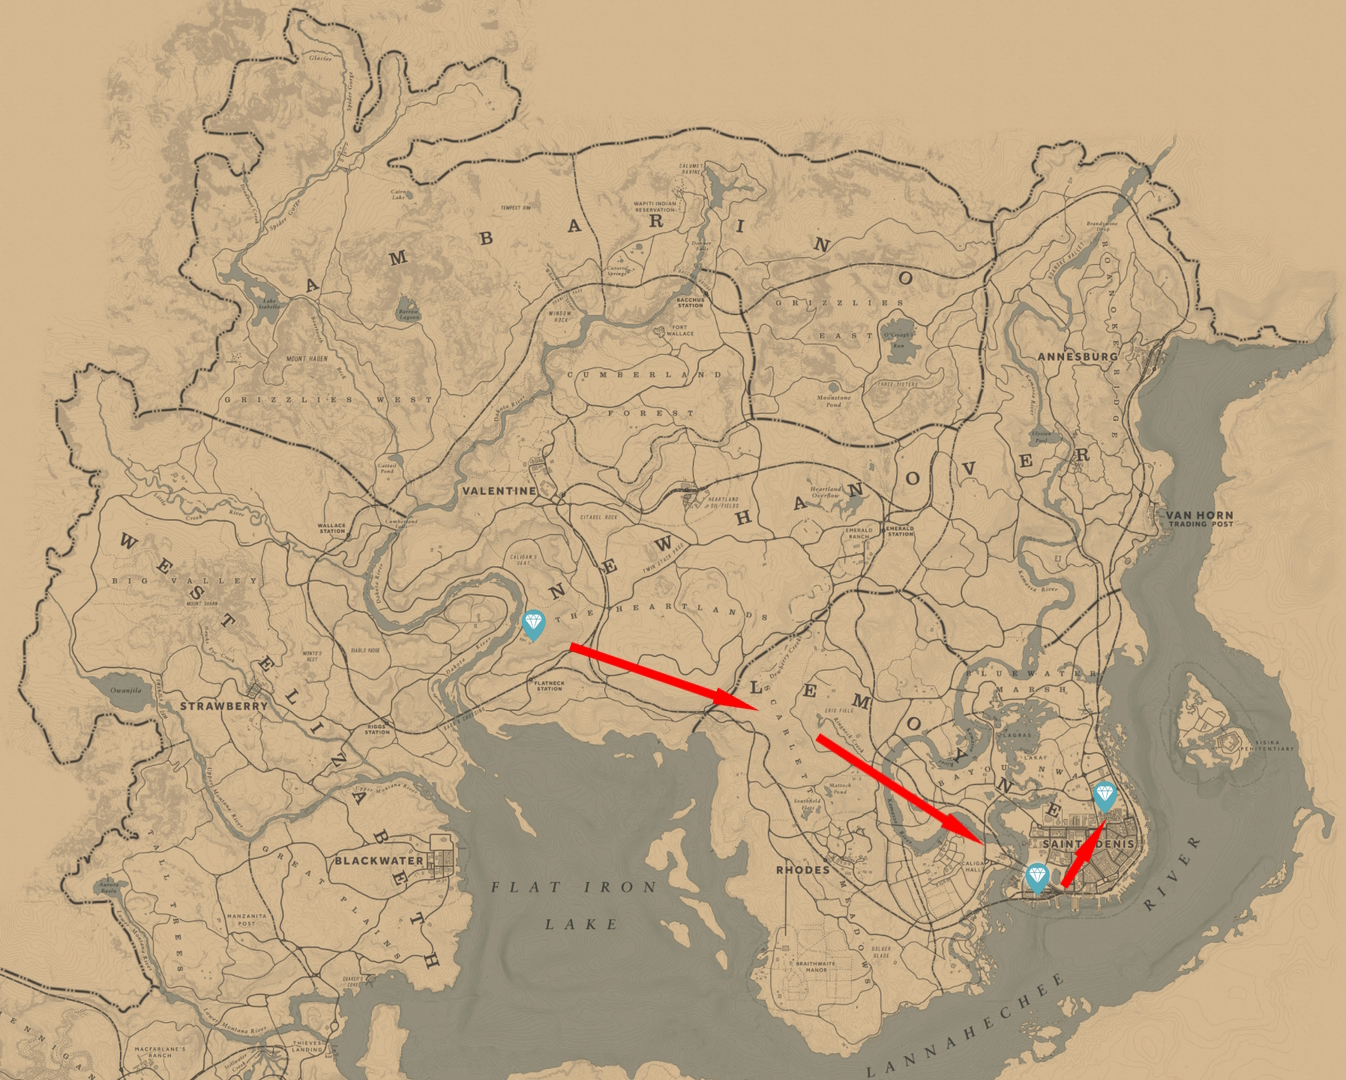
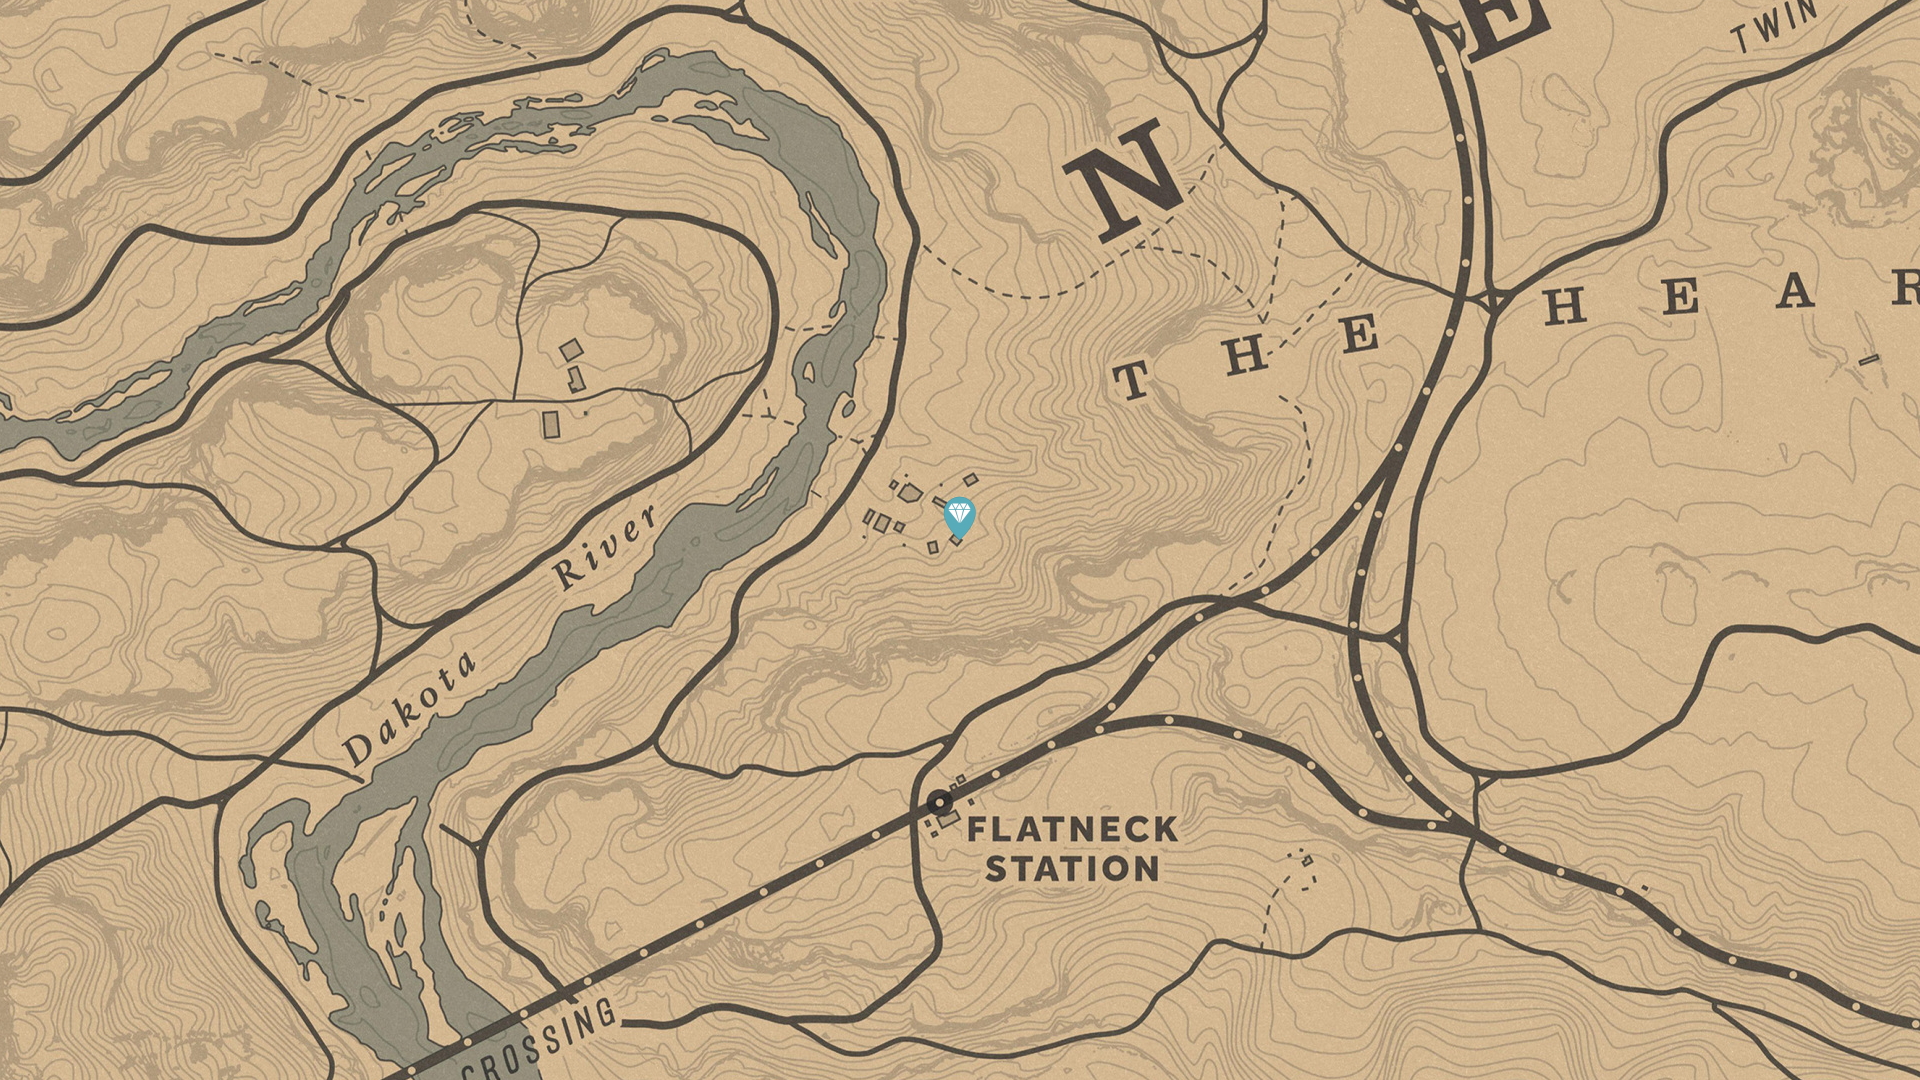
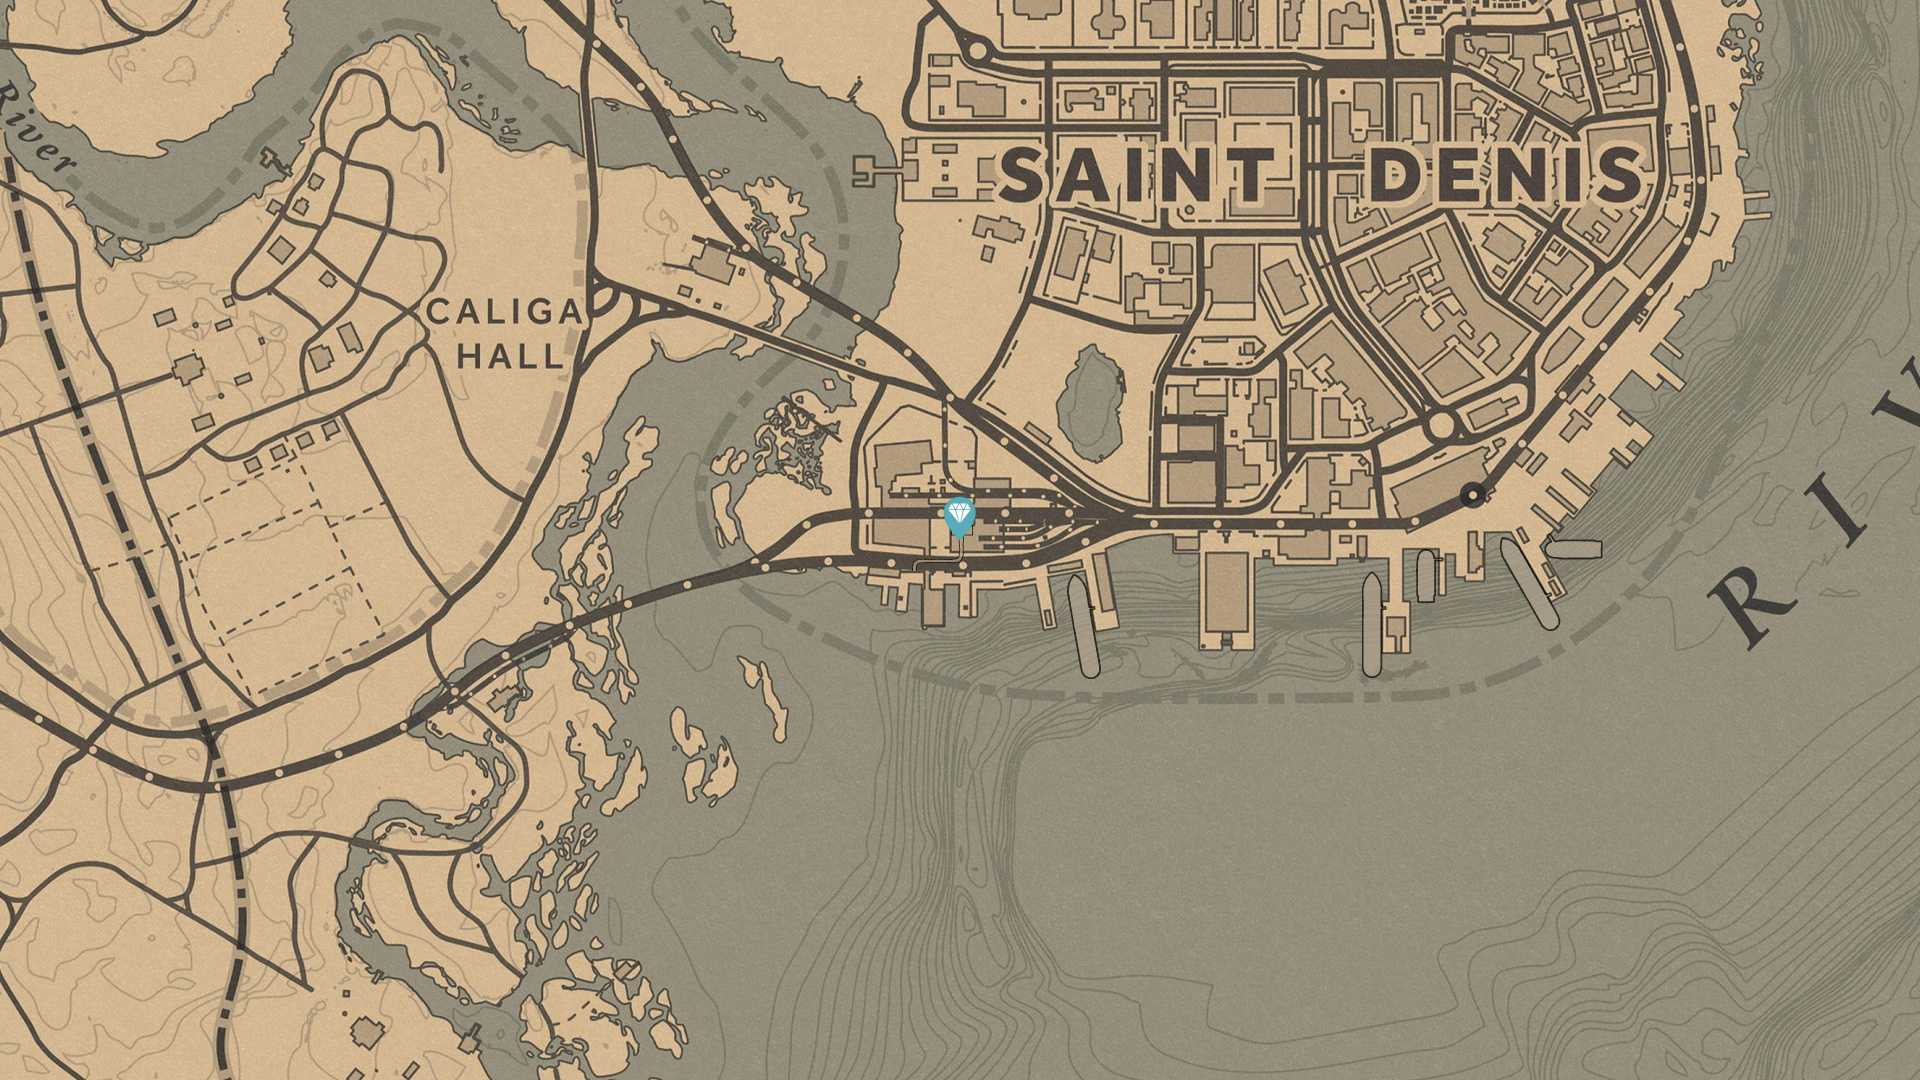
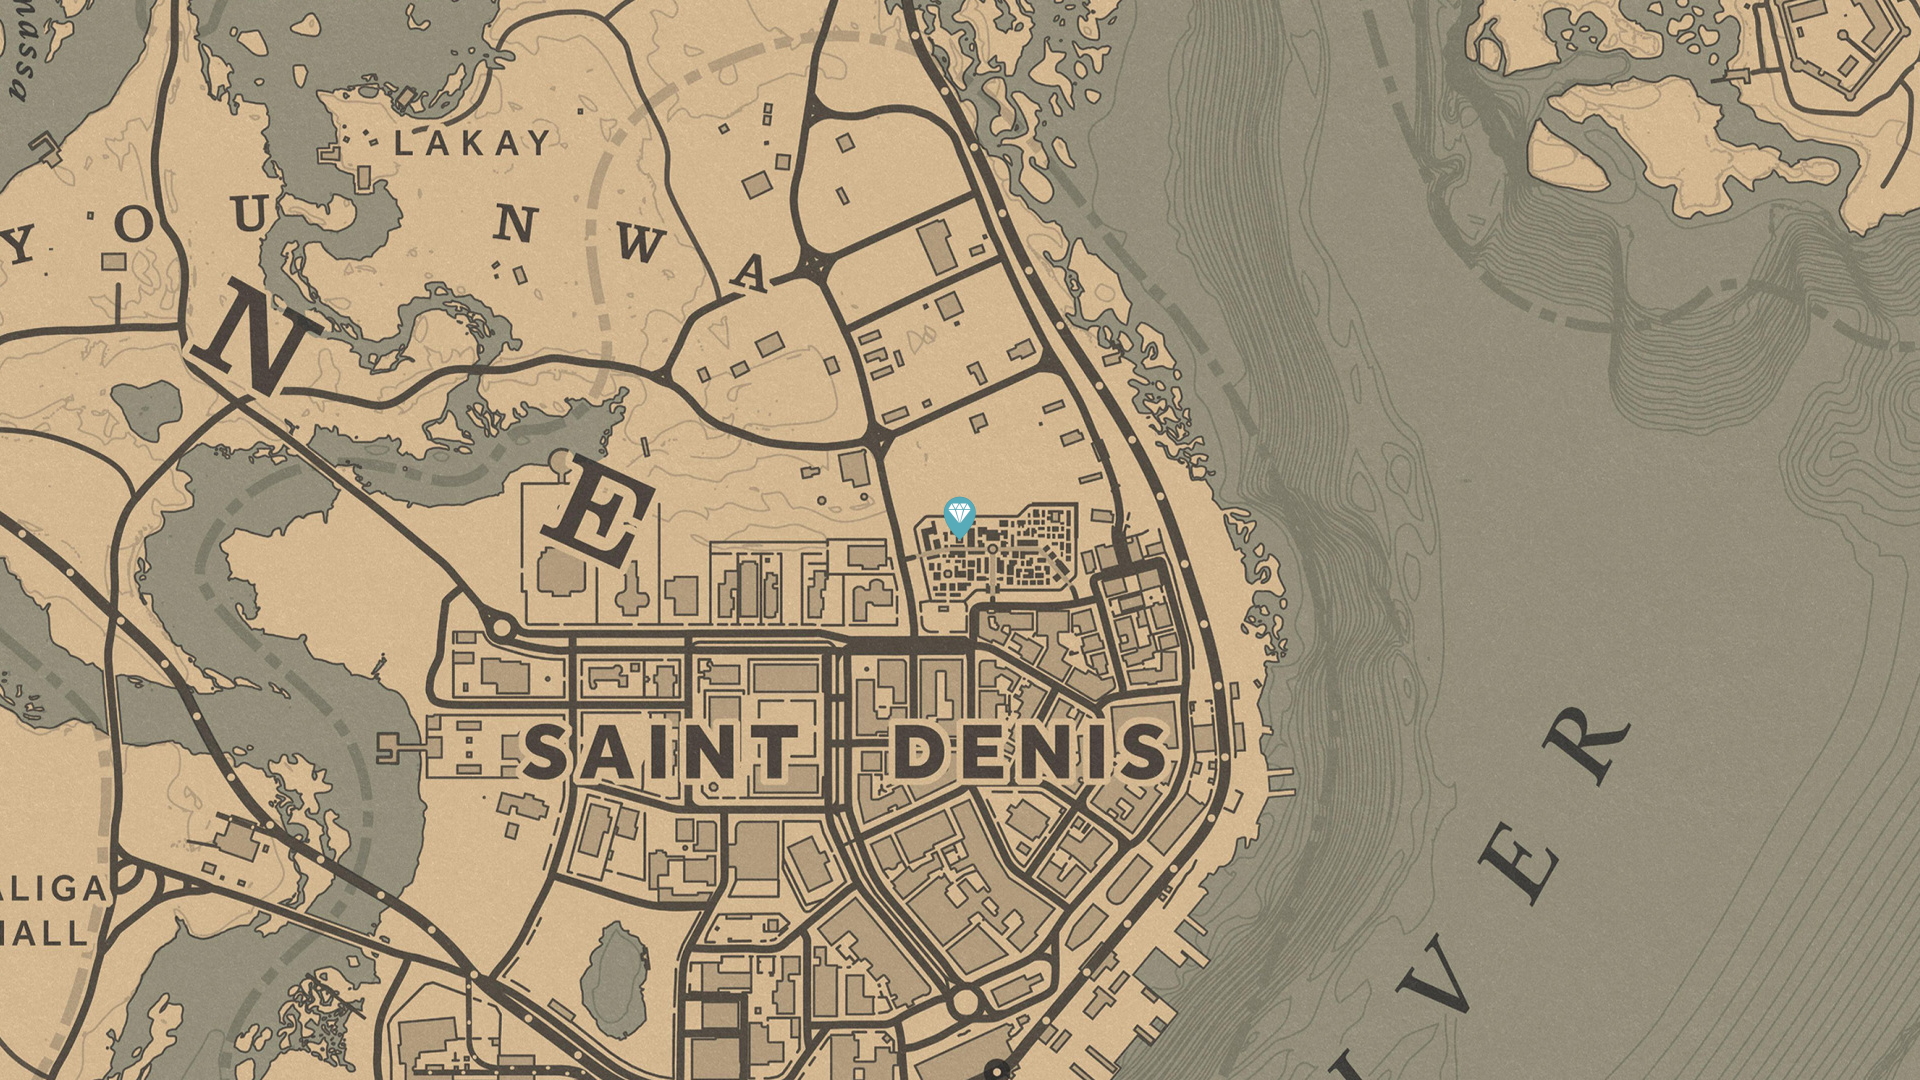
Valuables
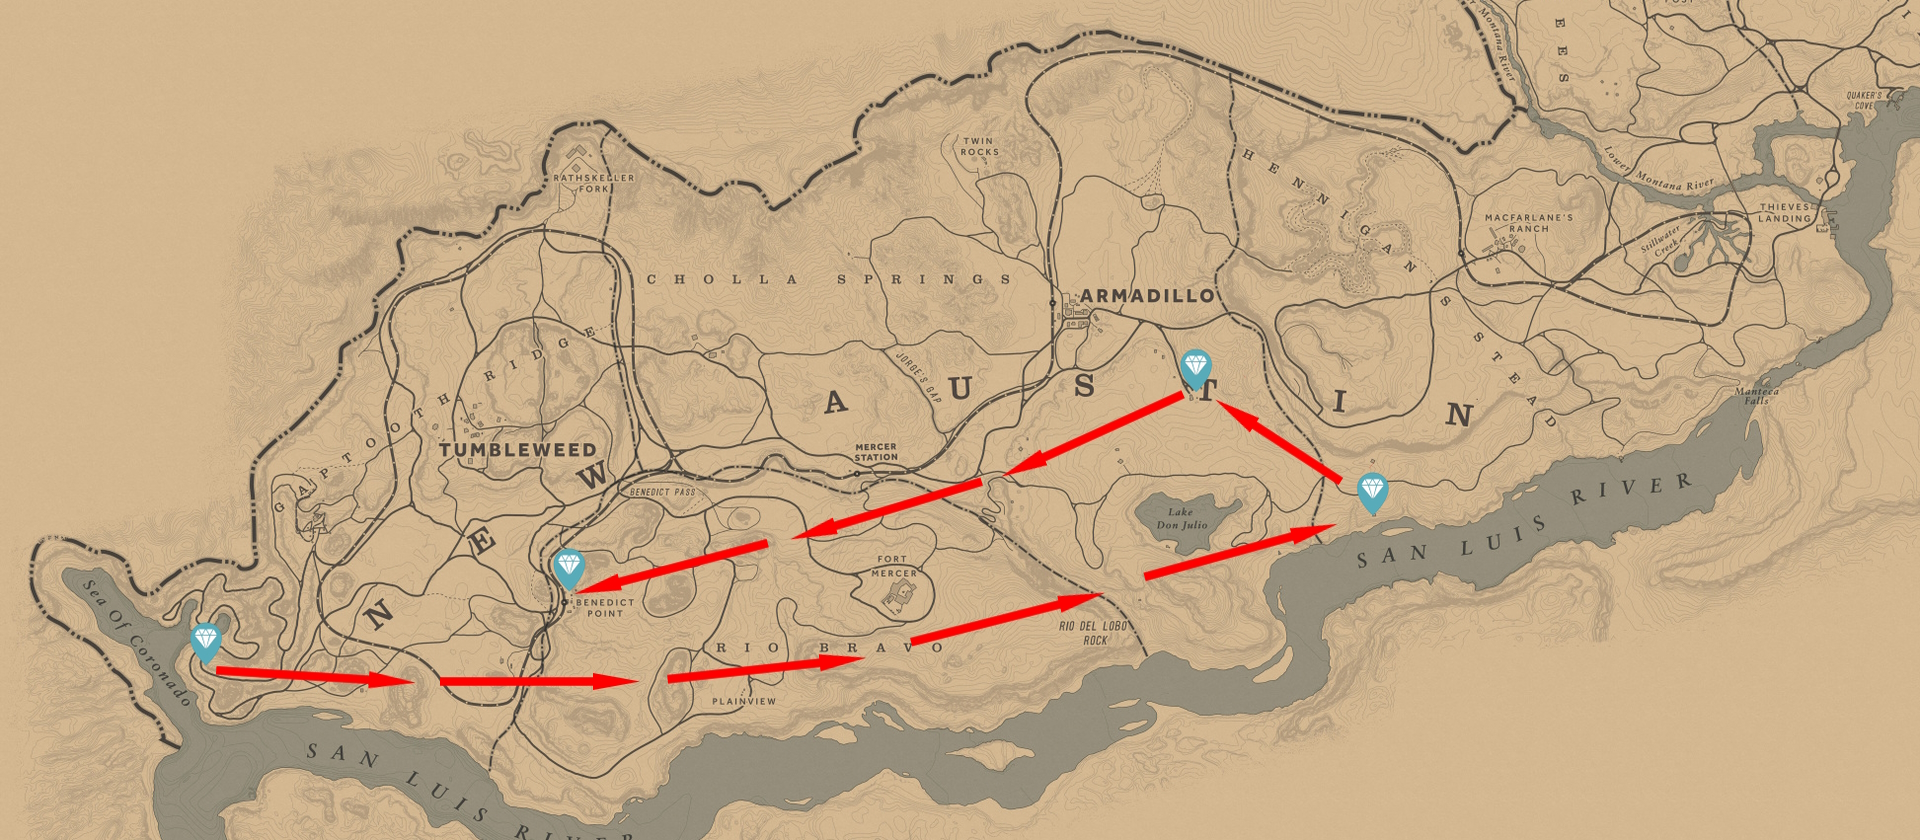
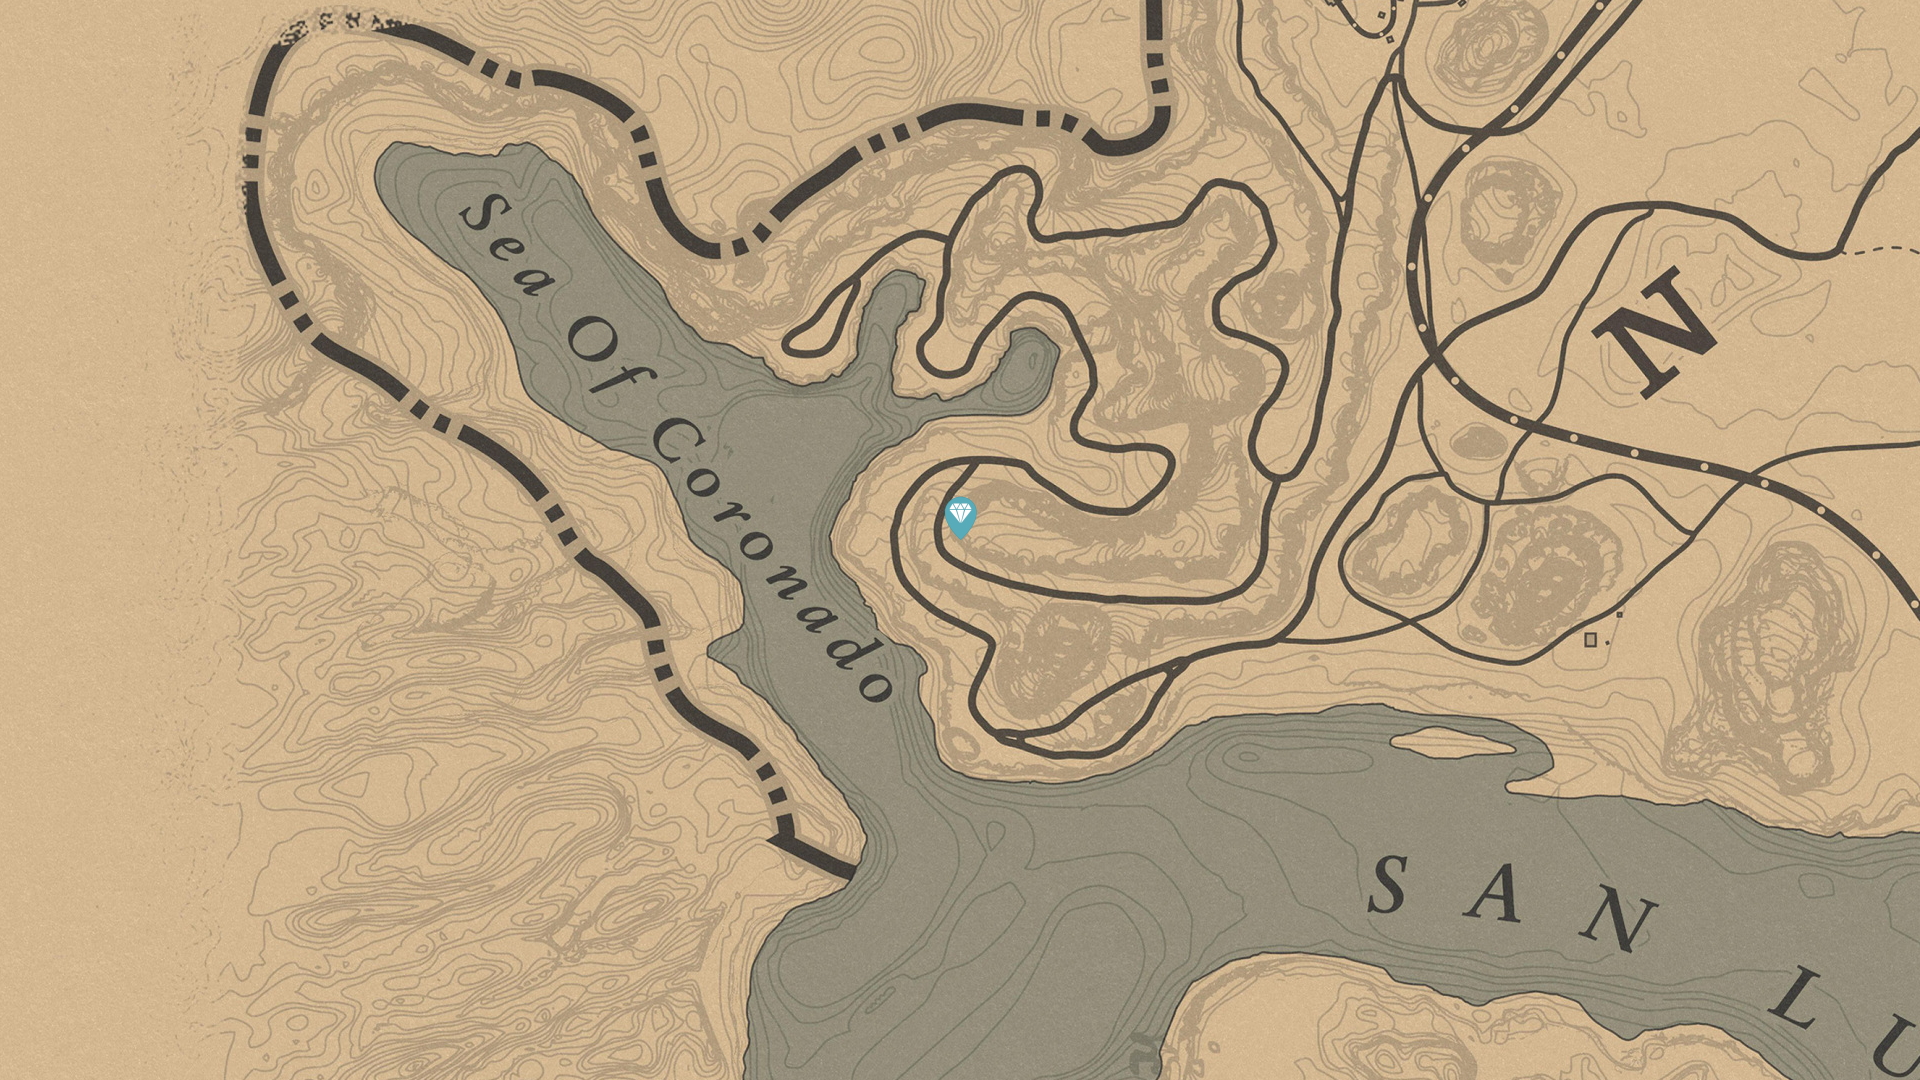
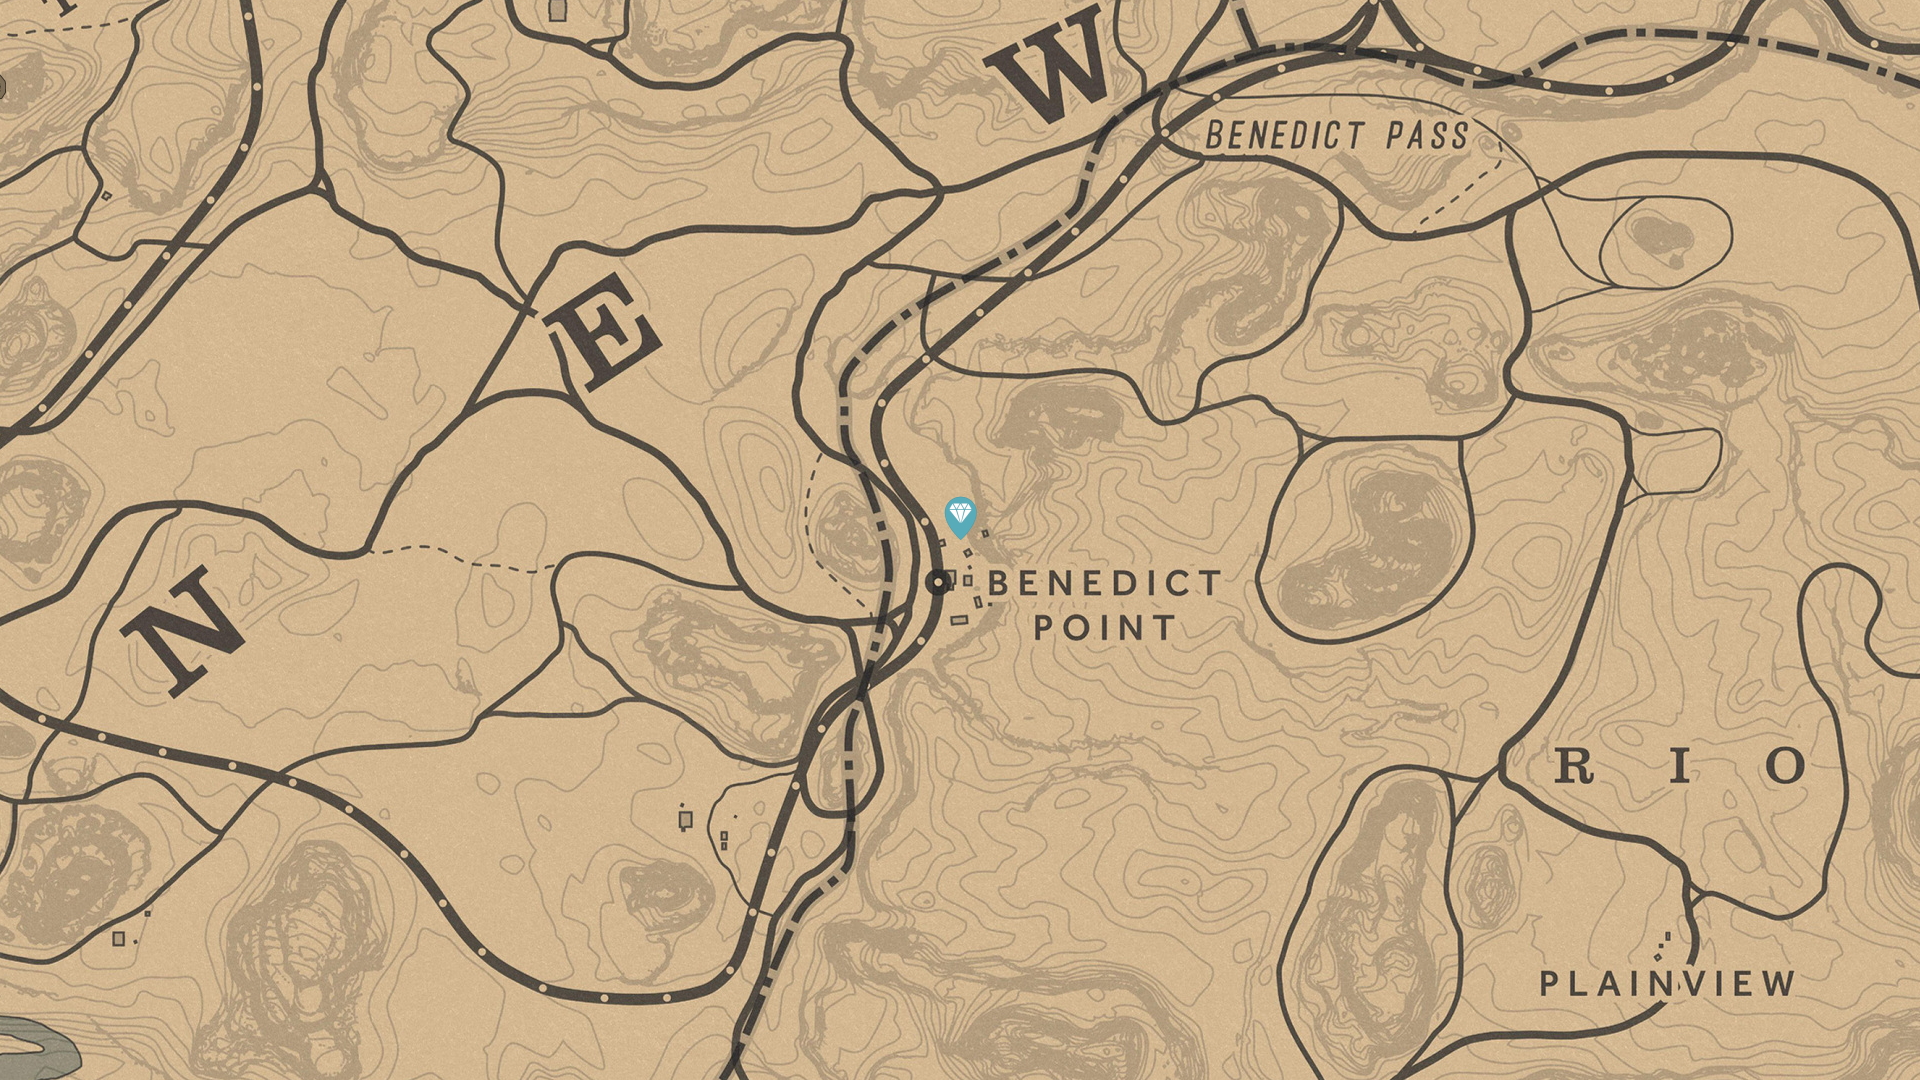
These loot locations have a value of $75 or more.